
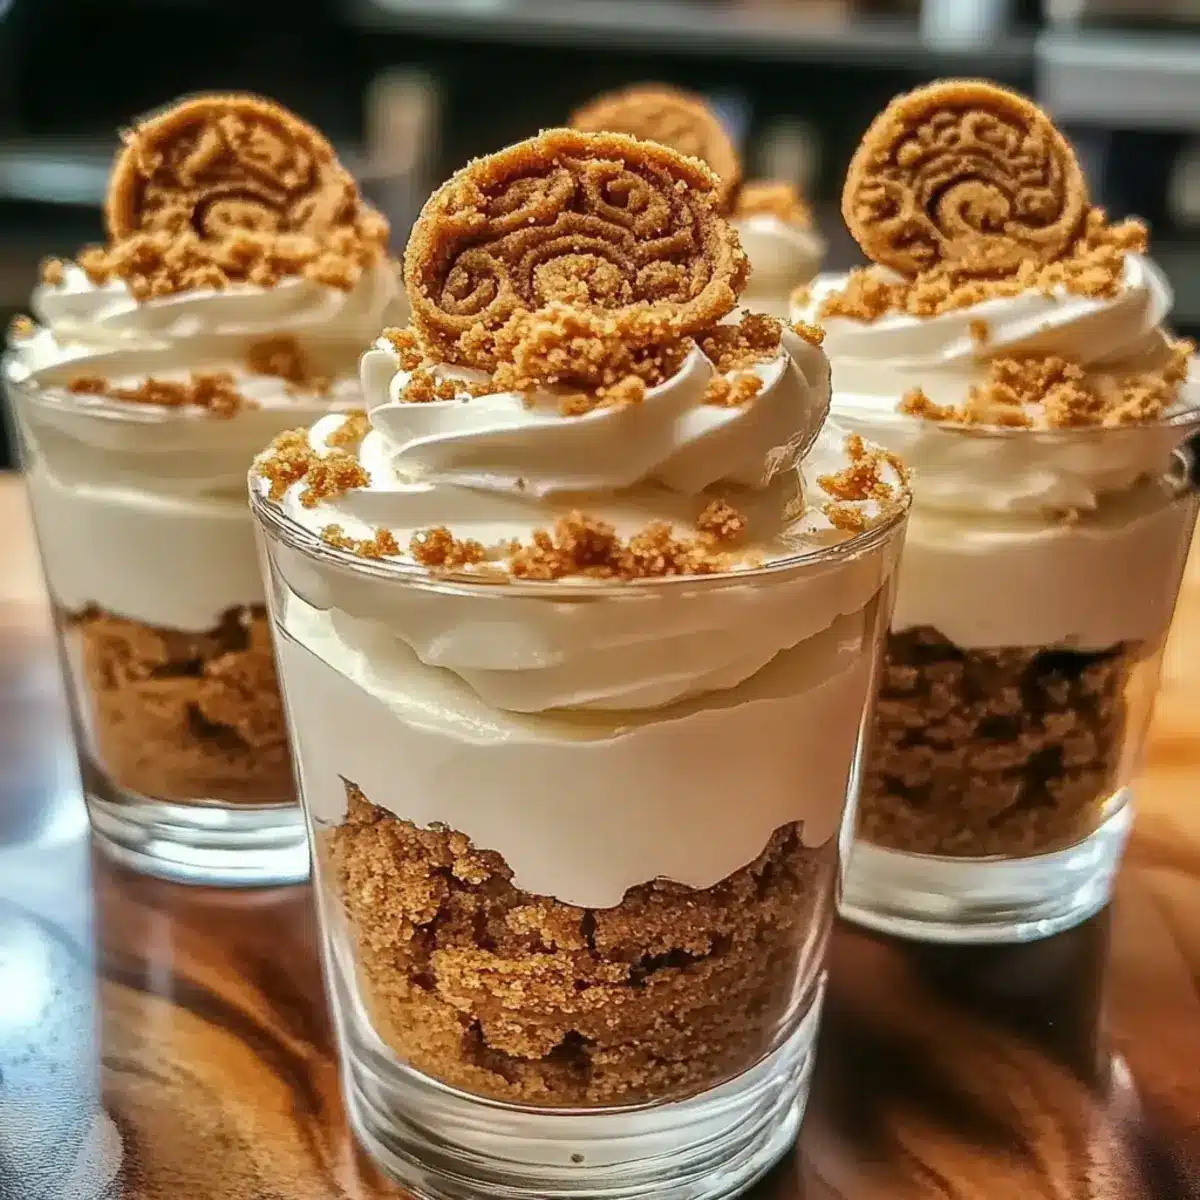
As I stood in my kitchen, the warm aroma of cookie butter wafted through the air, instantly transporting me to sweeter times. That’s when I decided to whip up these delightful No-Bake Cookie Butter Cheesecake Cups, a perfect treat for anyone craving a quick and indulgent dessert. With just a handful of ingredients and minimal effort, you’ll be able to create an impressive dessert that’s both creamy and crunchy, lightening up the classic cheesecake with a fun twist. These cups are not only a fun no-bake option, but they also make for a charming presentation at any gathering or a cozy night in. Can you already imagine the joy on your friends’ faces as they savor each spoonful? Get ready to dive into this deliciously simple recipe that’s bound to become a favorite!
Why are these cheesecake cups irresistible?
Decadent Flavor: The combination of rich cookie butter and creamy cheesecake creates a dessert that’s utterly indulgent.
No-Bake Ease: This recipe requires minimal effort—perfect for busy weeknights or last-minute gatherings.
Eye-Catching Presentation: These cups not only taste delicious, but they also look stunning, making them ideal for entertaining.
Versatile Options: Feel free to experiment with different cookie crumbs or flavorings to cater to your taste. If you’re a fan of unique desserts, you might also enjoy these Fried Strawberry Cheesecake or Mini Cheesecake Cups.
Crowd-Pleasing Appeal: Whether it’s a family dinner or a festive gathering, these cups are sure to impress!
Cookie Butter Cheesecake Cups Ingredients
For the Crust
- Biscoff or Speculoos Cookie Crumbs – Provides the crust with buttery, spiced flavor; substitute with gingersnap crumbs if desired.
- Melted Butter – Binds the cookie crumbs together for a sturdy crust.
For the Cheesecake Filling
- Cream Cheese – Creates the creamy cheesecake filling; make sure it’s softened for smooth mixing.
- Powdered Sugar – Adds sweetness and helps achieve that velvety texture.
- Cookie Butter – Infuses the cheesecake with flavor; drizzle some on top for a delicious finish.
- Vanilla Extract – Enhances the overall flavor profile of the cheesecake filling.
- Heavy Whipping Cream – Essential for a light, airy texture; make sure to whip it to soft peaks.
For Garnishing
- Extra Cookies (Optional) – Perfect for garnishing, adding visual appeal and extra crunch.
These no-bake Cookie Butter Cheesecake Cups are a simple yet elegant dessert that everyone will adore!
Step‑by‑Step Instructions for Cookie Butter Cheesecake Cups
Step 1: Prepare Crust
In a mixing bowl, combine Biscoff cookie crumbs with melted butter until the mixture resembles wet sand. Spoon this buttery mixture evenly into the bottom of serving cups, pressing it down firmly to create a solid crust. This step sets the delicious foundation for your Cookie Butter Cheesecake Cups, so ensure it’s compact and even.
Step 2: Whip Cream
In a separate mixing bowl, pour in the heavy whipping cream and use an electric mixer on medium speed. Whip it until soft peaks form, which will take about 2-3 minutes. Once you achieve that fluffy texture, set the whipped cream aside. This airy component will give your cheesecake filling a light and heavenly quality.
Step 3: Mix Filling
In a large mixing bowl, beat together softened cream cheese, powdered sugar, cookie butter, and vanilla extract using an electric mixer. Continue mixing until you achieve a smooth and creamy consistency, which should take about 3-4 minutes. Make sure there are no lumps for a silky texture in your Cookie Butter Cheesecake Cups.
Step 4: Fold Cream
Gently fold the whipped cream into the cookie butter mixture using a spatula, taking care to combine without deflating the whipped cream. This folding technique will incorporate airiness into your cheesecake filling, maintaining the lovely light texture. Stop mixing once you see no streaks to ensure a uniform and fluffy mixture.
Step 5: Layer
Using a spoon or piping bag, carefully layer the cheesecake filling over the crust in each cup, filling them about halfway. Drizzle some melted cookie butter on top of this first layer before repeating the process to create a second layer, finishing with cheesecake on top. The layers create a visually pleasing presentation for your Cookie Butter Cheesecake Cups.
Step 6: Garnish
If desired, sprinkle extra cookie crumbs or place a whole cookie on top of each cheesecake cup for a delightful garnish. This step adds visual appeal and a little extra crunch to your Cookie Butter Cheesecake Cups, enticing your guests even more.
Step 7: Chill
Finally, cover the cups with plastic wrap or lids and refrigerate for at least 1 hour. Chilling allows the cheesecake to set and firm up perfectly. For the best results, you can prepare these cups up to 24 hours in advance, ensuring they’re ready for any gathering or cozy night in.
What to Serve with No-Bake Cookie Butter Cheesecake Cups
Imagine indulging in a symphony of flavors and textures, perfectly complementing your delightful dessert in every bite.
- Fresh Berries: Bright and juicy, berries add a tangy contrast that balances the rich sweetness of your cheesecake cups.
- Coffee or Espresso: A warm cup of coffee enhances the dessert’s flavors, providing a cozy experience that’s delightful for any gathering.
- Chocolate Drizzle: Pouring melted chocolate over the cheesecake adds a luxurious touch and a rich layer of flavor for chocolate lovers.
- Whipped Cream Topping: Light and airy whipped cream brings extra creaminess, perfectly enhancing the already indulgent cheesecake experience.
- Coconut Macaroons: These chewy bites provide a delightful textural contrast, their tropical flavor adding a fun twist to your dessert spread.
- Spiced Apple Compote: Warm, spiced apples introduce a delightful warmth and acidity that elevate the overall taste experience.
- Milkshakes or Smoothies: Creamy drinks not only to refresh but also harmonize beautifully with the cheesecake’s rich and sweet profile.
- Ice Cream: A scoop of vanilla or cinnamon ice cream will melt beautifully into the warmth of your decadent cheesecake cups, enhancing each bite.
- Nutty Granola: A sprinkle of granola brings crunch and a hint of nuttiness, making for an exciting texture contrast with the soft cheesecake.
Make Ahead Options
These No-Bake Cookie Butter Cheesecake Cups are a dream for meal prep enthusiasts! You can prepare the crust and filling up to 24 hours in advance, which saves you time on busy days. To do this, simply mix the cookie crumbs with melted butter and layer them into your serving cups, then whip and fold the cheesecake filling without assembling the layers just yet. Cover the cups and refrigerate to keep everything fresh. When you’re ready to serve, layer the filling over the crust, drizzle with melted cookie butter, and add any garnishes. Your delicious dessert will taste just as heavenly, with the added convenience of being prepared ahead!
Expert Tips for Cookie Butter Cheesecake Cups
-
Room Temperature Cream Cheese: Ensure the cream cheese is at room temperature for a smooth mixture and to avoid lumps in your cheesecake filling.
-
Proper Whipping Technique: When whipping the cream, stop at soft peaks to maintain the airy texture. Over-whipping can lead to a butter-like consistency.
-
Layering is Key: Use a piping bag for easier layering of the cheesecake filling, making your Cookie Butter Cheesecake Cups not only delicious but also visually appealing.
-
Chilling Time: Be patient and allow the cups to chill for at least one hour to set properly; this makes all the difference in texture and flavor.
-
Customize Your Flavors: Don’t hesitate to experiment! Swap cookie butter for different spreads like Nutella or almond butter for a unique twist on the classic dessert.
How to Store and Freeze Cookie Butter Cheesecake Cups
Fridge: Store your Cookie Butter Cheesecake Cups in an airtight container for up to 3 days. This keeps them fresh and luscious until you’re ready to enjoy!
Freezer: If you want to save them for later, these cups can be frozen without toppings for up to 1 month. Just thaw them in the refrigerator before serving to maintain their delightful texture.
Reheating: These cheesecake cups are best enjoyed chilled. No need to reheat; simply take them out of the fridge and dig in!
Make-Ahead: You can prepare these cups up to 24 hours in advance, making them an excellent option for last-minute gatherings.
Cookie Butter Cheesecake Cups Variations
Feel free to let your creativity flourish as you customize these delightful cheesecake cups!
-
Peanut Butter Swirl: Substitute cookie butter with creamy peanut butter for a nutty twist. It adds a fabulous flavor contrast; try it for a fun variation!
-
Ginger Snap Crust: Use ginger snap cookie crumbs instead of Biscoff for an extra spice kick. The zesty flavor will elevate the entire dessert experience.
-
Chocolate Lovers: Stir in chocolate chips to the filling for a rich, chocolatey surprise. Each spoonful will be a decadent little treasure!
-
Seasonal Spice: Add a pinch of cinnamon and nutmeg to the filling for a warm spice touch, perfect for cozy gatherings or holiday festivities.
-
Dairy-Free Delight: Replace cream cheese with a vegan cream cheese alternative and use coconut cream for whipping. Enjoy a creamy dessert that everyone will love!
-
Banana Bliss: Incorporate mashed ripe bananas into the cream cheese filling for a fruity flavor burst. Pairing it with cookie butter creates an unforgettable peachy experience!
-
Coconut Cream: Fold toasted coconut flakes into the cheesecake filling for a tropical twist. It’s like a vacation in your mouth!
As you savor these cookies on your own or share with friends, consider pairing them with the delightful flavors of Maple Butter Pecan or treating yourself to some Garlic Butter Zucchini for a savory side!
Cookie Butter Cheesecake Cups Recipe FAQs
What kind of cookie crumbs should I use for the crust?
You can use Biscoff or Speculoos cookie crumbs for a buttery, spiced flavor! If you want a different twist, gingersnap crumbs also work beautifully for the crust.
How should I store leftover Cookie Butter Cheesecake Cups?
Store your cheesecake cups in an airtight container in the fridge for up to 3 days. This ensures they stay fresh and delicious, ready for your next sweet craving!
Can I freeze these cheesecake cups, and if so, how?
Absolutely! To freeze, prepare your cups without any toppings. Place them in an airtight container and store in the freezer for up to 1 month. When you’re ready to enjoy, simply thaw them in the fridge overnight before serving.
I don’t want to use cookie butter, what can I substitute it with?
You can easily substitute cookie butter with peanut butter or any nut butter you enjoy for a different flavor profile. Just keep in mind that this may alter the final taste, but it will still be creamy and delicious!
How can I ensure my cream cheese mixes smoothly?
For the best results, make sure your cream cheese is at room temperature before mixing. This will help you achieve a smooth and lump-free filling. You can let it sit out for about 30 minutes or microwave it for about 10 seconds—just be cautious not to melt it!
What if my whipped cream is over-whipped?
If you accidentally over-whip your cream and it becomes grainy, you can gently fold in a little more unwhipped cream to bring back its soft texture. This will help rescue your cheesecake filling for a lighter, fluffier result!
Irresistible Cookie Butter Cheesecake Cups You’ll Love
Ingredients
Equipment
Method
- In a mixing bowl, combine Biscoff cookie crumbs with melted butter until the mixture resembles wet sand. Spoon this mixture into the bottom of serving cups, pressing down firmly.
- In a separate mixing bowl, whip the heavy cream using an electric mixer on medium speed until soft peaks form, about 2-3 minutes.
- In a large mixing bowl, beat together softened cream cheese, powdered sugar, cookie butter, and vanilla extract until smooth and creamy, about 3-4 minutes.
- Gently fold the whipped cream into the cookie butter mixture using a spatula until no streaks remain.
- Layer the cheesecake filling over the crust in each cup, filling halfway. Drizzle with melted cookie butter before adding a second layer.
- Garnish with extra cookie crumbs or a whole cookie on top, if desired.
- Cover and refrigerate for at least 1 hour to set.
Leave a Reply