
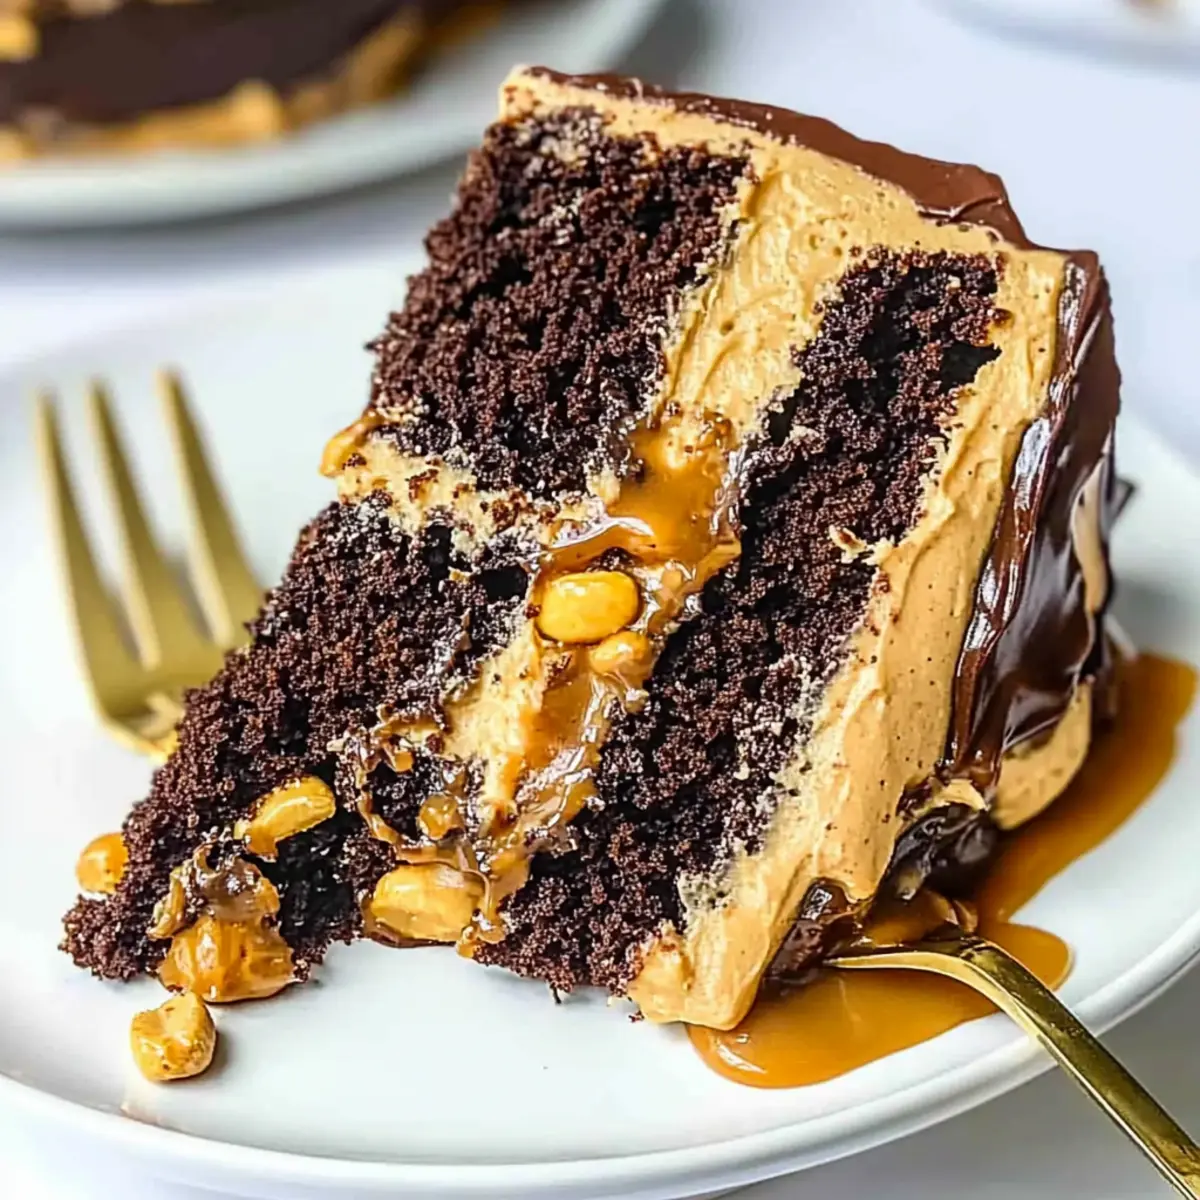
The delightful aroma of chocolate baking fills the kitchen, reminding me of carefree afternoons spent raiding the candy jar. Today, I’m thrilled to share my very own Chocolate Snickers Cake, a luscious dessert that harmoniously blends rich chocolate layers, creamy peanut butter frosting, and homemade peanut caramel. This indulgent cake not only brings the nostalgic flavors of the iconic candy bar to your table but also boasts a stunning presentation that makes it perfect for any celebration. Plus, it’s surprisingly easy to make and a true crowd-pleaser! Whether you’re impressing guests or treating yourself, this cake delivers on all fronts. So, are you ready to embark on this decadent baking adventure?
Why is this cake a must-try?
Decadent Indulgence: This Chocolate Snickers Cake is everything you’ve dreamed of and more, combining the classic flavors of the beloved candy bar into a luscious dessert.
Easy to Make: With straightforward steps, you’ll have a show-stopping cake that even beginner bakers can create with confidence.
Versatile Options: Whether you stick to the original recipe or try alternatives like Vanilla Chocolate Snickers Cake, there’s room for creativity here!
Perfect for Celebrations: Its stunning layers and rich taste make this cake a fantastic centerpiece for birthdays, holidays, or any gathering.
Crowd-Pleasing Flavor: The irresistible combination of chocolate, caramel, and peanut butter is sure to wow your guests and leave them asking for seconds!
Chocolate Snickers Cake Ingredients
For the Cake Layers
- All-Purpose Flour – Provides structure; can substitute with a gluten-free flour blend.
- Granulated Sugar – Adds sweetness and moisture; brown sugar can deepen the flavor.
- Unsweetened Cocoa Powder – Contributes rich chocolate flavor; use Dutch-processed cocoa for a richer taste.
- Baking Powder and Baking Soda – Essential leavening agents for rise; ensure freshness for best results.
- Salt – Enhances flavor; can reduce if using salted butter.
- Warm Water and Buttermilk – Adds moisture and tenderness; milk or non-dairy milk can replace buttermilk.
- Vegetable/Canola Oil – Keeps the cake moist without adding flavor; melted butter can replace for a richer taste.
- Large Eggs – Binds ingredients and adds structure; use flax eggs for a vegan option.
- Vanilla Extract – Provides depth of flavor; consider using vanilla bean paste for added intensity.
For the Peanut Butter Frosting
- Peanut Butter – Adds creaminess and flavor; almond or sunflower butter can be alternatives.
- Unsalted Butter – Creates a rich buttercream; if using salted butter, omit extra salt.
- Heavy Whipping Cream – Incorporates air for fluffy frosting; coconut cream is a great dairy-free substitute.
For the Peanut Caramel
- Granulated Sugar – The base for the caramel; melt gently for an even color.
- Unsalted Butter – Adds richness to the caramel; optional salted butter will alter the flavor slightly.
- Heavy Cream – Introduces creaminess; can be substituted with coconut cream for a dairy-free version.
- Salt – Balances sweetness; a pinch goes a long way.
For Decoration
- Chopped Salted Peanuts – Provides a delightful crunch; feel free to swap with chopped pretzels or any favorite nuts.
- Mini Snickers Bars – For decoration and extra flavor; optional caramel squares can work as a substitute.
Now that you have your ingredients ready, let’s dive into creating this Chocolate Snickers Cake that will surely dazzle everyone at your next gathering!
Step‑by‑Step Instructions for Chocolate Snickers Cake
Step 1: Prepare the Cake Layers
Preheat your oven to 350°F (175°C) and prepare four 8-inch round cake pans by lining them with parchment paper and spraying with non-stick spray. In a large bowl, whisk together the all-purpose flour, granulated sugar, cocoa powder, baking powder, baking soda, and salt. In another bowl, mix the warm water, buttermilk, eggs, vegetable oil, and vanilla extract until completely smooth. Gradually combine both mixtures, stirring until just blended, then evenly divide the batter among the prepared pans. Bake for 22-25 minutes, checking for doneness with a toothpick.
Step 2: Cool the Layers
Once your cake layers are done, remove them from the oven and let them cool in the pans for 10 minutes. Carefully turn the layers out onto a wire rack and allow them to chill in the freezer for 30 minutes. This method helps retain moisture and makes layering easier, ensuring your Chocolate Snickers Cake remains delectable and tender.
Step 3: Make the Peanut Caramel
While the cake layers are cooling, start making the peanut caramel. In a medium saucepan over low to medium heat, combine granulated sugar and allow it to melt gently, stirring constantly until it reaches a deep amber color, about 8-10 minutes. Remove from heat and carefully whisk in the unsalted butter, heavy cream, and a pinch of salt until fully incorporated. Let this caramel cool slightly before using it in your cake.
Step 4: Prepare the Peanut Butter Buttercream
In a mixing bowl, combine the unsalted butter and peanut butter, using an electric mixer to beat them together until the mixture is fluffy and smooth, about 3-4 minutes. Gradually add in powdered sugar and heavy cream, continuing to mix until the desired fluffy texture is achieved. This creamy frosting will be the perfect complement to your Chocolate Snickers Cake layers.
Step 5: Assemble the Cake
Begin stacking your cooled cake layers on a serving plate. Spread a layer of peanut butter buttercream on top of each cake layer, then drizzle with the homemade peanut caramel between the layers. Once all layers are stacked, apply a thin crumb coat of frosting over the entire cake and refrigerate for about 20-30 minutes to set it, ensuring a neat finish for the Chocolate Snickers Cake.
Step 6: Prepare Chocolate Ganache
To make the chocolate ganache for your cake, heat the heavy cream in a saucepan until it just begins to simmer. Pour it over the chocolate chips in a bowl and let it sit for 5 minutes to soften. Stir until smooth and shiny. Once your cake is chilled, pour the warm ganache over the top, allowing it to drape down the sides for an elegant presentation.
Step 7: Decorate
Finally, to finish off your Chocolate Snickers Cake, sprinkle the top with chopped salted peanuts and miniature Snickers bars cut into pieces for an indulgent touch. Optionally, add a light sprinkle of sea salt to enhance the flavors further. Your cake is now beautifully decorated and ready to be sliced and served!
Expert Tips for Chocolate Snickers Cake
-
Room Temperature Ingredients: Ensure all ingredients, especially eggs and butter, are at room temperature. This helps achieve a smooth batter and uniform texture in your Chocolate Snickers Cake.
-
Precise Measurements: Use kitchen scales for accuracy, particularly when measuring flour. Incorrect amounts can lead to a dense cake.
-
Cooling Technique: Chill cake layers in the freezer for 30 minutes. This keeps them moist and prevents crumbling while frosting, making your Chocolate Snickers Cake easier to assemble.
-
Test for Doneness: Insert a toothpick into the cake layers; it should come out clean or with a few moist crumbs. This ensures that your layers are perfectly baked and not overdone.
-
Even Ganache Pour: Allow the ganache to cool slightly before pouring. A too-hot ganache can melt the frosting, impacting the look of your finished cake.
-
Creative Decoration: Don’t hesitate to get creative with toppings! Use a mix of chopped nuts or other candies to personalize your Chocolate Snickers Cake presentation, giving it a unique flair.
Make Ahead Options
These Chocolate Snickers Cake layers are perfect for meal prep enthusiasts looking to save time during busy weeknights! You can bake the cake layers and refrigerate them for up to 3 days. Just ensure they are completely cooled before wrapping them tightly in plastic wrap to keep them fresh and moist. The peanut caramel sauce can also be made ahead and stored in the refrigerator for up to 2 weeks, but be sure to reheat it slightly before using to maintain its pourable consistency. When you’re ready to serve, simply assemble the cake with the peanut butter frosting and ganache, and you’ll have a stunning dessert that’s just as delicious as if made fresh that day!
What to Serve with Chocolate Snickers Cake
The rich, velvety layers of this cake create a symphony of flavors and textures, inviting delightful companions to complete your meal.
- Vanilla Ice Cream: A classic pairing that balances the cake’s richness with creamy coolness, enhancing each decadent bite.
- Fresh Berries: Light and vibrant, the natural acidity of raspberries or strawberries adds a refreshing contrast to the sweetness of the cake.
- Whipped Cream: Light and airy, it offers a soft, indulgent touch to each slice, perfect for those who enjoy a little extra creaminess.
- Coffee or Espresso: A warm cup serves as the ideal counterpart, the bitter notes enhance chocolate flavors while offering a cozy finish.
- Chocolate Ganache Drizzle: For the ultimate chocolate lover, an extra drizzle on top intensifies the chocolate experience and adds visual appeal.
- Peanut Butter Cup Milkshake: Blend this rich, nutty flavor for lusciously creamy sips that echo the cake’s delightful peanut butter frosting.
- Mocha Cake Pops: For a fun twist, serve these in case your guests haven’t had enough chocolate! They’ll be a delightful finger food and complement the dessert table beautifully.
How to Store and Freeze Chocolate Snickers Cake
Fridge: Store leftover Chocolate Snickers Cake in an airtight container for up to 1 week to maintain its moisture and flavor.
Freezer: If you want to keep the cake for a longer period, freeze it in slices wrapped well in plastic wrap and aluminum foil for up to 1 month.
Thawing: To enjoy frozen pieces, move them to the fridge overnight to thaw gently, retaining their delicious texture.
Reheating: If desired, warm individual slices in the microwave for about 10-15 seconds to enhance the gooey topping of caramel and frosting.
Chocolate Snickers Cake Variations
Feel free to get creative with this delightful cake, tailoring it to your taste while embracing your culinary spirit!
-
Gluten-Free: Use a gluten-free flour blend instead of all-purpose flour to accommodate dietary needs.
It’s just as delicious and allows everyone to enjoy the cake together. -
Nut-Free: Substitute peanut butter with sunflower seed butter for a nut-free alternative.
This way, you can savor the flavor without compromising on inclusivity! -
Extra Chocolatey: Swap unsweetened cocoa powder with dark cocoa powder for a deeper chocolate flavor.
It’s a small change that elevates your cake to new, rich heights. -
Caramel Lovers: Add a layer of caramel sauce between the cake layers for an even sweeter indulgence.
Who could resist that extra ooey-gooey goodness? -
Fruity Twist: Incorporate raspberries or strawberries in between the cake layers for a refreshing burst of flavor.
The combination of chocolate and fruit is sure to impress! -
Spice it Up: Add a hint of cinnamon or espresso powder to the dry ingredients for a flavor boost.
Just a pinch can add unexpected warmth and excitement. -
Cupcake Version: Transform the cake into cupcakes by baking at 350°F for 18-21 minutes.
These easy-to-eat treats are perfect for parties or just a cozy night in! -
Frosting Options: Experiment with chocolate frosting instead of peanut butter for a different, yet delightful taste.
It’s a classic combo sure to satisfy chocolate lovers everywhere!
While you’re trying these variations, why not also check out my easy recipe for Winter Wonderland Chocolate or enjoy a slice of the delightful Moist Pound Cake? Each offers its own flavor and celebration!
Chocolate Snickers Cake Recipe FAQs
How do I choose the right ripeness for the ingredients?
For the best outcome, ensure your eggs are fresh and at room temperature, as this helps create a smoother batter. Peanut butter should also be creamy rather than dry, which contributes to a luxurious frosting texture. If you’re using bananas for a variation, choose ones that are just ripe, as overly brown bananas can lead to an overly moist cake.
How should I store my Chocolate Snickers Cake?
Store your leftover Chocolate Snickers Cake in an airtight container in the refrigerator for up to 1 week. This will help keep the cake moist and flavorful. If you plan to keep it longer, freezing is the way to go! Wrap individual slices in plastic wrap, then aluminum foil, and pop them in the freezer for up to 1 month.
Can I freeze the Chocolate Snickers Cake, and what’s the process?
Absolutely! To freeze your Chocolate Snickers Cake, first slice it if you prefer individual servings. Wrap each slice tightly in plastic wrap, followed by aluminum foil to prevent freezer burn. Place the wrapped slices in a freezer bag or airtight container. When you’re ready to enjoy, simply move the slices to the fridge to thaw overnight. For a quick heat-up, microwave each slice for about 10-15 seconds if you like it a bit warm.
What common issues should I watch out for while baking?
One common problem is dry cake layers, which can result from overbaking or improper measurements of flour. Always use a kitchen scale for accurate measurements. Another issue may arise with the frosting; if it’s too runny, try adding a bit more powdered sugar to thicken it up. Conversely, if it’s too stiff, a splash of milk or cream can help achieve the desired consistency.
Are there any dietary considerations I should be aware of?
Indeed! If you’re baking for someone with nut allergies, you can easily swap the peanut butter with sunflower seed butter to maintain a similar flavor profile without the allergens. Additionally, for a vegan version, replace the eggs with flax eggs (1 tablespoon of ground flaxseed mixed with 2.5 tablespoons of water equals one egg) and use almond or coconut milk in place of dairy.
Can I use different types of chocolate for the ganache?
Very! While the recipe calls for milk chocolate chips, you can swap them for dark chocolate or even semi-sweet chocolate, depending on your taste preference. Just keep in mind that the flavor will vary; dark chocolate will lend a richer taste, while semi-sweet will keep that balanced sweetness!
Irresistible Chocolate Snickers Cake You Can't Resist
Ingredients
Equipment
Method
- Preheat your oven to 350°F (175°C) and prepare four 8-inch round cake pans by lining them with parchment paper and spraying with non-stick spray.
- In a large bowl, whisk together the all-purpose flour, granulated sugar, cocoa powder, baking powder, baking soda, and salt.
- In another bowl, mix the warm water, buttermilk, eggs, vegetable oil, and vanilla extract until completely smooth.
- Gradually combine both mixtures, stirring until just blended, then evenly divide the batter among the prepared pans.
- Bake for 22-25 minutes, checking for doneness with a toothpick.
- Remove the cakes from the oven and let them cool in the pans for 10 minutes.
- Turn the layers out onto a wire rack and chill in the freezer for 30 minutes.
- For the peanut caramel, combine granulated sugar in a saucepan over low to medium heat and allow it to melt gently.
- Carefully whisk in unsalted butter, heavy cream, and a pinch of salt until fully incorporated.
- Let the caramel cool slightly before using.
- To prepare the peanut butter buttercream, combine unsalted butter and peanut butter, and beat until fluffy.
- Gradually add powdered sugar and heavy cream until desired texture is achieved.
- Start stacking your cooled cake layers, spreading peanut butter buttercream on top of each layer.
- Drizzle homemade peanut caramel between the layers.
- Apply a thin crumb coat of frosting over the entire cake and refrigerate for 20-30 minutes.
- For the chocolate ganache, heat heavy cream until it just begins to simmer, then pour over chocolate chips.
- Stir until smooth and shiny, then pour over the chilled cake.
- Finish by sprinkling with chopped salted peanuts and mini Snickers bars.
Leave a Reply