
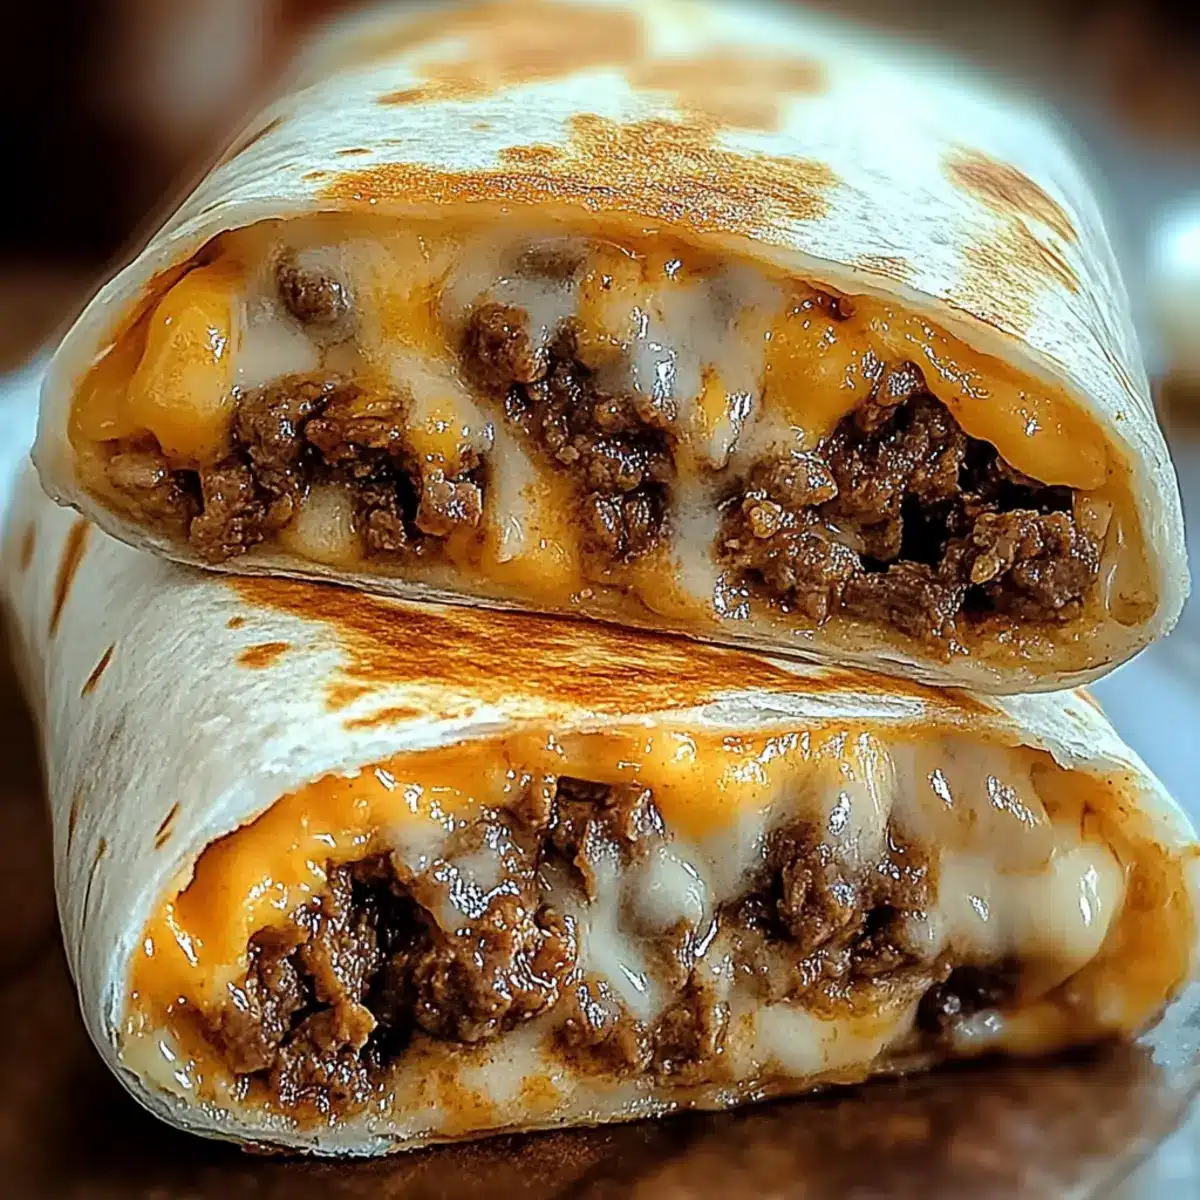
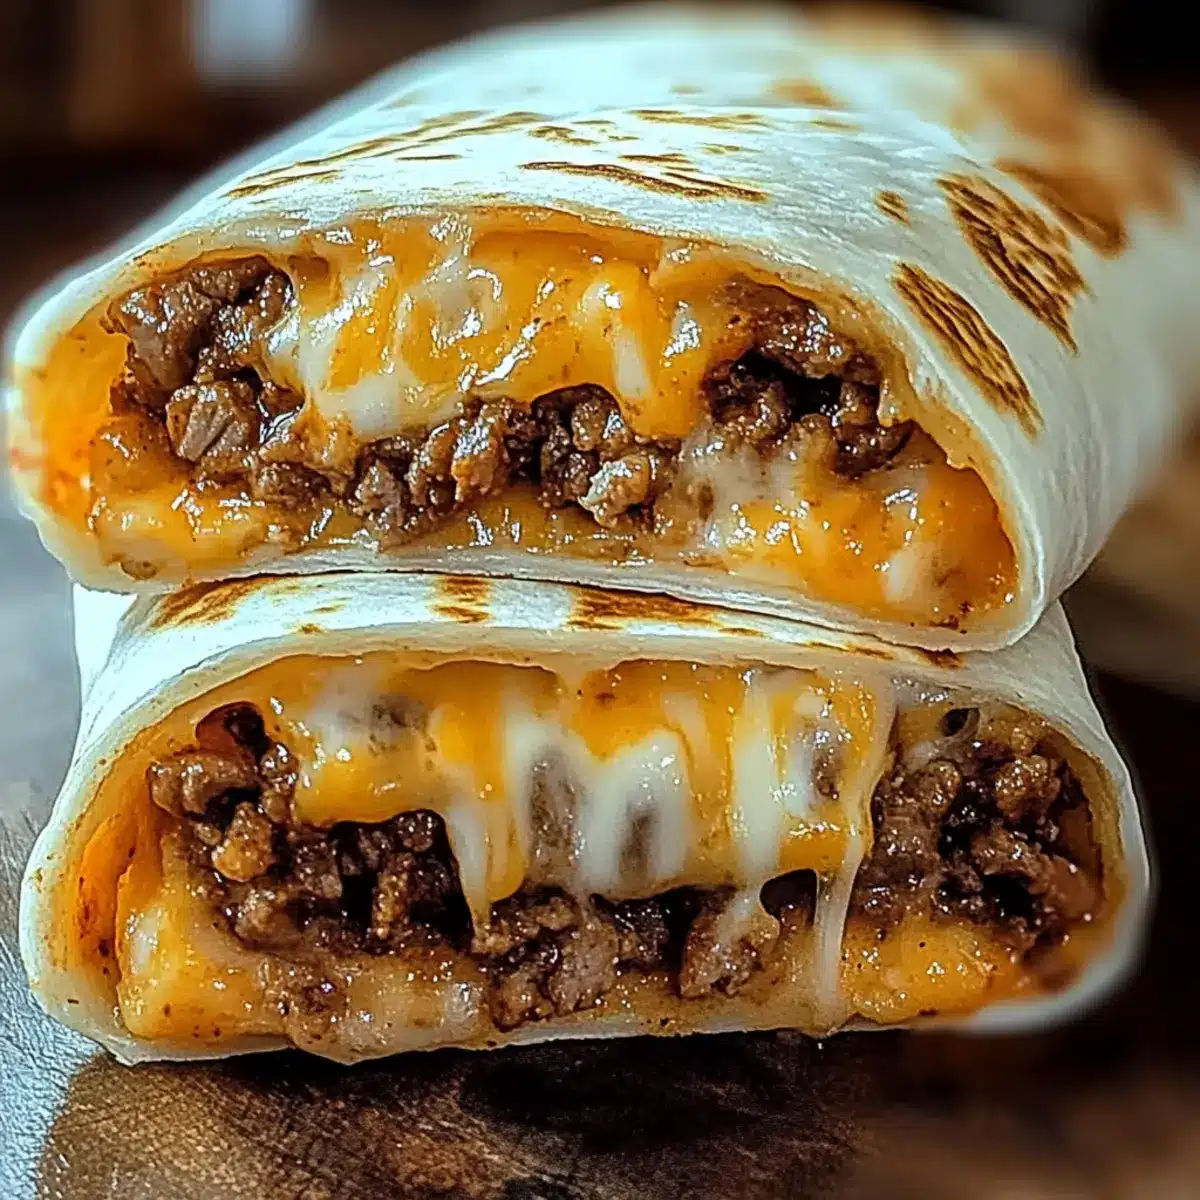
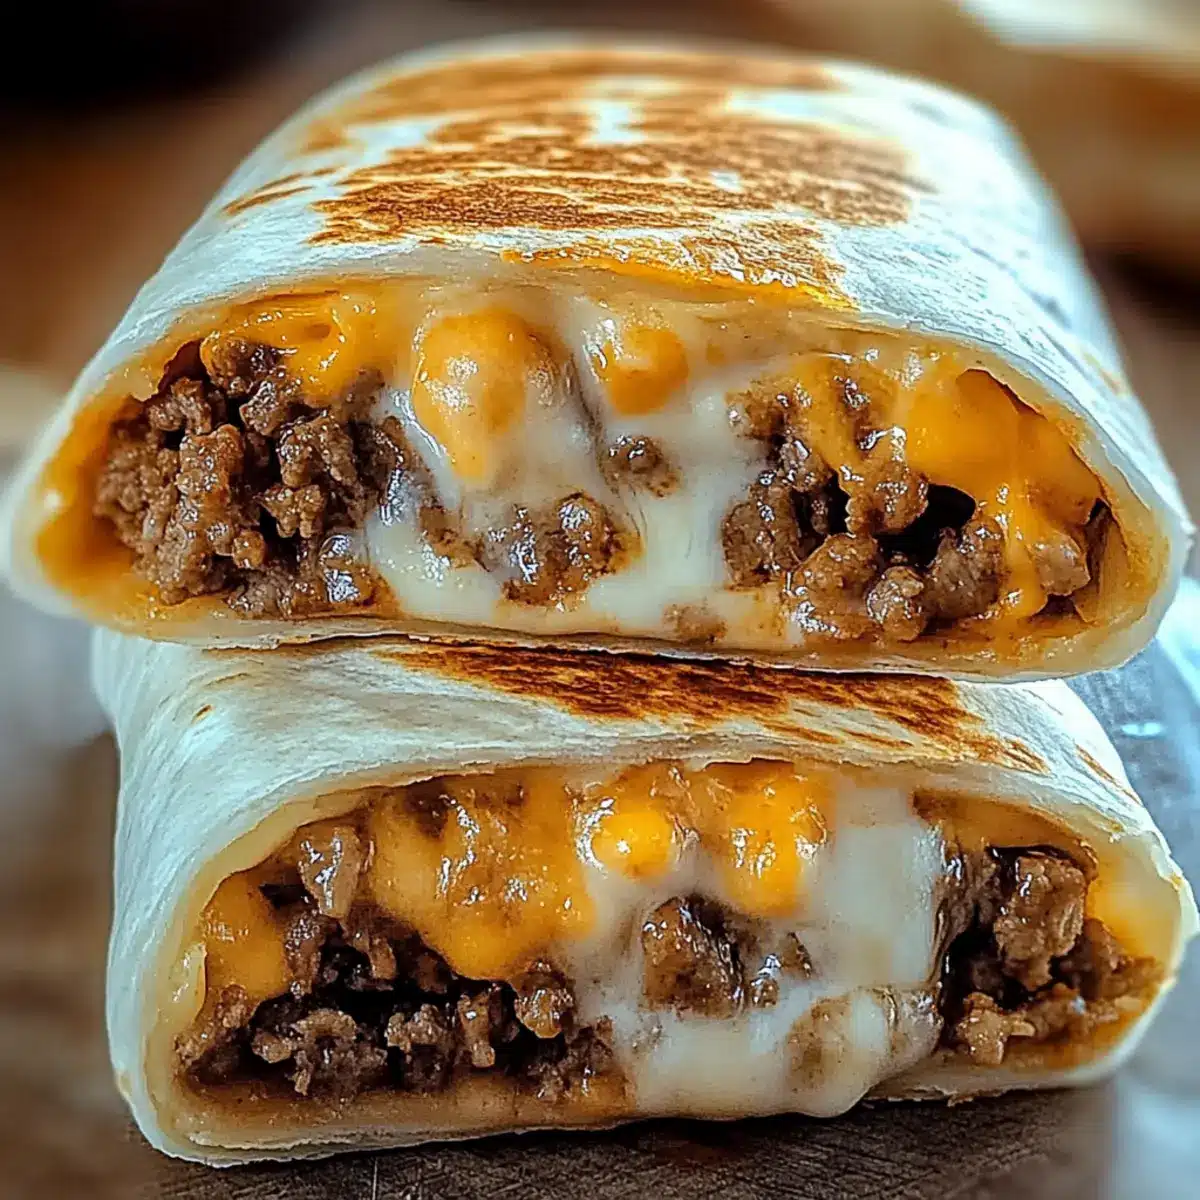
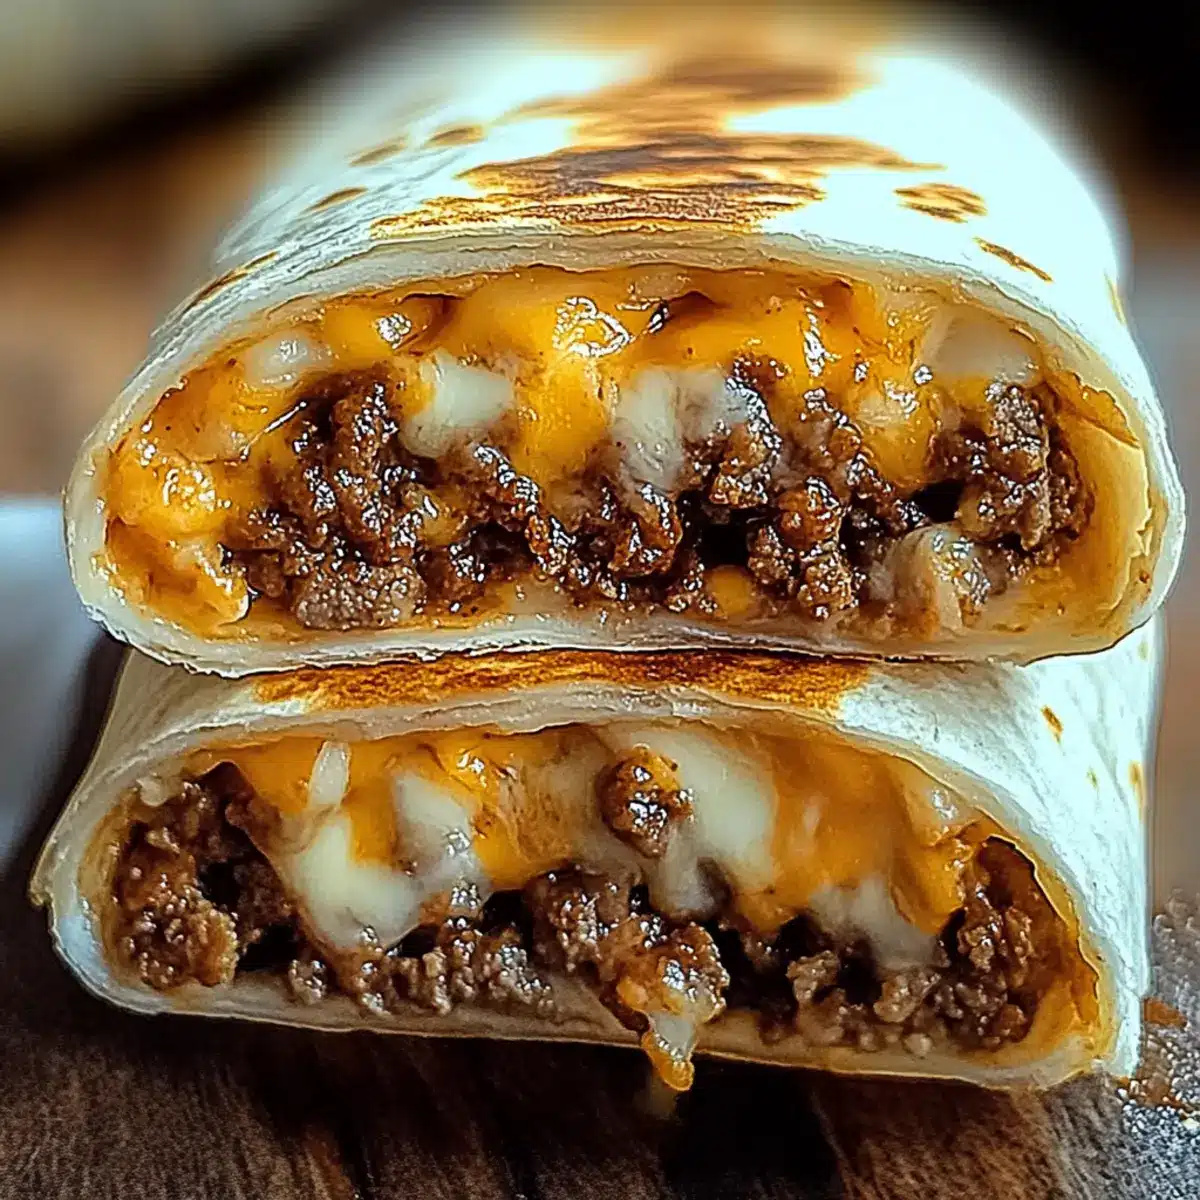
Late-night cravings can often turn into culinary adventures in my kitchen. That’s how I stumbled upon the delightful creation of the Easy Grilled Cheese Burrito. Imagine a crispy tortilla wrapping around layers of ooey-gooey cheese, zesty chipotle sauce, and your choice of seasoned fillings, all ready in under 30 minutes! This quick and customizable comfort food not only satisfies every family member’s appetite—whether they’re meat lovers or prefer vegetarian options—but also brings a touch of creativity to your weeknight meals. Trust me, it’s a kid-approved dish that’s perfect for both grown-ups and little ones alike. So, are you ready to elevate your grilled cheese game to a whole new level? Let’s get cooking!
Why will you love this Grilled Cheese Burrito?
Quick and Easy: This recipe is a lifesaver for busy weeknights, allowing you to whip up a delicious meal in under 30 minutes. Customizable: Tailor each burrito to suit your family’s tastes, whether you prefer hearty beef or vibrant vegetables. Kid-Approved: Kids will love the gooey cheese and fun flavors, making it a hit at the dinner table. Pair it with fresh guacamole or a side of Mexican street corn for a well-rounded meal. Versatile Ingredients: Use pantry staples, and feel free to experiment with veggie options or spice levels to create your ideal burrito. Comfort Food Win: It combines the nostalgia of classic grilled cheese with the heartiness of a burrito, making it a sure way to please everyone in the family!
Grilled Cheese Burrito Ingredients
• Here’s everything you need for the ultimate Grilled Cheese Burrito!
For the Filling
- Ground Beef – Main protein source providing flavor; substitute with turkey or plant-based alternatives.
- Taco Seasoning – Adds essential flavor to the beef; make homemade seasoning for a healthier option.
- Cooked White Rice – Provides a fluffy base; substitute with brown rice or quinoa for added nutrition.
- Sour Cream – Adds creaminess to the burrito; can be replaced with yogurt or dairy-free alternatives.
- Nacho Cheese Sauce – Creates a rich, cheesy layer; use homemade or vegan cheese for a dairy-free version.
- Shredded Cheddar Cheese – Offers sharp flavor; mix in mozzarella for extra richness.
- Shredded Mozzarella Cheese – Enhances the gooey factor; this can be omitted for a lighter burrito.
- Chipotle Sauce – Adds smokiness and spice; adjust the quantity to your preference.
For the Wrap
- Flour Tortillas – Encase the filling for that perfect burrito; opt for whole wheat or gluten-free tortillas as alternatives.
- Butter or Oil – For grilling the burrito to achieve a crispy exterior; use olive oil or non-stick spray for a healthier option.
Get ready to enjoy the cheesy goodness that is your Grilled Cheese Burrito!
Step‑by‑Step Instructions for Grilled Cheese Burrito
Step 1: Cook the Beef
In a large skillet over medium heat, brown 1 pound of ground beef for about 8-10 minutes, breaking it apart with a wooden spoon until no longer pink. Drain excess grease and stir in taco seasoning with a splash of water. Simmer for an additional 5 minutes, allowing the flavors to meld while the mixture thickens.
Step 2: Warm the Tortillas
While the beef is cooking, prepare 4 flour tortillas. Warm them in a skillet over low heat for about 20 seconds on each side or microwave for 15-20 seconds until pliable. Keep the tortillas warm by covering them with a clean kitchen towel to maintain their softness as you move to the next step.
Step 3: Assemble the Burrito
On each warmed tortilla, start layering your fillings. Begin with 1/2 cup of cooked white rice, followed by the seasoned beef. Drizzle on some nacho cheese sauce, add a dollop of sour cream, and sprinkle with chipotle sauce to taste. Finally, top with shredded cheddar and mozzarella cheese before carefully folding the tortilla into a burrito shape.
Step 4: Grill the Burrito
In the same skillet, add a tablespoon of butter or oil over medium heat. Once melted and hot, place the assembled burrito seam-side down in the skillet. Grill for about 3-4 minutes until the exterior turns golden brown and crispy. Carefully flip the burrito to grill the other side for an additional 3-4 minutes, ensuring both sides are perfectly browned.
Step 5: Serve and Enjoy
Once grilled, remove the burrito from the skillet and let it cool for about a minute. Slice in half to reveal the melted cheesy goodness within. Serve with extra chipotle sauce for dipping or guacamole on the side to enjoy the comforting flavors of your Grilled Cheese Burrito!
Expert Tips for Grilled Cheese Burrito
-
Preheat Your Skillet: Ensure that your skillet is hot before adding the burrito; a cold skillet may result in a soggy exterior instead of the desired crispy texture.
-
Press for Crunch: While grilling, apply a gentle pressure on the burrito with a spatula. This helps achieve that delightful crunch that everyone loves.
-
Flavorful Alternatives: If you’re short on time, prepare your beef and rice mixture in advance. Both can be stored in the fridge for up to three days, making weeknight meals a breeze!
-
Control the Heat: Adjust the amount of chipotle sauce based on your family’s preference for spiciness. Start with a small amount, and you can always add more later!
-
Customize Your Fillings: Don’t hesitate to experiment with fillings! From black beans for a vegetarian option to different cheeses, your Grilled Cheese Burrito can be tailored to suit any taste.
Grilled Cheese Burrito Variations & Substitutions
Feel free to get creative and tailor this delightful dish to your liking!
-
Vegetarian: Swap ground beef for black beans, lentils, or sautéed bell peppers and onions to keep things hearty and satisfying.
-
Dairy-Free: Use vegan cheese and dairy-free sour cream for a creamy burrito without the dairy, ensuring everyone can enjoy it.
-
Extra Heat: Add sliced jalapeños or a sprinkle of crushed red pepper flakes for a spicy kick that enhances the smoky chipotle flavor.
-
Herb Infusion: Mix in fresh cilantro or parsley for an aromatic burst that brightens the overall flavor profile of the burrito.
-
Texture Twist: For a crunch factor, consider adding crushed tortilla chips to the filling for delightful texture contrasts in every bite.
-
Health Boost: Substitute regular tortillas with whole grain or spinach tortillas to add nutrients and a splash of color to your creation.
-
Sweet & Savory: Incorporate sweet corn or diced pineapple in your filling for a surprising hint of sweetness that pairs perfectly with the savory components.
-
Flavor Elevation: For a gourmet touch, consider drizzling truffle oil or adding caramelized onions to elevate the taste and bring a restaurant-style experience to your home.
Whether you’re in the mood for comfort food or looking to switch things up a bit, these variations will make your Grilled Cheese Burrito memorable. You can also explore the comforting world of a Caramelized Onion Grilled Cheese or try pairing your burrito with a delicious Broccoli Potato Cheese soup for a complete meal. Happy cooking!
Make Ahead Options
These Easy Grilled Cheese Burritos are perfect for meal prep enthusiasts! You can prepare the beef and rice mixture up to 3 days in advance and store it in an airtight container in the refrigerator to save time on busy nights. Additionally, warm the tortillas ahead of time and keep them covered to maintain their softness. When you’re ready to serve, simply assemble the burritos with your desired fillings and grill them until crispy—this makes for a quick, satisfying dinner! Whether for a weeknight meal or a weekend treat, your burritos will be just as delicious and ready in no time!
What to Serve with Easy Grilled Cheese Burrito
Transform your meal into a feast with delightful side dishes that perfectly complement the warmth and comfort of this cheesy burrito.
-
Guacamole: Creamy and fresh, guacamole adds a luscious texture and balances the spiciness of the chipotle sauce. Plus, who doesn’t love swirling their burrito into some freshly made guac?
-
Mexican Street Corn: This street food favorite, with its creamy, tangy flavor and sprinkle of cheese, creates a crispy and savory contrast to the soft burrito. It’s a delightful pairing that brightens up any meal.
-
Tropical Fruit Salsa: A sweet and zesty fruit salsa made with mango and pineapple contrasts beautifully with the savory flavors of the burrito. It brings a refreshing note that harmonizes with the spicy elements.
-
Crispy Oven-Baked Tortilla Chips: Serve these alongside your burrito for an added crunch! They’re perfect for scooping up extra cheese sauce or guacamole, enhancing your dining experience.
-
Simple Green Salad: A light and refreshing salad, tossed with lime vinaigrette, cuts through the richness of the burrito. Add some cucumber and avocado for extra creaminess and color!
-
Chilled Horchata: This sweet, creamy drink made from rice and cinnamon is a wonderful partner to the spicy burrito. It cools the palate and makes every bite even more enjoyable.
-
Black Bean Soup: Warm and hearty, this soup is loaded with flavor and pairs well with the cheesy burrito. It adds an extra layer of comfort, making your meal complete and satisfying.
-
Pineapple Coconut Smoothie: For dessert, this refreshing smoothie takes the meal to the next level! Its creamy texture and tropical flavors provide a perfect sweet ending after the savory burrito experience.
How to Store and Freeze Grilled Cheese Burrito
Fridge: Store leftover Grilled Cheese Burritos in an airtight container for up to 3 days. Reheat gently in a skillet or microwave to revive their gooey texture.
Freezer: For longer storage, wrap each burrito tightly in foil, place them in a freezer bag, and freeze for up to 1 month. Reheat in the oven at 350°F (175°C) for the best results.
Reheating: When reheating from frozen, allow the burrito to thaw in the fridge overnight for even heating. Then, use the oven or skillet to warm until heated through and crisp.
Prep Ahead: Prepare the beef and rice filling in advance and store in the fridge for up to 3 days to streamline your Grilled Cheese Burrito assembly on busy nights.
Easy Grilled Cheese Burrito Recipe FAQs
How do I choose ripe ingredients for my Grilled Cheese Burrito?
Absolutely! When selecting ingredients like tomatoes or avocados, look for vibrant color and a slight give when gently squeezed. For ground beef, ensure it’s bright red with no gray spots, while for cheese, opt for fresh varieties without any dark spots or a sour smell.
How should I store leftover Grilled Cheese Burritos?
Leftover burritos can be stored in an airtight container in the fridge for up to 3 days. To reheat and maintain their crispy goodness, warm them gently in a skillet over medium heat for about 5-7 minutes, flipping them halfway.
Can I freeze my Grilled Cheese Burritos?
Yes, you can! Wrap each burrito tightly in foil and place them in a freezer bag to avoid freezer burn. They can be frozen for up to 1 month. When ready to eat, thaw in the fridge overnight, then reheat in the oven at 350°F (175°C) for about 15-20 minutes until heated through and crispy.
What if my burrito filling is too watery?
Very commonly, a watery filling can occur if too much liquid is added during cooking. To remedy, you can either simmer the mixture longer to thicken it, or drain excess liquid before assembling. Also, consider adding more rice or cheese as these will absorb some moisture.
Are there any dietary considerations for the Grilled Cheese Burrito?
The more the merrier! For vegetarian options, consider using black beans or sautéed vegetables instead of beef, and replace the cheese with vegan alternatives. Always check ingredient labels for allergens like lactose if you’re cooking for someone with dairy sensitivities!
Irresistible Grilled Cheese Burrito: A Cheesy Delight!
Ingredients
Equipment
Method
- In a large skillet over medium heat, brown 1 pound of ground beef for about 8-10 minutes, breaking it apart with a wooden spoon until no longer pink. Drain excess grease and stir in taco seasoning with a splash of water. Simmer for an additional 5 minutes, allowing the flavors to meld while the mixture thickens.
- While the beef is cooking, prepare 4 flour tortillas. Warm them in a skillet over low heat for about 20 seconds on each side or microwave for 15-20 seconds until pliable. Keep the tortillas warm by covering them with a clean kitchen towel.
- On each warmed tortilla, layer your fillings: start with 1/2 cup of cooked white rice, followed by the seasoned beef. Drizzle on some nacho cheese sauce, add a dollop of sour cream, and sprinkle with chipotle sauce to taste. Top with shredded cheddar and mozzarella cheese before folding the tortilla into a burrito shape.
- In the same skillet, add a tablespoon of butter or oil over medium heat. Once melted and hot, place the assembled burrito seam-side down. Grill for about 3-4 minutes until golden brown and crispy, then flip to grill the other side for another 3-4 minutes.
- Remove the burrito from the skillet, let cool for about a minute, then slice in half to reveal the cheesy goodness. Serve with extra chipotle sauce or guacamole.
Leave a Reply