
The sizzle of the pan and the aroma of fresh basil fills the kitchen as I roll out my latest creation: Golden Crispy Thai Basil Beef Rolls. The moment those beefy bundles hit the hot oil, it’s a small victory—one that transforms my kitchen into a vibrant Thai street market. These savory delights are not only ready in under 30 minutes, perfect for a busy weeknight, but they also deliver an unparalleled crunch that’ll impress friends and family alike. With each bite, you can enjoy both the tender, flavorful filling and the satisfying texture that elevates any meal into a special occasion. Ready to discover the easy steps to make these delightful rolls at home? Let’s dive in!
Why are these rolls a must-try?
Quick and Easy: These Golden Crispy Thai Basil Beef Rolls come together in just 30 minutes, making them perfect for busy weeknights.
Flavor Explosion: Each bite packs a punch of authentic Thai flavors, thanks to fresh basil and savory beef.
Crispy Perfection: The golden, crispy exterior offers a delightful crunch that contrasts beautifully with the juicy filling.
Versatile Delight: Enjoy them as an appetizer, a snack, or even as a meal. Pair them with a dipping sauce, like sweet chili, to elevate the experience, much like my Flavor Packed Thai Fried Chicken that you’ll crave over and over.
Crowd-Pleasing: These rolls will not only satisfy your taste buds but also impress guests at your next gathering! Don’t forget to check out my Spring Rolls Bold for more delicious Thai-inspired recipes.
Golden Crispy Thai Basil Beef Rolls Ingredients
For the Filling
- Ground Beef – Provides protein and richness; feel free to substitute with ground pork or chicken for a variation.
- Fresh Thai Basil Leaves – Adds authentic Thai flavor and fragrance; regular basil can be used in a pinch, though the taste will differ.
- Minced Garlic – Contributes aromatic depth and slight heat; fresh garlic is preferred, but powdered garlic can be a substitute if you’re in a bind.
- Soy Sauce – Enhances umami flavor and adds saltiness; opt for low-sodium soy sauce for a lighter option.
- Fish Sauce – Adds a distinctive savory depth characteristic of Thai cuisine; you can substitute more soy sauce for a vegetarian-friendly alternative.
- Sugar – Balances the flavors with a hint of sweetness; consider coconut sugar or honey for a different twist.
For the Wrapping
- Spring Roll Wrappers – Forms the rolling structure; rice paper can work if spring roll wrappers aren’t available.
- Vegetable Oil – Necessary for frying to achieve that coveted crispy texture; peanut oil adds another layer of flavor that’s worth considering.
These Golden Crispy Thai Basil Beef Rolls are not just a quick meal; they’re a celebration of flavors that will keep everyone coming back for more!
Step‑by‑Step Instructions for Golden Crispy Thai Basil Beef Rolls
Step 1: Prepare the Filling
In a mixing bowl, combine ground beef, minced garlic, soy sauce, fish sauce, sugar, and chopped fresh Thai basil leaves. Use your hands or a spatula to mix until all ingredients are well incorporated, creating a fragrant and flavorful filling. This step should take about 5 minutes before you move on to assembling your Golden Crispy Thai Basil Beef Rolls.
Step 2: Roll the Wrappers
Lay a spring roll wrapper flat on a clean surface, with one corner facing you. Spoon approximately 2 tablespoons of the beef mixture onto the corner, ensuring it sits about an inch from the edge. Fold the corner over the filling, tucking it in tightly, then fold in the sides and continue rolling until sealed. Repeat this process with the remaining wrappers and filling to create multiple rolls, which should take about 10 minutes.
Step 3: Heat the Oil
In a large frying pan, pour enough vegetable oil to cover the bottom and heat it over medium heat. Allow the oil to reach a shimmering state, which typically takes about 3-5 minutes. This is crucial for achieving that golden crispy texture on your Thai Basil Beef Rolls, so keep an eye on the oil to avoid overheating or smoking.
Step 4: Fry the Rolls
Carefully place the assembled rolls into the hot oil, avoiding overcrowding the pan. Fry in batches to ensure even cooking, turning occasionally using tongs until they achieve a beautiful golden brown, about 3-4 minutes per side. The crispy exterior should be visibly crackling and fragrant, inviting you to indulge in these delicious Golden Crispy Thai Basil Beef Rolls.
Step 5: Drain and Serve
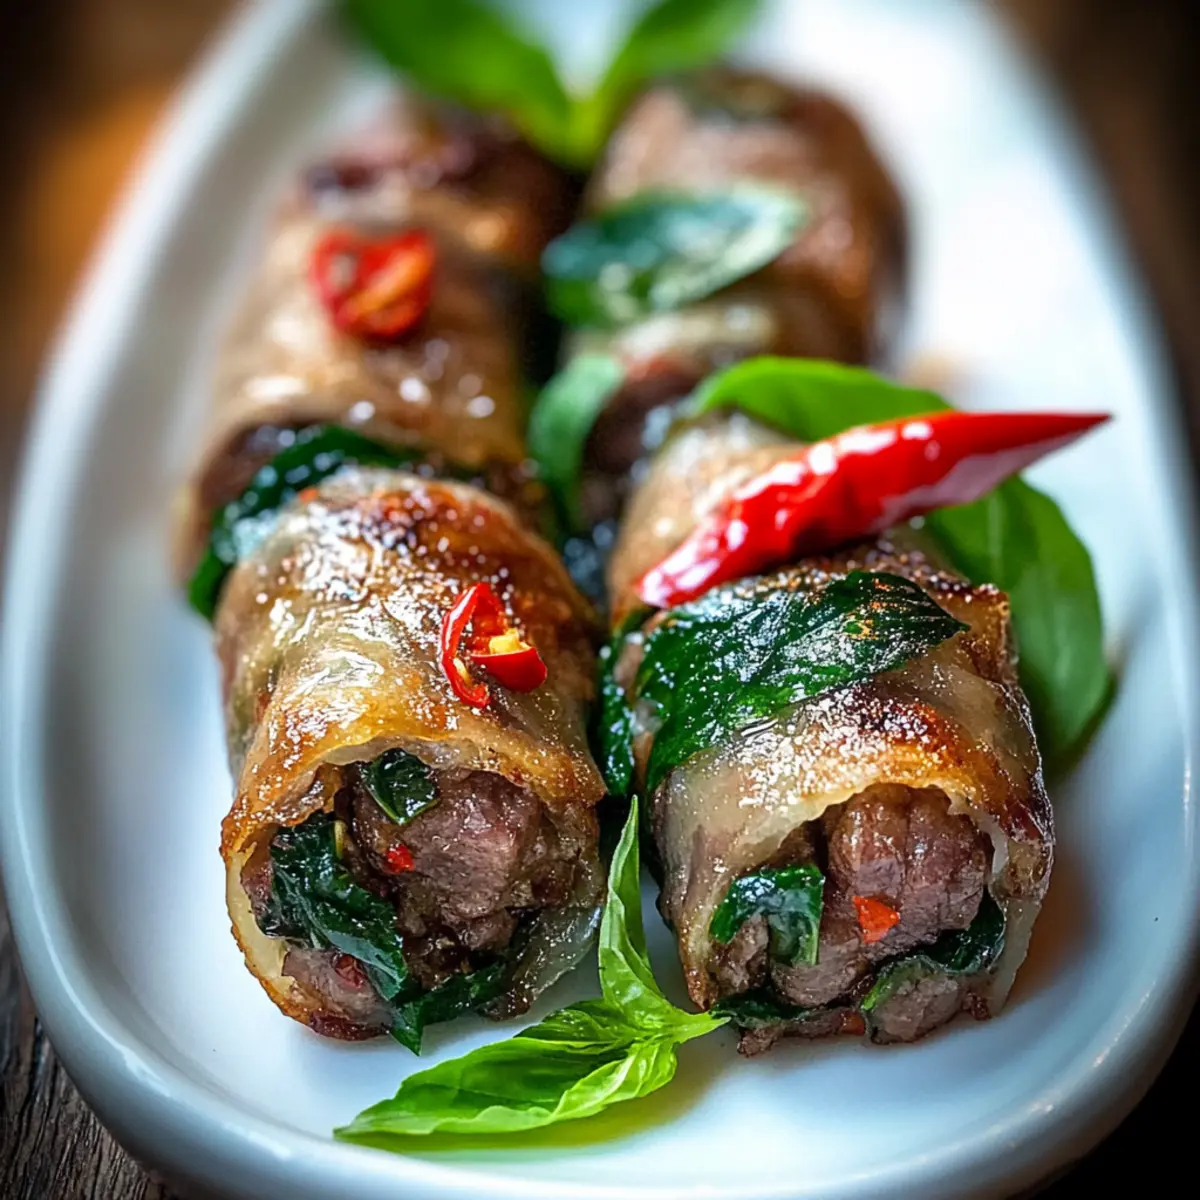
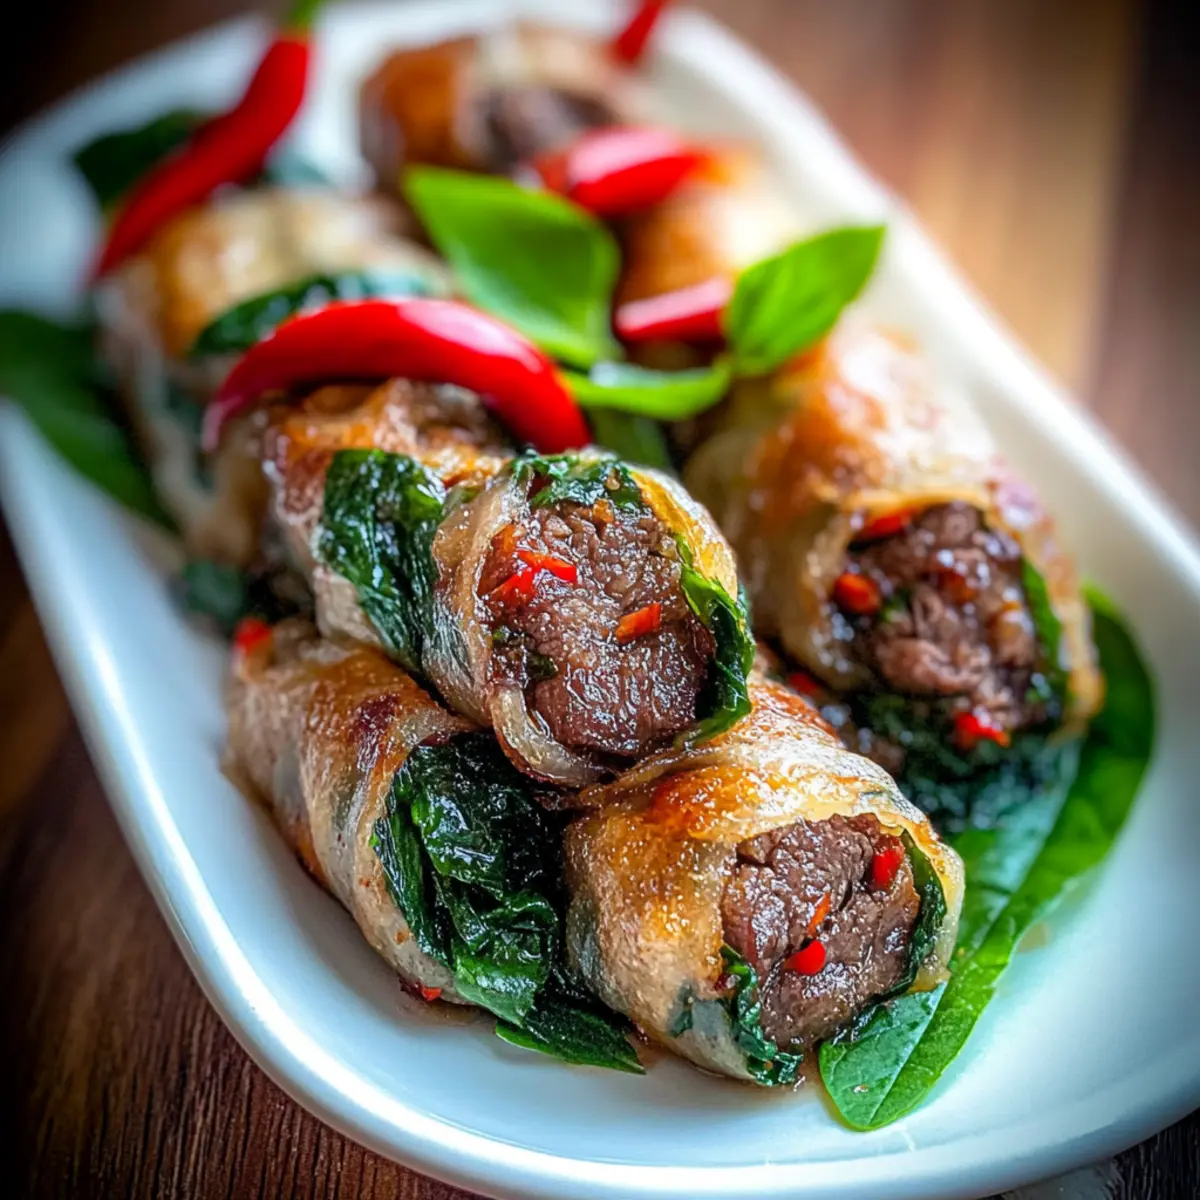
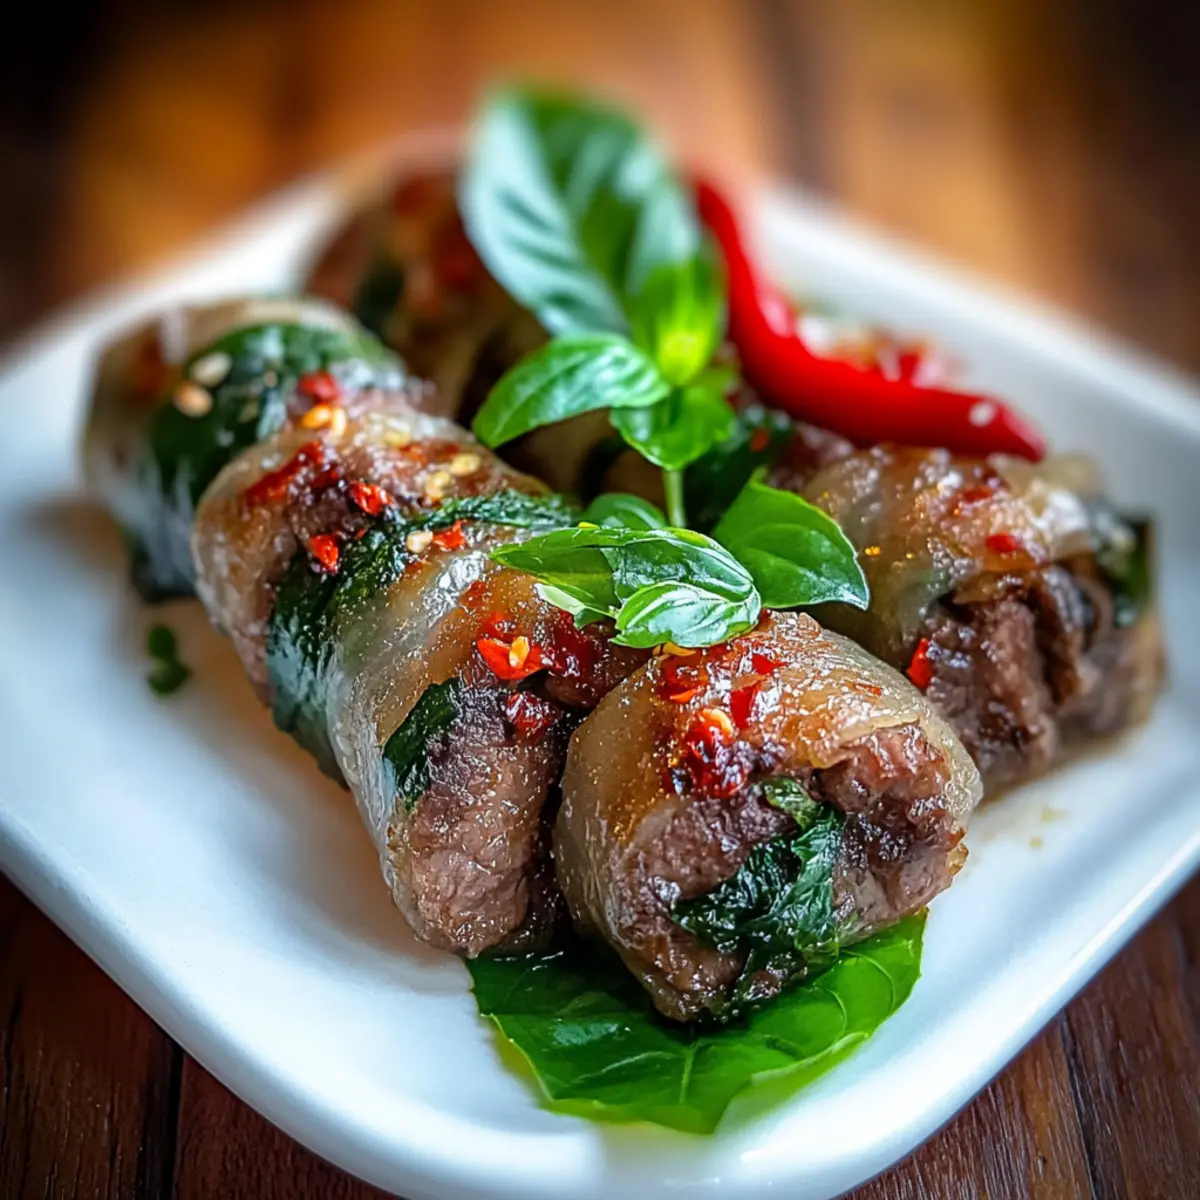
Once perfectly fried, remove the rolls from the pan and let them drain on paper towels to absorb excess oil. Arrange the crispy rolls on a serving plate, garnishing with fresh Thai basil and slices of red chili for a pop of color. Serve warm with your favorite dipping sauce, and savor the delightful crunch and flavor of these outstanding Golden Crispy Thai Basil Beef Rolls.

Storage Tips for Golden Crispy Thai Basil Beef Rolls
Airtight Container: Store any leftover Golden Crispy Thai Basil Beef Rolls in an airtight container in the fridge for up to 2 days to maintain freshness.
Freezer: If you have extra rolls, freeze them uncooked. Wrap each roll tightly in plastic wrap and place them in a freezer-safe bag. They will keep for up to 2 months.
Reheating: To reheat, simply pan-fry cooked rolls over medium heat for about 3-4 minutes per side, or bake them in the oven at 375°F (190°C) until heated through and crispy.
Defrosting: If frozen, it’s best to defrost the Golden Crispy Thai Basil Beef Rolls in the fridge overnight before reheating for even cooking.
Variations & Substitutions for Golden Crispy Thai Basil Beef Rolls
Feel free to get creative and customize these delightful rolls to suit your taste and dietary preferences!
-
Dairy-Free: Substitute any creamy dip with a tangy vinegar sauce for a refreshing contrast. This keeps the rolls light while still satisfying.
-
Spicy Twist: Add chili flakes or sriracha into the beef mixture for a kick of heat that will tantalize your taste buds. Adjust the amount to suit your spice level preference.
-
Vegetarian Delight: Use shredded carrots, mushrooms, or crumbled tofu instead of beef, creating a filling bursting with fresh veggies. The textures remain delightful, while the flavors shine through.
-
Asian Fusion: Incorporate ginger and scallions into your filling for an added layer of flavor that pays homage to various Asian cuisines, making every bite special.
-
Rice Paper Wraps: If spring roll wrappers are unavailable, try using rice paper. Simply hydrate them in warm water until pliable for a gluten-free option that’s just as tasty.
-
Experiment with Sauces: Serve with a variety of dipping sauces! Try combinations like peanut sauce or spicy soy sauce that can complement the rolls perfectly, much like my crowd-pleasing Beef Braciole Melt.
-
Savory Sweet Touch: Swap regular sugar with coconut sugar or honey to add a hint of tropical sweetness while reinforcing that lovely savory balance.
These variations not only enhance your Golden Crispy Thai Basil Beef Rolls but also keep them exciting. Dive in and let your creativity shine!
What to Serve with Golden Crispy Thai Basil Beef Rolls
Create a delightful dining experience by adding complementary flavors alongside your crispy creations.
-
Coconut Rice: The subtle sweetness and creamy texture of coconut rice beautifully balance the savory and spicy notes of the beef rolls.
-
Fresh Green Papaya Salad: A tangy, crunchy salad brings a refreshing contrast, enhancing the meal’s overall flavor profile while adding a nutritious touch.
-
Spicy Peanut Sauce: This rich and nutty sauce serves as the perfect dip, elevating the taste of the crispy rolls while providing a delightful kick.
-
Chilled Thai Iced Tea: The creamy and lightly spiced flavors of this refreshing beverage make it an ideal pairing, cooling down the palate after each bite.
-
Steamed Asparagus: Lightly seasoned asparagus adds a nice crunch and fresh element, complementing the savory richness of the rolls without overwhelming the palate.
-
Garlic Edamame: These tender beans tossed in a sprinkle of sea salt deliver a satisfying bite that’s packed with protein, making them a perfect side.
-
Fruit Skewers: For a sweet finale, colorful fruit skewers add a burst of freshness and a touch of sweetness, perfect for cleansing the palate between bites.
-
Crispy Spring Rolls: Pairing these crispy beef rolls with classic vegetable spring rolls creates a delightful assortment of textures and flavors, ensuring every bite is unique.
Expert Tips for Golden Crispy Thai Basil Beef Rolls
Prep Ahead: Prepare the filling in advance to save time when you’re ready to assemble the rolls, making the cooking process smoother.
Don’t Overcrowd: Fry in small batches to avoid crowding the pan; this ensures each roll gets that perfect golden crispy texture.
Seal Tight: Make sure to roll the wrappers tightly to prevent any leaking during frying, keeping the filling juicy while retaining the crispy shell.
Use Fresh Ingredients: Always opt for fresh Thai basil and minced garlic for the best flavor; they truly elevate your Golden Crispy Thai Basil Beef Rolls.
Reheat Wisely: If you have leftovers, gently reheat in a pan instead of a microwave to maintain that crispy exterior.
Make Ahead Options
These Golden Crispy Thai Basil Beef Rolls are excellent for those busy evenings when you need a quick meal! You can prepare the filling and roll the wrappers up to 24 hours in advance. Simply store the filled rolls in an airtight container in the refrigerator to maintain freshness. When you’re ready to serve, heat the oil and fry the rolls directly from the fridge; this ensures they remain crispy and delicious. To keep the crispy texture, avoid pre-frying them and wait until just before serving. This way, you can enjoy a delightful homemade treat with minimal effort on a hectic weeknight!
Golden Crispy Thai Basil Beef Rolls Recipe FAQs
What kind of ground beef should I use?
For these Golden Crispy Thai Basil Beef Rolls, lean ground beef is ideal as it provides a rich flavor without being overly greasy. If you’re looking for a variation, you can also use ground pork or chicken. Just make sure the meat is fresh and not past its expiration date to ensure the best taste.
How do I store leftovers?
To keep your leftover rolls fresh, place them in an airtight container in the fridge for up to 2 days. This way, you can enjoy them later without sacrificing flavor. If you want to maintain their crunchiness, I recommend gently reheating them in a pan rather than using a microwave, as microwaving can make them soggy.
Can I freeze the un-fried rolls?
Absolutely! If you want to prepare in advance, you can freeze the uncooked rolls. Simply wrap each roll tightly in plastic wrap and place them in a freezer-safe bag. They can be stored in the freezer for up to 2 months. When you’re ready to enjoy them, just defrost them in the fridge overnight before frying.
How can I prevent the rolls from leaking during frying?
To avoid leaking, it’s essential to roll the wrappers tightly. Make sure to tuck the filling in securely while folding in the sides before rolling up. This technique will not only help keep the filling inside but also result in a perfectly crispy texture! Additionally, don’t overcrowd the frying pan, as this can cause uneven cooking and oil splashes.
Are there any dietary considerations to keep in mind?
Yes, if you have dietary restrictions or allergies, there are several alternatives you can consider. If you’re looking for a vegetarian option, you can replace the ground beef with finely chopped vegetables like mushrooms or shredded carrots, and use soy sauce in place of fish sauce. Always double-check the labels for allergens if you’re serving these rolls to guests.
Golden Crispy Thai Basil Beef Rolls in Just 30 Minutes
Ingredients
Equipment
Method
- In a mixing bowl, combine ground beef, minced garlic, soy sauce, fish sauce, sugar, and chopped fresh Thai basil leaves. Mix until well incorporated.
- Lay a spring roll wrapper flat on a clean surface. Spoon approximately 2 tablespoons of the beef mixture onto the corner, fold the corner over the filling, tuck it in tightly, fold in the sides and continue rolling until sealed.
- In a large frying pan, pour enough vegetable oil to cover the bottom and heat it over medium heat until shimmering.
- Carefully place the assembled rolls into the hot oil in batches, frying until golden brown, about 3-4 minutes per side.
- Remove the rolls from the pan and let them drain on paper towels. Serve warm with dipping sauce.
Leave a Reply