
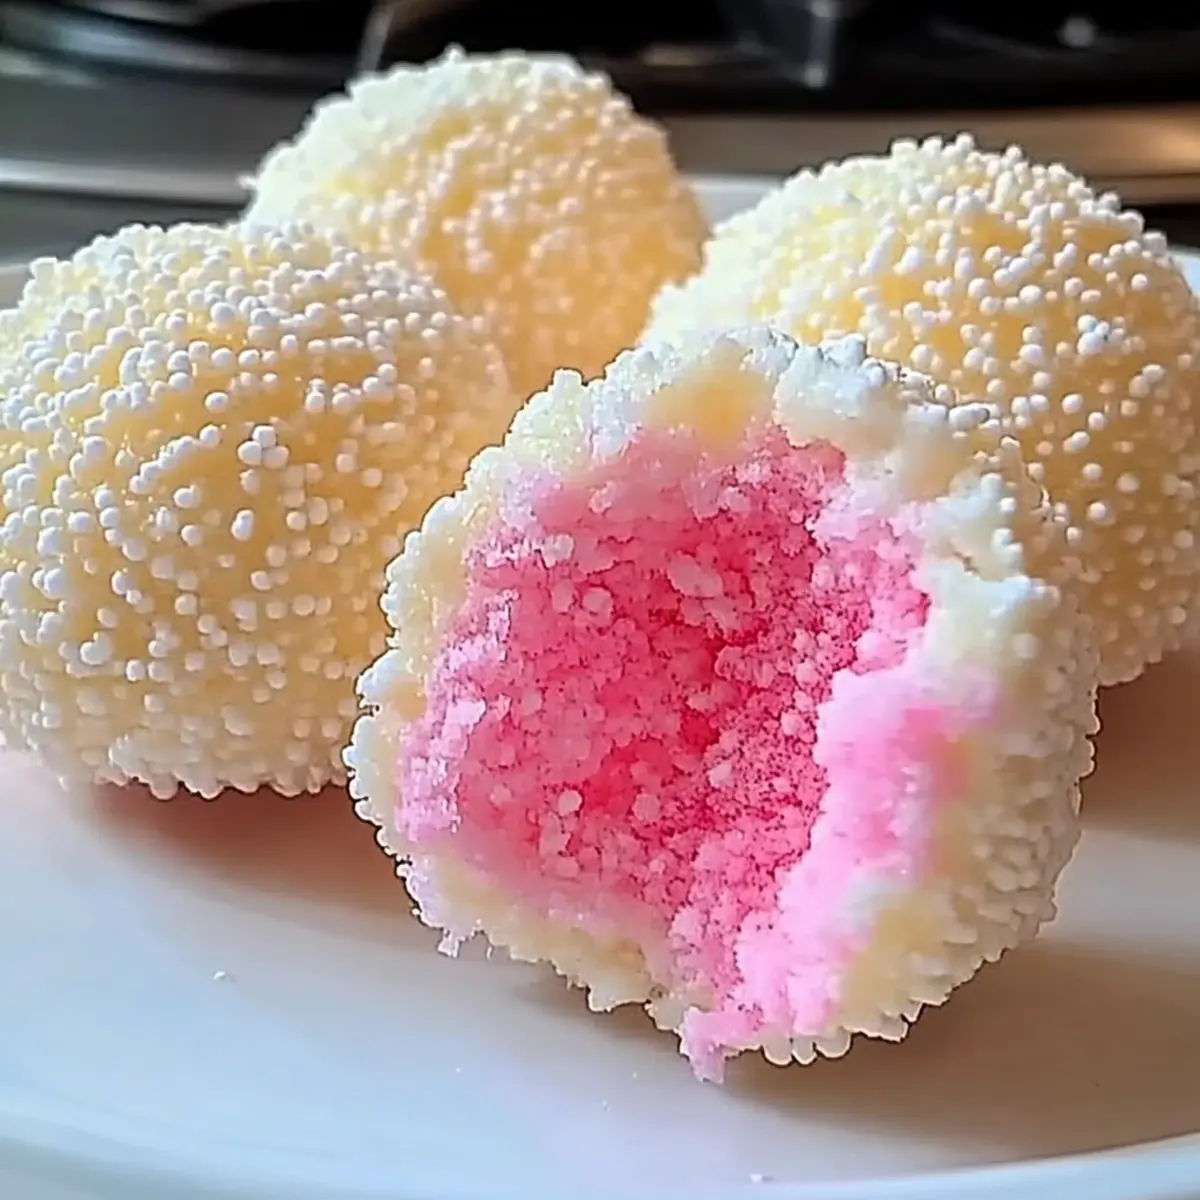
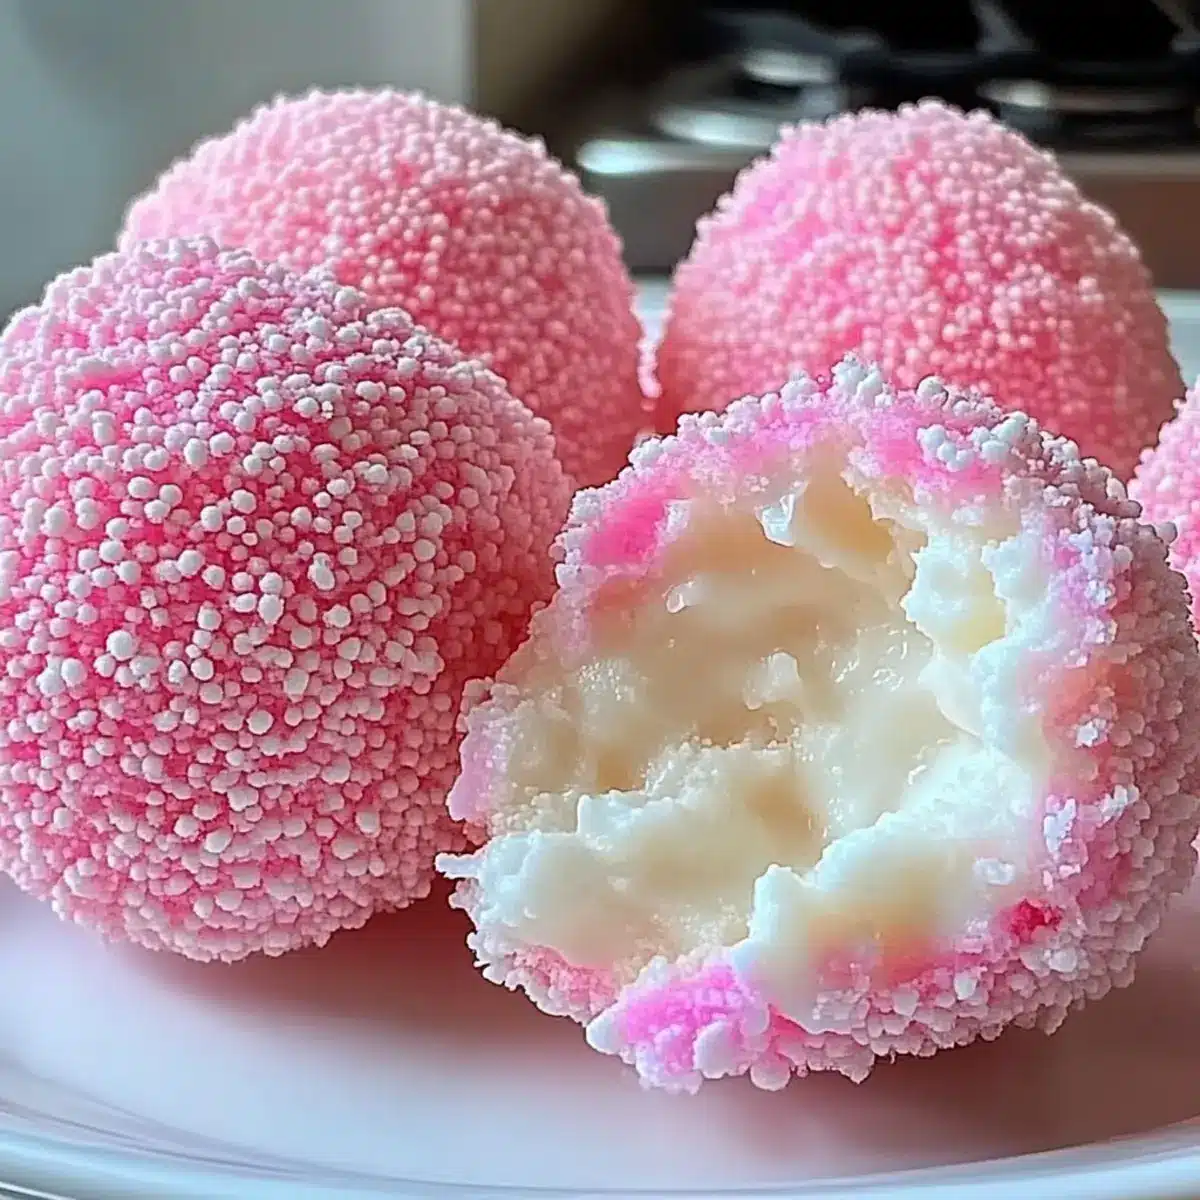
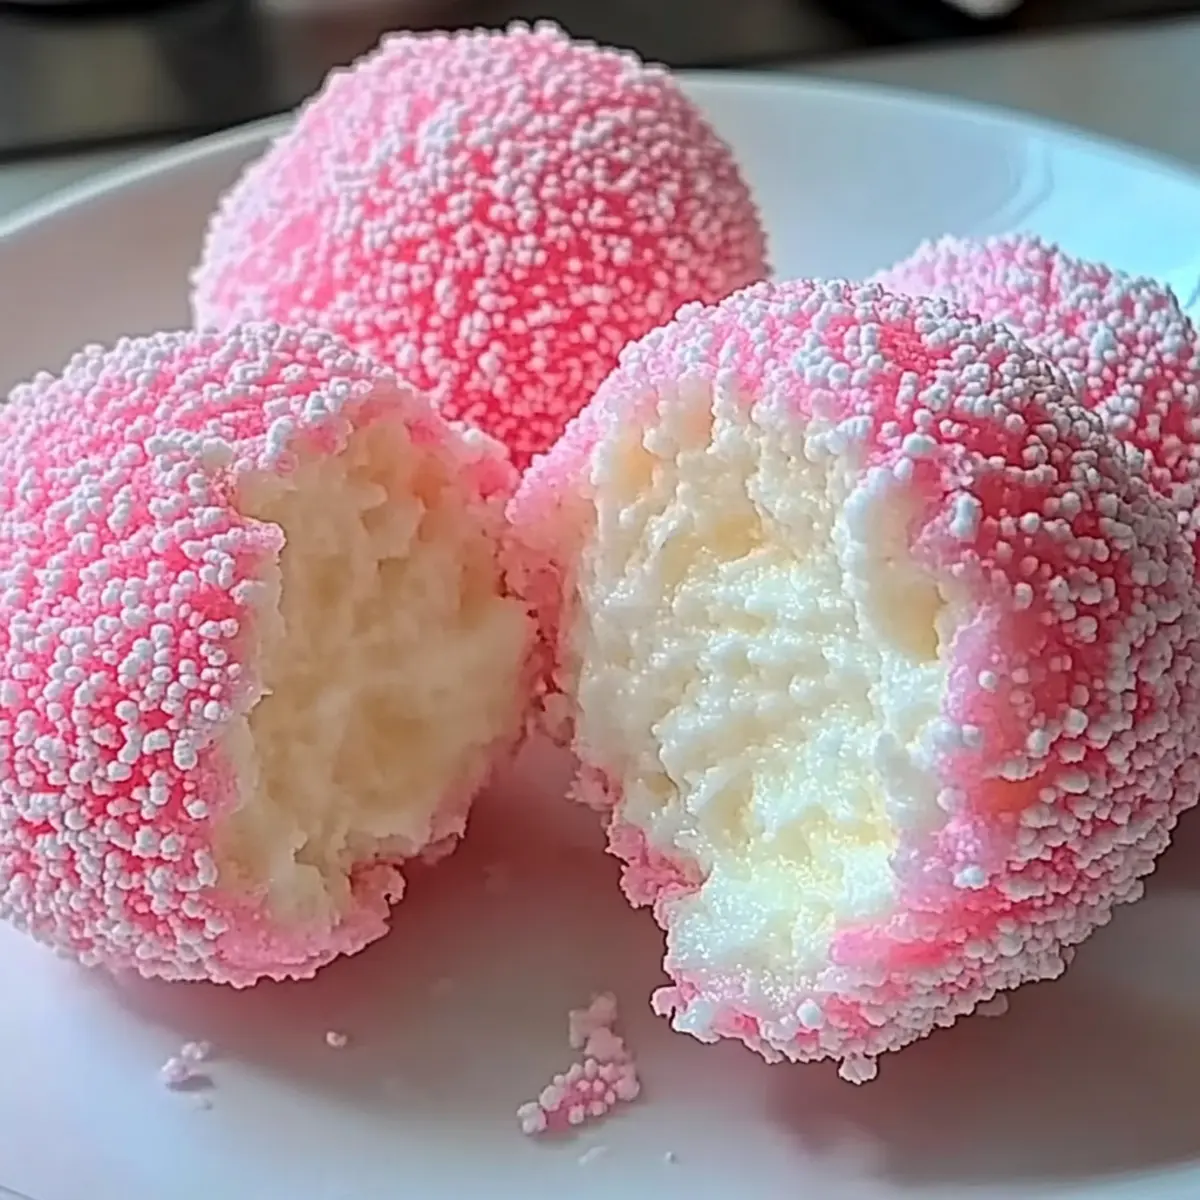
The aroma of fried treats wafting through the air transports me back to carefree childhood days spent at the fair. Today, I’m excited to share my recipe for Crispy Cotton Candy Cheesecake Bombs, a whimsical dessert that marries the creamy richness of cheesecake with a playful hint of cotton candy nostalgia. Not only are these bombs a delightful crowd-pleaser perfect for parties, but they also come together with surprising ease, making them an ideal family cooking project. Imagine the joy of biting into that crispy exterior to find a sweet, luscious filling—pure bliss! Are you ready to create a fun and irresistible dessert that will have everyone asking for seconds? Let’s dive in!
Why are these cheesecakes a must-try?
Irresistible Flavor: The fusion of creamy cheesecake and whimsical cotton candy delivers a sweet burst of nostalgia.
Easy to Make: This recipe requires simple ingredients and straightforward steps that even beginner cooks can master.
Crowd-Pleasing Snack: These delightful bites are perfect for gatherings, ensuring guests will rave about your creative dessert!
Fun Cooking Activity: Making Crispy Cotton Candy Cheesecake Bombs with family or friends can turn into a joyful bonding experience.
Versatile Options: Customize by swapping cotton candy with your favorite flavors, like crushed cookies or chocolate, for a personalized touch.
Serve these delightful bites warm at your next party, and don’t forget to check out my Mini Cheesecake Cups for another sweet treat option!
Crispy Cotton Candy Cheesecake Bombs Ingredients
• For the Filling
- Cream cheese – Adds creaminess and a rich flavor to the filling; substitute with mascarpone for a different taste.
- Granulated sugar – Sweetens the cheesecake filling; brown sugar can add a deeper flavor.
- Vanilla extract – Enhances the overall flavor profile; use almond extract for an alternate flavor.
- Cotton candy – Provides flavor and texture in the filling; can be omitted for a simpler cheesecake.
• For the Dough
- Graham cracker crumbs – Forms the base of the cheesecake bombs, contributing texture and flavor; substitute with crushed digestive biscuits for a different taste.
- All-purpose flour – Creates stability in the dough; gluten-free flour can be used for a gluten-free version.
- Baking powder – Helps the dough rise slightly, making it fluffy; baking soda could be used as an alternative.
- Salt – Balances and enhances flavors in the recipe.
- Eggs – Bind the ingredients together in the dough; egg substitute can be used for a vegan version.
• For the Coating
- Cotton candy-flavored candy melts – Used for coating and adding sweetness; white chocolate can be a substitute for a plain coating.
- Oil – For frying, providing the desired crispy texture; canola or vegetable oil works best.
Step‑by‑Step Instructions for Crispy Cotton Candy Cheesecake Bombs
Step 1: Prepare the Filling
In a mixing bowl, combine the cream cheese, granulated sugar, vanilla extract, and crushed cotton candy. Using an electric mixer, blend the ingredients on medium speed until the mixture is smooth and creamy, about 2–3 minutes. This delightful filling will be rich with flavor, so once combined, set it aside to chill in the refrigerator for 30 minutes, allowing it to firm up for easier handling.
Step 2: Make the Dough
In a separate bowl, whisk together the graham cracker crumbs, all-purpose flour, baking powder, and salt until well combined. This mixture will act as your dough base. Next, crack in the eggs and stir vigorously until a soft, pliable dough forms. You’ll want a consistency that’s easy to shape, so take care to mix thoroughly, ensuring that no dry patches remain.
Step 3: Form the Bombs
Grab small portions of the dough and flatten them in the palm of your hand. Place a spoonful of the chilled cheesecake filling in the center of each flattened dough portion, then carefully wrap the dough around the filling, sealing it tightly. Roll each filled dough into a ball, ensuring the seams are closed securely to prevent any leakage during frying. Place them gently on a lined baking sheet as you work.
Step 4: Freeze the Cheesecake Balls
Once all your bombs are shaped, pop them into the freezer for 15 minutes. This step is crucial as it firms up the filling and helps maintain their shape during frying. While they freeze, you can prepare your frying station, ensuring everything is ready for a delicious finish.
Step 5: Heat the Oil
In a deep pot or fryer, pour enough oil to submerge the bombs and heat it to 350°F (175°C). Use a cooking thermometer for accuracy; the oil is hot enough when it shimmers and small bubbles begin to form around a wooden spoon or chopstick dipped into the oil. This temperature is key for achieving that crispy exterior you desire for your Crispy Cotton Candy Cheesecake Bombs.
Step 6: Fry the Bombs
Carefully lower the frozen cheesecake balls into the hot oil, frying them in batches to avoid overcrowding. Cook each batch for about 2–3 minutes or until they turn a gorgeous golden brown, flipping them occasionally for even cooking. Once fried, use a slotted spoon to remove the bombs from the oil and let them drain on paper towels to absorb excess oil.
Step 7: Add the Coating
Melt the cotton candy-flavored candy melts in a microwave-safe bowl, heating in short intervals and stirring until smooth. Take each fried bomb and dip it into the melted candy, ensuring it’s fully coated. Before the coating sets, sprinkle crushed cotton candy on top to add that whimsical flair. Allow the coating to harden completely before serving these delightful Crispy Cotton Candy Cheesecake Bombs.
Crispy Cotton Candy Cheesecake Bombs Variations
Feel free to get creative and customize these delicious desserts to suit your taste!
-
Dairy-Free: Swap cream cheese for coconut cream and use plant-based milk for a vegan-friendly filling.
This twist still offers a creamy texture while aligning with dairy-free preferences, making everyone feel included. -
Gluten-Free: Replace all-purpose flour with a gluten-free flour blend to accommodate those with gluten sensitivities.
Savor the same delightful crunch and flavor while ensuring everyone can indulge seamlessly. -
Sugar-Free: Use a sugar substitute like erythritol or stevia in place of granulated sugar for a sugar-free option.
This allows you to enjoy the sweetness without the guilt, keeping your dessert dreams alive! -
Chocolate Lovers: Incorporate cocoa powder into the filling for a chocolatey cheesecake bomb.
Enhance the whipped filling with a chocolate coating for an indulgent treat everyone will adore—pure decadence! -
Fruit Addition: Mix in finely chopped strawberries or blueberries to bring a fruity freshness to the cheesecake filling.
This adds a delightful twist while maintaining that creamy texture; delightful summer vibes in every bite! -
Spicy Kick: Add a pinch of cinnamon or chili powder to the filling for a surprising spicy-sweet combination.
The warmth of the spice elevates the flavors, tantalizing taste buds and making a fun conversation starter. -
Caramel Drizzle: Drizzle caramel sauce over the finished bombs for an extra layer of sweetness and richness.
The mix of crispy, creamy, and gooey adds delicious complexity and makes your desserts even more indulgent! -
Cotton Candy Flavor Change: Simply use flavored cotton candy, like bubblegum or grape, to change the profile.
Feel the nostalgia while experimenting with different flavor choices; each bite takes you on a whimsical journey!
Explore the dessert world! You might also enjoy crafting some Fried Strawberry Cheesecake Sandwiches or savoring a slice of Cherry Pistachio Cheesecake for more inspiring treats.
Make Ahead Options
These Crispy Cotton Candy Cheesecake Bombs are perfect for busy cooks looking to save time without sacrificing flavor! You can prepare the cheesecake filling and dough up to 24 hours in advance. Simply make the filling as directed, chill it, and store it in an airtight container in the refrigerator. Roll the dough into balls and freeze them for up to 3 days before frying. When you’re ready to enjoy, just heat the oil and fry the frozen bombs for about 2-3 minutes until golden brown and crispy. By prepping ahead, you’ll have delicious, whimsical treats ready with minimal effort, making your gatherings even sweeter!
What to Serve with Crispy Cotton Candy Cheesecake Bombs
Indulge everybody’s sweet tooth by complementing your delicious desserts with some delightful sides and beverages.
-
Vanilla Ice Cream: A creamy scoop offers a rich contrast to the crispy texture, making every bite a comforting experience. Pairing these bombs with ice cream adds a lusciousness that balances out their sweetness beautifully.
-
Fresh Berries: Strawberries, raspberries, or blueberries add a refreshing burst of acidity, cutting through the richness of the cheesecake bombs while bringing a pop of color to your plate.
-
Whipped Cream: Light and airy, this classic topping enhances the overall texture while providing a sweet and fluffy finish. Consider adding a hint of vanilla or a dash of cinnamon for extra flair.
-
Chocolate Sauce: Drizzling warm chocolate sauce over the bombs introduces a rich and decadent flavor that will keep chocolate lovers craving more. This addition also enhances the visual appeal!
-
Lemonade: A tall glass of zesty lemonade offers a refreshing, tangy contrast that cleanses the palate between bites, making your dessert experience even more enjoyable.
-
Cotton Candy Fluff: For the ultimate whimsical pairing, serve a bit of cotton candy fluff alongside for a nostalgic touch that echoes the flavors of your cheesecake bombs!
-
Sparkling Water: A light and bubbly drink enhances the experience without overwhelming the senses. Opt for a lemon or berry-infused sparkling water for an added refreshing twist.
Each accompaniment brings out different notes from the Crispy Cotton Candy Cheesecake Bombs, inviting your guests to explore delightful flavors in every bite.
How to Store and Freeze Crispy Cotton Candy Cheesecake Bombs
Fridge: Store leftover Crispy Cotton Candy Cheesecake Bombs in an airtight container for up to 3 days. Make sure they’re completely cooled before sealing to maintain freshness.
Freezer: For longer storage, freeze the bombs before frying. Place them in a single layer on a baking sheet until firm, then transfer to a freezer-safe bag. They can last up to 2 months.
Reheating: To enjoy the bombs again, reheat them in an air fryer at 350°F (175°C) for 3-5 minutes, until crispy. This will bring back that delightful crunch!
Room Temperature: These treats are best enjoyed fresh, so if serving at a gathering, aim to eat them the same day they are made for optimal flavor and texture.
Expert Tips for Crispy Cotton Candy Cheesecake Bombs
-
Hot Oil Check: Ensure your oil is at a steady 350°F (175°C) before frying. This helps achieve that perfect crispy texture for your cheesecake bombs.
-
Avoid Overcrowding: Fry in small batches to prevent lowering the oil temperature, which can lead to soggy bombs instead of crispy delights.
-
Sealing Technique: Make sure to seal your bombs tightly after filling them. Proper sealing will prevent any filling from leaking out during frying, keeping these treats intact.
-
Chill for Best Results: Chilling the filling before assembling makes it easier to handle and helps maintain shape, resulting in a well-formed crispy treat.
-
Coating Creativity: Don’t hesitate to experiment with different flavored candy melts for coating—chocolate or caramel can add delicious twists to your Crispy Cotton Candy Cheesecake Bombs!
Crispy Cotton Candy Cheesecake Bombs Recipe FAQs
What type of cotton candy should I use for the filling?
Absolutely! I recommend using fluffy, freshly made cotton candy for the best flavor and texture. Look for cotton candy that’s soft and not overly sticky. If you want to change things up, you can also use flavored cotton candy like strawberry or grape for a fun twist!
How should I store leftover Crispy Cotton Candy Cheesecake Bombs?
You can store leftover bombs in an airtight container in the refrigerator for up to 3 days. Ensure they are completely cooled before sealing to maintain freshness. When you’re ready to enjoy them again, just pop them into an air fryer at 350°F (175°C) for 3-5 minutes to regain that crispy texture.
Can I freeze these cheesecake bombs before or after frying?
Definitely! I often freeze them before frying for longer storage. To do this, place your shaped but un-fried bombs in a single layer on a baking sheet and freeze until firm. Then transfer them to a freezer-safe bag where they can last up to 2 months. When you’re ready to fry, there’s no need to thaw—just fry them straight from the freezer!
What can I do if the bombs leak during frying?
Very importantly, ensure you seal the dough tightly around the filling. This prevents any leakage. If a leak happens, don’t worry! Just scoop up any excess filling that escapes and serve the bombs with a little cream drizzle for added flair.
Can I make these cheesecake bombs without eggs?
Yes! You can easily make a vegan version of these Crispy Cotton Candy Cheesecake Bombs. Replace the eggs with a suitable substitute, such as 1/4 cup unsweetened applesauce or 1/4 cup mashed banana for each egg. This keeps the texture smooth and ensures everything holds together beautifully while still being delicious.
Is it safe to give these dessert bombs to pets?
I would advise against sharing these sweet treats with pets. Ingredients like sugar and dairy can be hard on their stomachs, and toppings like cotton candy are especially not safe. It’s best to enjoy these delightful snacks among friends and family!

Crispy Cotton Candy Cheesecake Bombs for Sweet Nostalgia
Ingredients
Equipment
Method
- In a mixing bowl, combine the cream cheese, granulated sugar, vanilla extract, and crushed cotton candy. Blend until smooth and creamy, about 2–3 minutes. Chill in the refrigerator for 30 minutes.
- In a separate bowl, whisk together the graham cracker crumbs, flour, baking powder, and salt. Add the eggs and stir until a soft, pliable dough forms.
- Flatten portions of the dough in your hand, add a spoonful of chilled filling, and wrap the dough around it. Roll into a ball and place on a lined baking sheet.
- Freeze the bombs for 15 minutes to maintain their shape during frying.
- Heat oil in a deep pot to 350°F (175°C).
- Carefully lower the frozen bombs into the hot oil and fry in batches for 2–3 minutes until golden brown. Drain on paper towels.
- Melt candy melts and dip each bomb to coat, topping with crushed cotton candy before it sets.
Leave a Reply