
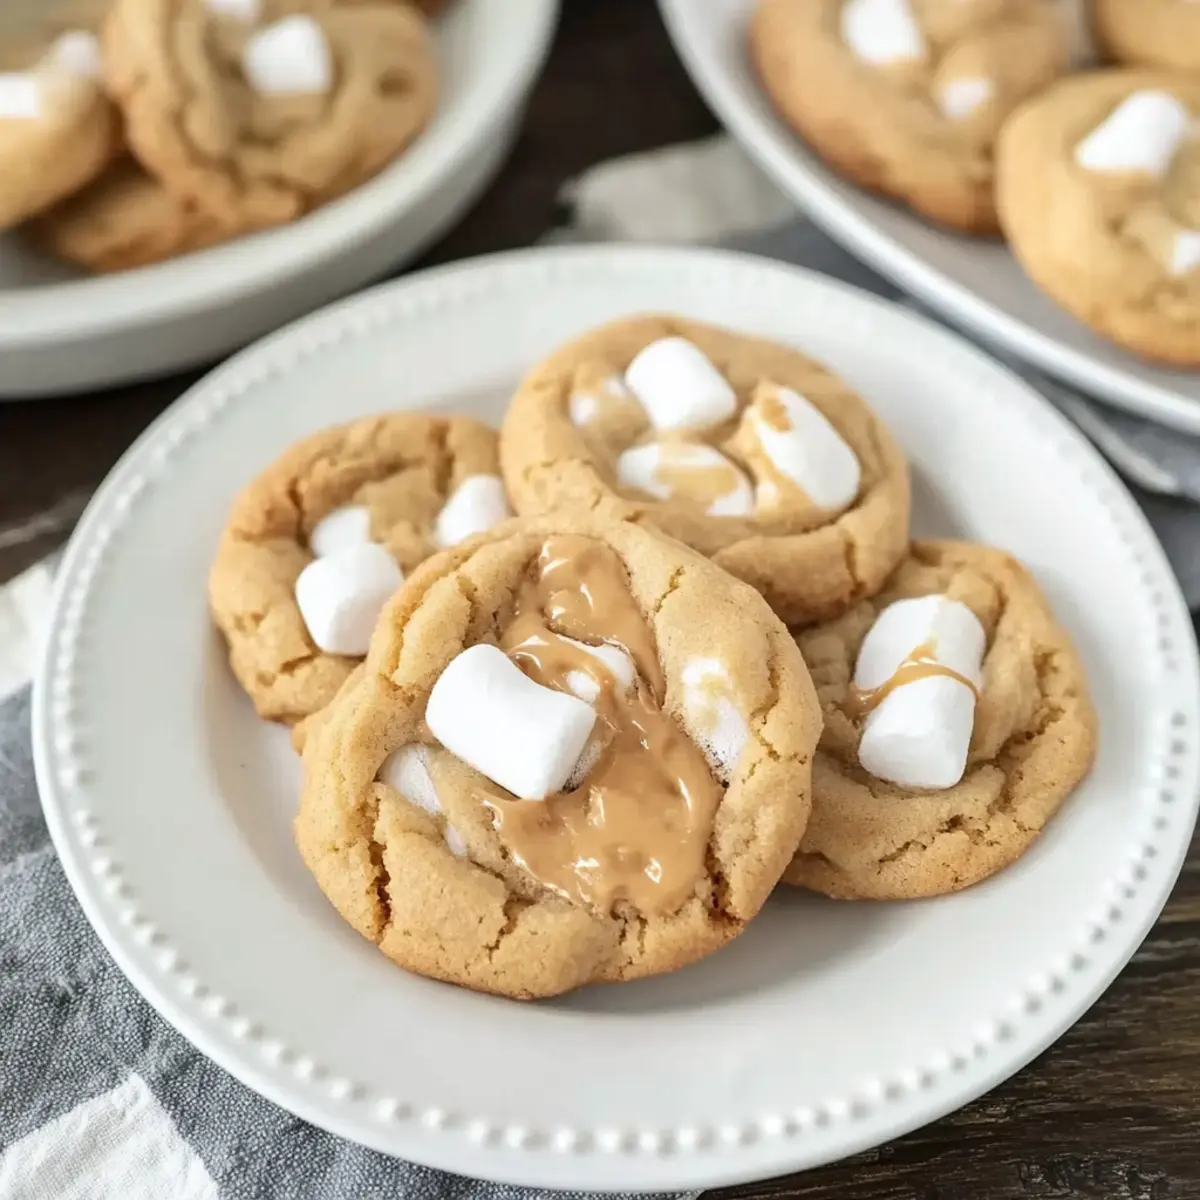
Stepping into my kitchen feels like wandering into a nostalgic candy store, where my favorite treats come to life. This Fluffernutter Cookies recipe is a treasure, seamlessly marrying creamy peanut butter with fluffy marshmallows to create the ultimate soft and chewy cookie. What I adore about these cookies is their instant gratification—no chilling required and minimal prep, making them the perfect antidote to those takeout nights. When friends pop over or cravings hit, these mouthwatering delights step up as a quick, satisfying homemade indulgence. Trust me, one bite will feel like a warm hug! Are you ready to discover your new favorite cookie?
Why Are Fluffernutter Cookies Amazing?
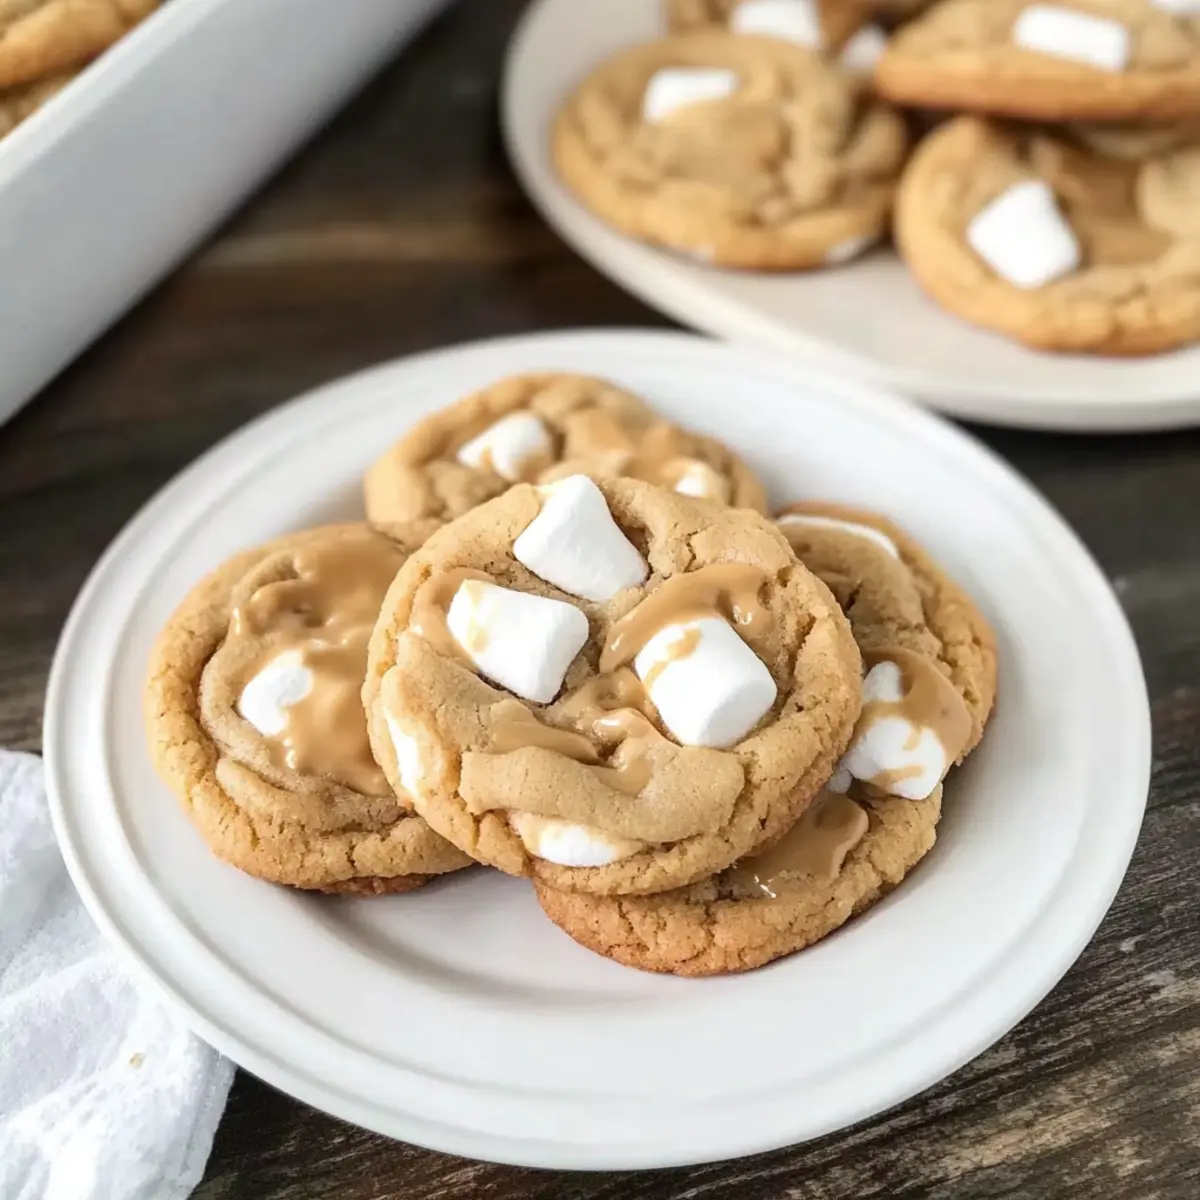
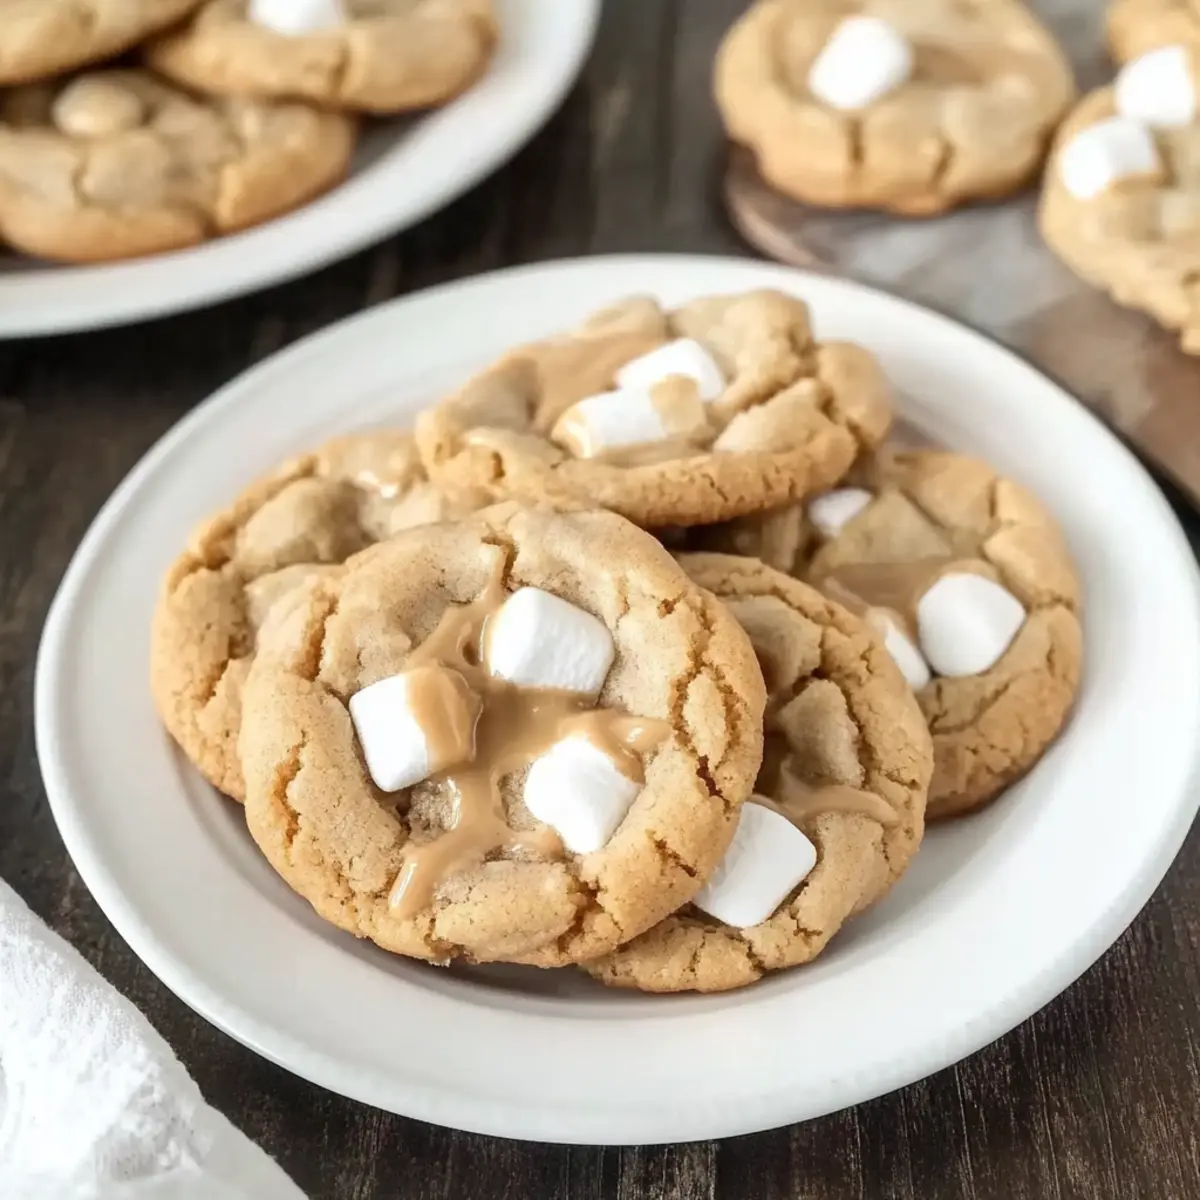
Irresistible Flavor: The luscious combination of creamy peanut butter and gooey marshmallows makes every bite a delightful experience.
Quick and Easy: With no chilling required and simple ingredients, you can whip up these cookies in no time, perfect for those spontaneous cravings!
Crowd-Pleasing Treat: Whether it’s a gathering or just a cozy night in, these cookies will impress friends and family alike, thanks to their nostalgic charm and delightful texture.
Versatile Options: Feeling adventurous? Customize them easily—try adding chocolate chips for a gooey twist or replace marshmallows with a dollop of marshmallow fluff!
Perfect for Pairing: Enjoy these cookies warm with a glass of milk or alongside your favorite dessert platter. They’re an excellent companion to an assortment of cookies like Soft Christmas Cookies or Raspberry Filled Cookies.
Fluffernutter Cookie Ingredients
• For the Cookie Dough
- All-Purpose Flour – Provides structure to the cookies; make sure to stir, spoon, and level for accurate measurement.
- Baking Soda – Acts as a leavening agent for a delightful rise in your Fluffernutter Cookies.
- Salt – Enhances flavors and balances the sweetness of sugars.
- Unsalted Butter – Adds richness and moisture; it’s best to use it at room temperature for a smoother mix.
- Granulated Sugar – Brings sweetness and contributes to that perfect cookie texture.
- Light Brown Sugar – Provides moisture along with a hint of caramel flavor; remember to pack it gently!
- Creamy Peanut Butter – The star of the show! Opt for a creamy texture for easy mixing and to achieve the perfect rich taste.
- Large Egg – Binds all the ingredients while adding moisture for a chewy finish.
- Vanilla Extract – Introduces a profound depth to the overall flavor, making every bite heavenly.
• For the Marshmallow Filling
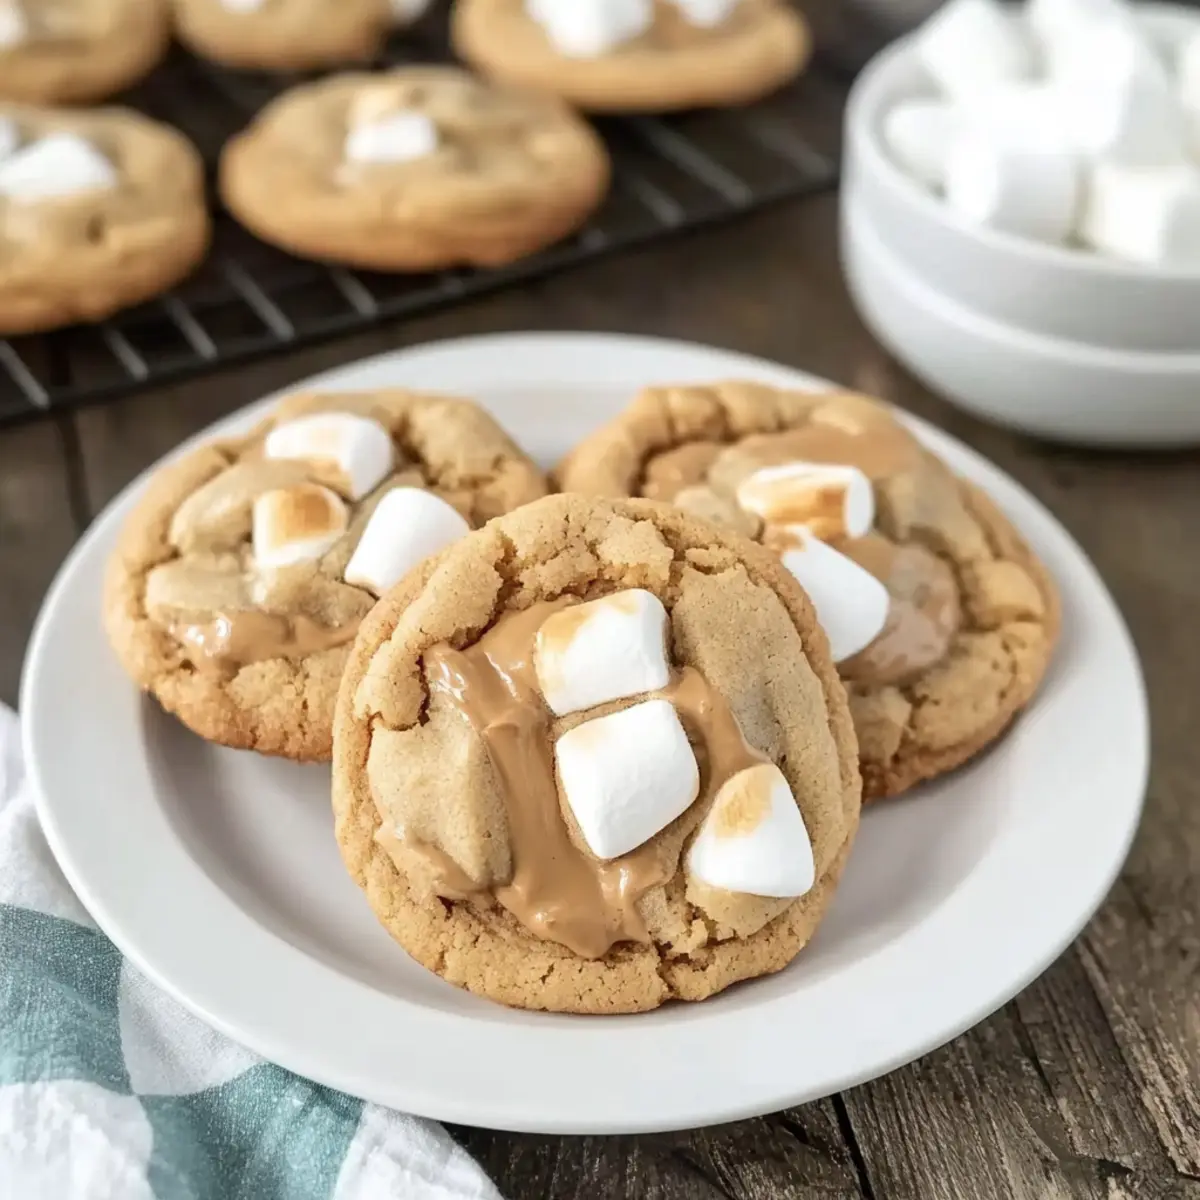
- Mini Marshmallows (frozen) – Introduces those gooey pockets of happiness; freezing them prevents melting too quickly during baking for the ideal fluffy surprise!
Step‑by‑Step Instructions for Fluffernutter Cookies
Step 1: Prepare the Marshmallows
Start by placing your mini marshmallows in the freezer for at least 1-2 hours before baking. This step is crucial as it prevents them from melting too quickly in the oven. While the marshmallows freeze, preheat your oven to 350°F (175°C) and line two baking sheets with silicone mats or parchment paper to ensure easy removal of the Fluffernutter Cookies later.
Step 2: Mix Dry Ingredients
In a medium bowl, whisk together 2 cups of all-purpose flour, 1 teaspoon of baking soda, and ½ teaspoon of salt. This dry mix will provide the structure and leavening for your Fluffernutter Cookies. Set this aside, letting the ingredients blend seamlessly til they’re ready to incorporate into the wet mixture, enhancing the cookie’s overall texture.
Step 3: Cream the Wet Ingredients
Using an electric mixer, combine ½ cup of room temperature unsalted butter with ½ cup of granulated sugar and ½ cup of light brown sugar in a large mixing bowl. Beat them together on medium speed until the mixture is light and fluffy, about 2-3 minutes. Then, add 1 cup of creamy peanut butter, 1 large egg, and 1 teaspoon of vanilla extract, mixing just until combined and smooth.
Step 4: Combine Wet and Dry Mixes
Gradually add the dry ingredients to the wet mixture, mixing on low speed just until everything is combined and no more flour streaks are visible. Be careful not to overmix, as this will lead to dense cookies. This step creates the perfect base for your Fluffernutter Cookies, combining the rich flavors of peanut butter and the sweetness of sugars.
Step 5: Fold in the Marshmallows
Gently fold in the frozen mini marshmallows using a spatula or wooden spoon, ensuring they are evenly distributed throughout the cookie dough. This step is vital for achieving those delightful pockets of gooeyness in your Fluffernutter Cookies, making every bite a little surprise of melty marshmallow goodness.
Step 6: Shape the Cookies
Use a #30 cookie scoop, which is about 2 tablespoons, to portion out your cookie dough onto the prepared baking sheets. Make sure to space the cookie dough balls a few inches apart, as they will spread during baking. The uniform size will help ensure even baking, resulting in perfectly soft and chewy Fluffernutter Cookies.
Step 7: Bake the Cookies
Place the baking sheets in your preheated oven and bake for 11-12 minutes. The cookies are done when they are just set with lightly browned edges. Keep an eye on them towards the end to avoid overbaking, as you want that delightful chewy texture that Fluffernutter Cookies are known for.
Step 8: Cool and Store
Once baked, remove the cookies from the oven and let them cool on the baking sheets for about 10 minutes. This allows them to firm up slightly before transferring them to a wire rack or an airtight container for storage. If you’re saving some for later, they can stay fresh for up to 5 days—though I doubt they’ll last that long!
What to Serve with Fluffernutter Cookies
Imagine cozying up with a plate of warm cookies and a lovely beverage; let’s create the perfect spread!
-
Creamy Milk: The classic choice that perfectly balances the sweetness of the cookies, enhancing the rich flavors of peanut butter and marshmallow.
-
Vanilla Ice Cream: A scoop of creamy vanilla ice cream adds a delightful chill, making those gooey marshmallow pockets even more enjoyable.
-
Fresh Fruit Salad: Bright, juicy fruits like strawberries and bananas provide a refreshing contrast to the richness of the cookies, adding a splash of color and nutrition to your treat time.
-
Coffee or Espresso: The deep flavors of a warm cup of coffee or espresso create a wonderful contrast with the sweetness of the cookies; this pairing makes for an invigorating afternoon treat.
-
Chocolate Dipped Pretzels: These bring together salty and sweet flavors, offering a crunchy texture that complements the soft, chewy cookies delightfully—perfect for those craving a little something extra.
-
Peanut Butter Milkshake: Blend your favorite milkshake with peanut butter for an indulgent drink that echoes the cookie’s flavor and creates an unforgettable pairing.
-
S’mores Dip: Layer this on a dessert platter; it’s a gooey, chocolatey companion that will have everyone reminiscing about campfire nights and adds a fun twist to your Fluffernutter experience.
-
Homemade Hot Chocolate: Rich, creamy hot chocolate with whipped cream elevates the cozy factor while harmonizing with the soft, chewy cookies for a real treat that warms the heart.
-
Coconut Macaroons: These chewy coconut cookies introduce a tropical vibe to your dessert lineup, mingling beautifully with the peanut butter flavors and sweetness from the marshmallows.
Make Ahead Options
Fluffernutter Cookies are ideal for busy home cooks looking to save time on hectic days! You can prepare the cookie dough up to 24 hours in advance and refrigerate it in an airtight container. Additionally, the dry ingredients can be pre-mixed and stored for up to 3 days. When you’re ready to bake, simply scoop the chilled dough onto your prepared baking sheets, fold in the frozen marshmallows, and bake as directed. To maintain the cookies’ soft and chewy texture, be sure to keep them stored in an airtight container once cooled, ensuring they stay just as delicious as when freshly baked. Enjoy these delightful treats without the stress of last-minute prep!
Fluffernutter Cookies Variations & Substitutions
Get creative and make these Fluffernutter Cookies your own, adding delightful twists to every bite!
-
Oatmeal Twist: Substitute half of the flour with oats for a heartier, chewy texture. These oatmeal peanut butter cookies bring a wholesome twist to the classic recipe.
-
Marshmallow Fluff Swap: Replace mini marshmallows with a spoonful of marshmallow fluff in the center of each cookie. This provides an extra layer of gooey sweetness.
-
Chocolate-Chip Boost: Add chocolate chips or a Hershey’s kiss on top of each cookie before baking. This will elevate your Fluffernutter experience with luscious chocolate!
-
Nut-Free Option: Swap peanut butter with sunflower seed butter for a nut-free version. The flavor differs, but the creamy, dense texture remains delightful.
-
Gluten-Free Delight: Use a gluten-free flour blend in place of all-purpose flour. This keeps the cookies soft and chewy while accommodating gluten sensitivities.
-
Spicy Kick: For an unexpected heat, add a pinch of cayenne pepper to the cookie dough. This spice balances the sweetness and intrigues your taste buds.
-
Coconut-Lover’s Dream: Mix in shredded coconut to your dough for a tropical twist. The coconut adds a chewy consistency that pairs beautifully with peanut butter.
-
Cinnamon Infusion: Sprinkle in a teaspoon of cinnamon to the dough for warm, spicy notes. Cinnamon and peanut butter create an enchanting flavor combination.
Elevate your cookie game by exploring these variations! Whether you’re feeling adventurous or keeping it classic, your homemade Fluffernutter Cookies will shine. And if you want to explore more delightful sweet treats, don’t miss out on these Raspberry Filled Cookies or Espresso Shortbread Cookies.
Storage Tips for Fluffernutter Cookies
Room Temperature: Store your Fluffernutter Cookies in an airtight container for up to 5 days. This keeps them soft and chewy, ready for a sweet snack anytime!
Fridge: If you need your cookies to last a bit longer, refrigerate them. They’ll stay fresh for up to a week; just be sure to keep them tightly wrapped to prevent drying out.
Freezer: For extended storage, freeze the baked cookies in an airtight container for up to 3 months. Place parchment paper between layers to prevent sticking.
Reheating: To enjoy your cookies warm again, pop them in the microwave for about 10-15 seconds. This will revive their chewy texture and melty marshmallows!
Expert Tips for Fluffernutter Cookies
-
Marshmallow Freezing: Always freeze mini marshmallows for 1-2 hours before use. This prevents them from melting too fast and ensures those delightful gooey pockets in your Fluffernutter Cookies.
-
Accurate Measurement: When measuring flour, stir, spoon, and level it off in your measuring cup. This simple tip will help avoid overly dense cookies, keeping them soft and chewy.
-
Room Temperature Butter: Use unsalted butter at room temperature for the creaming process. This will incorporate air better, yielding a fluffier cookie texture that melts in your mouth.
-
Proper Mixing: Be careful not to overmix after adding the dry ingredients. Mix just until combined to maintain that soft, chewy consistency that Fluffernutter Cookies are famous for.
-
Spacing Cookies: Ensure proper spacing on the baking sheet. Leaving a few inches between dough balls allows for spreading during baking, resulting in perfectly shaped cookies.
Fluffernutter Cookies Recipe FAQs
What type of peanut butter is best for Fluffernutter Cookies?
Absolutely! I recommend using creamy peanut butter for a smooth texture that seamlessly blends into the dough. Look for brands without added sugar or hydrogenated oils for the best flavor.
How should I store my baked Fluffernutter Cookies?
To keep your cookies fresh, store them in an airtight container at room temperature for up to 5 days. If they start to lose their softness, you can pop them in the microwave for 10-15 seconds to revive that gooeyness!
Can I freeze Fluffernutter Cookies?
Yes, you can definitely freeze your cookies! Arrange them in a single layer in an airtight container, placing parchment paper between layers to prevent sticking. They can be frozen for up to 3 months. When you’re ready to enjoy, let them thaw at room temperature, or reheat them in the microwave for a few seconds for that fresh-baked feel.
What should I do if my cookies spread too much during baking?
If you encounter excessive spreading, don’t worry—simply adjust your method for next time! Consider chilling the cookie dough for 30 minutes before baking, or increase the flour by 1-2 tablespoons. This should help achieve that perfect chewy texture without excessive spreading.
Are there any allergy considerations for Fluffernutter Cookies?
Definitely! Since this recipe contains peanuts, those with nut allergies should avoid it. For alternative sweet treats, consider substituting peanut butter with sunbutter (sunflower seed butter) for similar taste and texture while being nut-free. Always check labels for cross-contamination!
What can I do if I don’t have frozen mini marshmallows?
If you can’t find frozen mini marshmallows, you can use regular mini marshmallows; just keep an eye on baking time to ensure they don’t melt too much. Alternatively, you could substitute with marshmallow fluff placed in the center of each cookie dough ball before baking for a delightful gooey surprise!
Fluffernutter Cookies: Soft, Chewy Bliss in Every Bite
Ingredients
Equipment
Method
- Prepare the marshmallows by placing them in the freezer for at least 1-2 hours before baking.
- Preheat your oven to 350°F (175°C) and line two baking sheets with silicone mats or parchment paper.
- In a medium bowl, whisk together 2 cups of all-purpose flour, 1 teaspoon of baking soda, and ½ teaspoon of salt.
- In a large mixing bowl, cream together ½ cup of room temperature unsalted butter, ½ cup of granulated sugar, and ½ cup of light brown sugar until light and fluffy.
- Add 1 cup of creamy peanut butter, 1 large egg, and 1 teaspoon of vanilla extract. Mix until combined.
- Gradually add the dry ingredients and mix on low speed until combined.
- Fold in the frozen mini marshmallows until evenly distributed.
- Use a #30 cookie scoop to portion the dough onto the prepared baking sheets, spacing them a few inches apart.
- Bake for 11-12 minutes or until just set with lightly browned edges.
- Cool on baking sheets for about 10 minutes before transferring to a wire rack.
Leave a Reply