
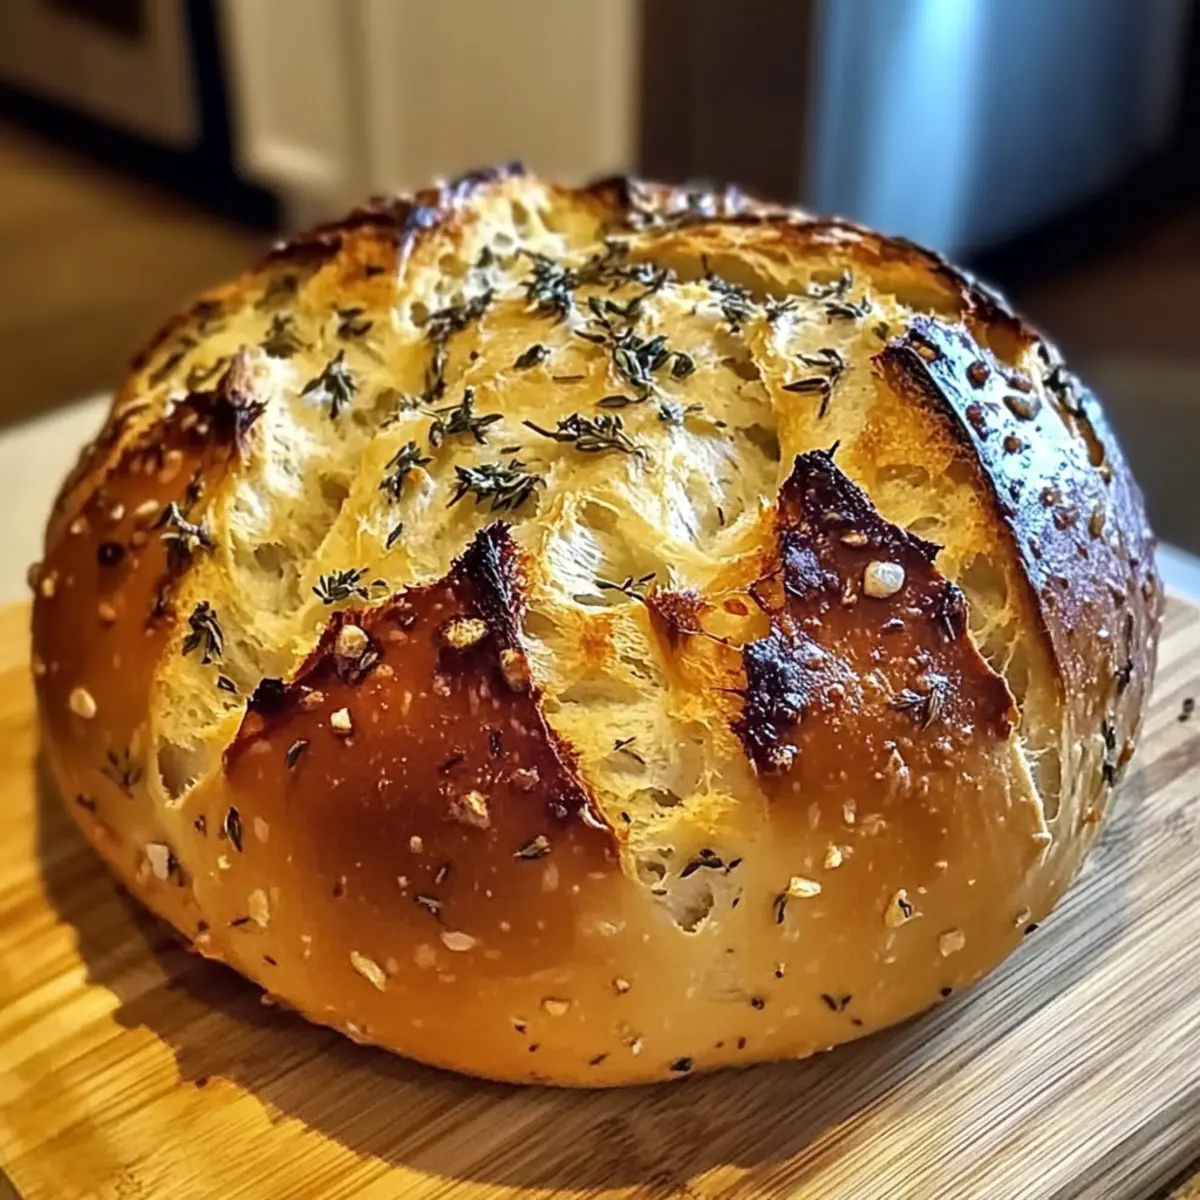
The moment the oven door swings open, a warm, savory breeze fills the kitchen, and I can almost hear my family’s delighted gasps. This Garlic Herb Dutch Oven Bread is a game changer, bringing the magic of artisanal loaves into your home with minimal effort. This recipe is not just a delightful bake; it’s a comforting solution for busy evenings and perfect for those just starting their baking journey. The no-knead technique means you can let time work its wonders while you go about your day, resulting in a rustic loaf with a shatteringly crispy crust and a soft, pillowy inside. Whether you’re planning a cozy dinner with loved ones or craving a slice slathered in butter, this homemade bread is sure to impress. Curious about how simple pantry staples can create such a masterpiece? Let’s dive into the details!
Why Is This Bread So Irresistible?
Effortless preparation makes this Garlic Herb Dutch Oven Bread a dream for all home cooks. With a no-knead method, it’s perfect for busy individuals or beginner bakers. Flavor-packed with roasted garlic and fresh herbs, each bite is incredibly satisfying. Versatile enough for sandwiches or as a side for your favorite pasta dishes, this bread brings a rustic charm to any meal. Want something extra special? Try adding cheese for a delightful twist! Whether you’re enjoying it straight from the oven or toasted, your family will rave about this comforting homemade loaf.
Garlic Herb Dutch Oven Bread Ingredients
Get ready to bake a delicious loaf!
For the Dough
- All-Purpose Flour – This staple provides structure and a chewy texture for your bread; substitute with whole wheat flour for added nutrition.
- Salt – An essential ingredient that enhances flavor and strengthens the dough’s gluten structure.
- Instant Yeast – This active leavening agent helps create a light and airy crumb; feel free to use active dry yeast if that’s what you have on hand.
- Minced Garlic – Adds savory flavor throughout the loaf; for a sweeter profile, try using roasted garlic.
- Fresh Herbs – Imparts a vibrant taste; if fresh isn’t available, 2 teaspoons of dried herbs will work nicely.
- Olive Oil – Adds moisture and richness to the dough, ensuring a delightful texture in every bite.
- Lukewarm Water – Activates the yeast and hydrates the flour for the perfect dough consistency; warm water is key for the baking process.
This Garlic Herb Dutch Oven Bread is the comforting solution you’ve been searching for!
Step‑by‑Step Instructions for Garlic Herb Dutch Oven Bread
Step 1: Prepare Dough
In a large mixing bowl, whisk together the all-purpose flour, salt, and instant yeast until well combined. Stir in the minced garlic and fresh herbs, followed by the lukewarm water, mixing until no dry flour remains. Expect a sticky dough that will form, as this consistency helps create the characteristic airy crumb of the Garlic Herb Dutch Oven Bread.
Step 2: First Rise
Cover the bowl with plastic wrap or a damp kitchen towel and let the dough rise at room temperature for 12-18 hours. You’ll know it’s ready when it has doubled in size and is dotted with bubbles. The long rise provides depth of flavor, making your bread irresistible when it bakes.
Step 3: Shape Dough
Lightly flour a clean surface and gently scrape the dough out of the bowl using a spatula. Avoid deflating it too much as you fold the edges towards the center to form a round ball. Place the shaped dough on a piece of parchment paper and allow it to rest for 45-60 minutes, covered with a towel, while you prepare for baking.
Step 4: Preheat Oven
About 30 minutes before baking, place your Dutch oven (with the lid) into the oven and preheat to 450°F. This step is crucial to ensure the Dutch oven is hot enough, which will help you achieve that coveted crispy crust on your Garlic Herb Dutch Oven Bread.
Step 5: Bake Bread
Once the oven is preheated, carefully remove the Dutch oven from the oven—remember it’s extremely hot! Using the parchment paper, transfer the rested dough into the Dutch oven and score the top with a sharp knife. Cover with the lid and bake for 30 minutes, then uncover and bake for an additional 15-20 minutes, until golden brown and the internal temperature reaches 205-210°F.
Step 6: Cool
After baking, carefully transfer the bread to a cooling rack. Allow the Garlic Herb Dutch Oven Bread to cool for at least 30 minutes before slicing. This resting period is vital to let the steam escape, ensuring that each slice has the perfect texture without being gummy. Enjoy the aromas filling your kitchen!
Make Ahead Options
These Garlic Herb Dutch Oven Bread loaves are perfect for meal prep enthusiasts looking to save time on busy weeknights! You can prepare the dough up to 24 hours in advance, allowing it to rise beautifully at room temperature; just cover it tightly to prevent drying out. Alternatively, you can shape the dough and refrigerate it for up to 3 days—just remember to let it rest for about an hour after taking it out before proceeding to bake. This way, you’ll achieve that amazing crust and soft interior just as if you baked it fresh that day. When you’re ready to indulge, simply proceed with preheating your Dutch oven and bake as per the recipe, resulting in a delightful artisan-quality loaf with minimal effort!
How to Store and Freeze Garlic Herb Dutch Oven Bread
-
Room Temperature: Keep your Garlic Herb Dutch Oven Bread wrapped in a kitchen towel or paper bag for up to 2-3 days. This helps maintain its crusty exterior while keeping the interior tender.
-
Fridge: If storing for more than three days, consider placing the bread in an airtight container in the fridge. It will remain fresh for up to a week, but the crust may soften slightly.
-
Freezer: For longer storage, slice the bread and freeze it in a zip-top bag for up to 3 months. This way, you can enjoy a slice anytime your cravings hit!
-
Reheating: To revive the crust, reheat slices in a toaster oven or regular oven at 350°F for about 5-10 minutes. Enjoy the fresh-baked flavor again!
Garlic Herb Dutch Oven Bread Variations
Feel free to let your creativity shine as you customize this delightful bread recipe to suit your taste!
-
Cheese Garlic Herb Bread: Add 1 cup of shredded cheese to the dough for rich, savory pockets that melt in your mouth. Garlic and cheese are a classic match, and they create a wonderful comfort food vibe that everyone will love.
-
Whole Wheat Garlic Herb Bread: Substitute half of the all-purpose flour with whole wheat flour for added nutrition. Just be prepared to adjust the water slightly to maintain the right dough consistency as you indulge in a healthier twist.
-
Roasted Garlic Version: Use 1/2 cup of mashed roasted garlic for a sweeter, mellow flavor that’s incredible. It creates a creamy texture that pairs beautifully with the crispy crust—perfect for garlic lovers!
-
Herb Variations: Experiment with different herbs! Try basil or rosemary for a fresh twist or even some crushed red pepper for a spicy kick. Each herb will change the flavor profile, making every loaf uniquely yours.
-
Olive Oil Infusion: Infuse the olive oil with garlic or herbs before adding for an extra layer of flavor. Warm the oil slightly with crushed garlic for about 10 minutes, then cool before mixing it into the dough. This boost will make your bread even more aromatic.
-
Add Seeds: Sprinkle sesame or poppy seeds on top just before baking to add a delightful crunch. It’s a lovely visual accent as well as a way to enhance nutrition and texture!
-
Olive Tapenade Variation: Swirl in some olive tapenade for a Mediterranean flair, enriching your bread with briny flavors that marry beautifully with the garlic and herbs. This twist makes the bread ideal for casual gatherings with wine.
-
Spicy Garlic Version: Add diced jalapeños or crushed red pepper flakes to amp up the heat. Each bite will surprise you with a satisfying kick—perfect for those seeking adventure in their homemade bread journey!
Whether you’re enjoying it with a hearty soup like Garlic Butter Beef or pairing it alongside a pasta dish like Creamy Garlic Sauce Potatoes, these variations will elevate your garlic herb bread experience to new heights!
What to Serve with Garlic Herb Dutch Oven Bread?
This warm, aromatic masterpiece invites a world of delicious pairings that will elevate your meal to new heights.
-
Creamy Pasta Dishes: The rich textures of creamy fettuccine or Alfredo sauce create a delightful contrast to the crispy crust, making each bite memorable.
-
Savory Soups: Pair with a steaming bowl of minestrone or tomato basil soup. The bread’s crispy crust is perfect for dipping into rich broth.
-
Fresh Salads: A bright, zesty salad with lemon vinaigrette adds a refreshing contrast to the hearty bread, balancing flavors beautifully.
-
Garlic Butter Shrimp: Serve alongside garlicky, buttery shrimp for a harmonious garlic explosion that will tantalize your taste buds.
-
Cheese Platter: Create a cheese board featuring sharp cheddar and creamy brie. This combo complements the herby notes of the bread for an indulgent snack.
-
Roasted Veggies: Enjoy the bread with a side of caramelized roasted vegetables. Their sweetness enhances the savory garlic flavors in each bite.
-
Homemade Bruschetta: Use slices of the bread as a base for fresh tomato and basil bruschetta, adding a vibrant and colorful twist to your meal.
-
Red Wine: Enjoy with a glass of bold red wine, which beautifully complements the bread’s richness and elevates your dining experience.
Expert Tips for Garlic Herb Dutch Oven Bread
-
Preheat Is Key: Ensure your Dutch oven is thoroughly preheated to achieve that perfect, crispy crust. Skipping this step can result in a softer outer layer.
-
Rise Time Matters: Allow the dough to rise for the full 12-18 hours. This enhances flavor and texture; don’t rush it!
-
Sticky Dough: Embrace the stickiness! Avoid adding too much flour while mixing; a moist dough guarantees a light and airy crumb in your Garlic Herb Dutch Oven Bread.
-
Cool Before Slicing: Patience is a virtue! Let your bread cool for at least 30 minutes to prevent a gummy texture—then enjoy perfectly sliced pieces.
-
Customize Flavor: Feel free to adjust the amount of garlic and herbs according to your taste preferences. Don’t hesitate to experiment for a unique twist!
Garlic Herb Dutch Oven Bread Recipe FAQs
How do I choose the best garlic and herbs for this recipe?
Absolutely! For the garlic, fresh cloves offer a robust flavor, while roasted garlic provides sweetness and a milder taste. Choose fresh, firm bulbs without any dark spots for the best results. When it comes to herbs, use a mix of your favorites like rosemary, thyme, or parsley. If using dried herbs, opt for high-quality brands, as their flavor can intensify the bread without being overpowering.
What is the best way to store Garlic Herb Dutch Oven Bread?
To keep your bread fresh, wrap it in a clean kitchen towel or place it in a paper bag at room temperature for up to 2-3 days. The towel allows the bread to breathe while maintaining its crust. If you’re looking to store it longer, put it in an airtight container in the fridge for up to a week, but be mindful that the crust may soften slightly.
Can I freeze Garlic Herb Dutch Oven Bread?
Yes! To freeze, let the loaf cool completely after baking. Slice it into desired portions, and then wrap each slice in plastic wrap or place them in a zip-top bag. This way, you can easily take out a slice whenever you please. It can be frozen for up to 3 months! When you’re ready to enjoy it, reheat the slices in a toaster oven or at 350°F for about 5-10 minutes to restore that fresh-baked taste.
What should I do if my bread doesn’t rise properly?
Very! If your dough doesn’t rise as expected, a common culprit could be your yeast. Ensure that your yeast is fresh and active. If using instant yeast, it should be mixed with dry ingredients without needing to dissolve first. In addition, if your kitchen is too cold, the dough may require more time to rise. Try placing it in a warmer spot or lightly covering it with a towel to retain warmth. If your bread is still dense, you may have added too much flour; remember, a sticky dough is key for light, airy bread!
Is this recipe suitable for those with dietary restrictions?
This Garlic Herb Dutch Oven Bread is suitable for many diets, but it does contain gluten. For a gluten-free version, you can experiment with gluten-free all-purpose flour blends, adjusting water as needed. If you’re concerned about allergies to garlic or specific herbs, you can omit them entirely or substitute with alternatives like onion powder or different spices. Always ensure to check label ingredients if allergies are a concern.
How long can I store the baked bread before it goes stale?
Generally, wrapped properly, the Garlic Herb Dutch Oven Bread will remain fresh for up to 2-3 days at room temperature without losing its delightful texture. After this period, it may start to stale. Storing it in the fridge extends its life to around a week, but for optimal flavor and texture, freezing is the best option if you wish to keep it for longer.
Savor Homemade Garlic Herb Dutch Oven Bread Effortlessly
Ingredients
Equipment
Method
- In a large mixing bowl, whisk together the all-purpose flour, salt, and instant yeast until well combined.
- Stir in the minced garlic and fresh herbs, followed by the lukewarm water, mixing until no dry flour remains.
- Cover the bowl with plastic wrap or a damp kitchen towel and let the dough rise at room temperature for 12-18 hours.
- Lightly flour a clean surface and gently scrape the dough out of the bowl using a spatula.
- Form a round ball by folding the edges towards the center and place on parchment paper.
- About 30 minutes prior to baking, preheat your Dutch oven to 450°F.
- Transfer the rested dough into the Dutch oven, score the top with a knife, cover with the lid, and bake for 30 minutes.
- Uncover and bake for an additional 15-20 minutes until golden brown, internal temp reaches 205-210°F.
- After baking, transfer the bread to a cooling rack and allow it to cool for at least 30 minutes before slicing.
Leave a Reply