
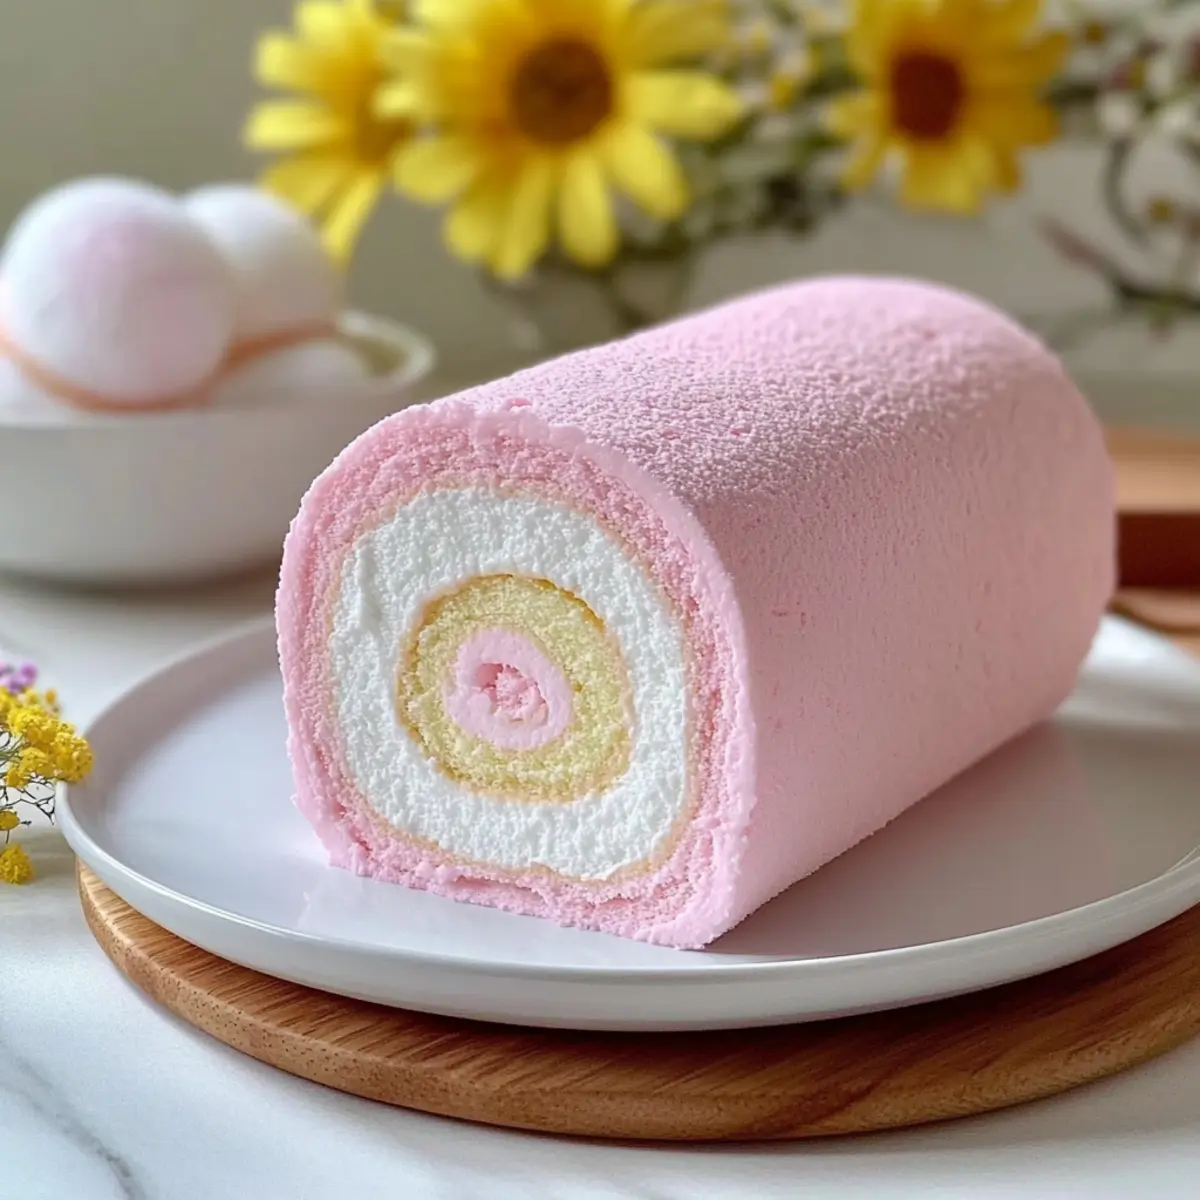
The aroma of a summer fair wafts through my memories as I recall the vibrant colors and sweet scents swirling around joyous laughter. That’s the magic I aimed to capture in this Japanese Cotton Candy Cake Roll—a whimsical, pastel dessert that brings a touch of carnival delight to any celebration. With a light and airy chiffon base nestled around a fluffy whipped cream filling infused with nostalgic cotton candy flavor, it’s the perfect indulgence for birthdays, baby showers, or just to brighten a regular day. What’s even better? This enchanting treat is surprisingly easy to whip up, making it a favorite for both seasoned bakers and novices alike. Curious to see how you can turn your kitchen into a magical dessert realm? Let’s dive into this delightful recipe!
What makes this cake roll special?
Whimsical Delight: The Japanese Cotton Candy Cake Roll evokes childhood memories of carnivals and fun, making every bite a trip down memory lane.
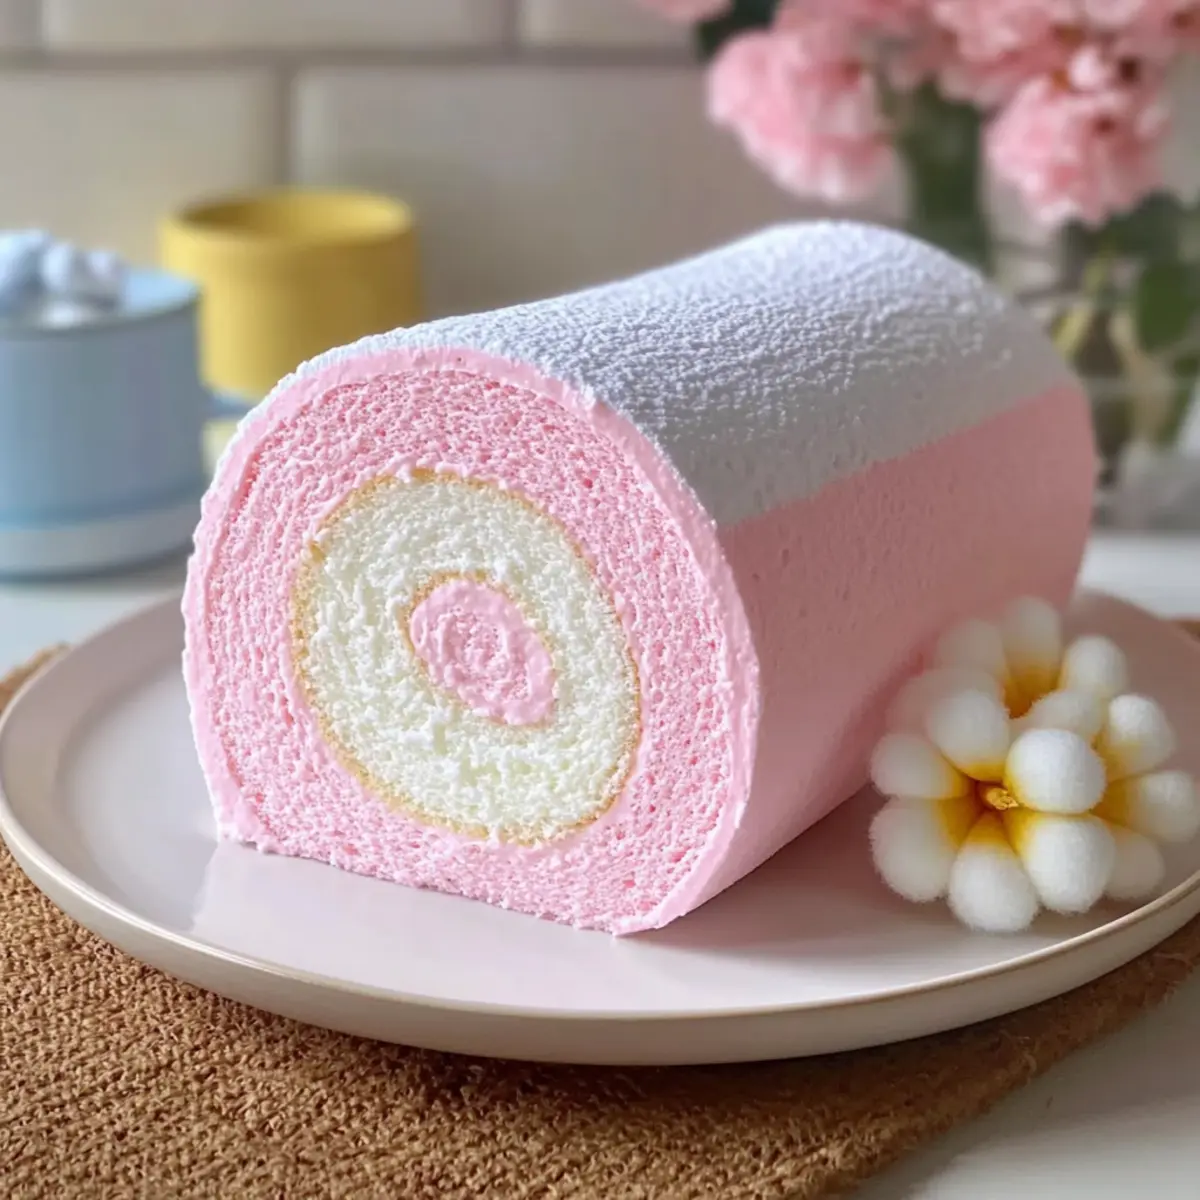
Visual Appeal: Its stunning pastel colors create a feast for the eyes, perfect for enchanting any party atmosphere.
Easy to Make: Surprisingly simple, this dessert requires minimal baking skills, making it an excellent choice for beginners.
Flavorful Whimsy: With a light chiffon cake and cotton candy cream, it strikes a balance between nostalgia and taste.
Versatile Option: Customize with different colors or flavors—think strawberry or vanilla—to suit your next celebration!
Perfect Pairing: Serve alongside refreshing beverages like sparkling lemonade or jasmine tea to elevate the experience.
Japanese Cotton Candy Cake Roll Ingredients
For the Cake
• Cake Flour – Provides structure for the cake; if you don’t have it, all-purpose flour can be used for a denser texture.
• Sea Salt – Enhances flavor and balances the sweetness; no substitutions needed.
• Whole Milk – Adds moisture to the cake; you can use almond milk for a dairy-free option.
• Vegetable Oil – Keeps the cake moist; can be substituted with canola oil.
• Granulated Sugar – Sweetens both the cake and filling; no substitutes recommended.
• Cotton Candy Extract – Infuses the cake with that nostalgic flavor; you can use vanilla or almond extract for a different twist.
• Egg Whites – Create a light meringue for the cake’s airy texture; essential for structure and not replaceable.
• Cream of Tartar – Stabilizes the egg whites; can be replaced with lemon juice (1/2 tsp for every 1/4 tsp of cream of tartar).
• Gel Food Coloring – Provides vibrant pastels for the cake aesthetics; stick to gel for best results.
For the Whipped Filling
• Heavy Cream – Forms the base of the whipped filling; coconut cream works great as a dairy-free substitute.
• Unflavored Gelatin – Stabilizes the whipped cream for structure; agar-agar can be used as a vegetarian substitute.
Feel free to explore this Japanese Cotton Candy Cake Roll and bring a touch of whimsical magic to your kitchen!
Step‑by‑Step Instructions for Japanese Cotton Candy Cake Roll
Step 1: Preheat the Oven
Begin by preheating your oven to 325°F (165°C). While the oven is heating, line an 8×12” baking pan with parchment paper, ensuring it hangs over the edges for easy removal later. This preparation will ensure your Japanese Cotton Candy Cake Roll has the right environment to bake evenly and come out easily once done.
Step 2: Mix Wet Ingredients
In a small bowl, combine the wet ingredients: whisk together the whole milk, vegetable oil, and granulated sugar until fully blended. This mixture will be the foundation of your cake’s moistness and sweetness. Take a moment to ensure the sugar dissolves, making a smooth, pale mixture that conveys the joy of the cotton candy flavor to come.
Step 3: Combine Dry Ingredients
In another bowl, sift together the cake flour and sea salt. Create a well in the center of this dry mixture, and gently pour in the wet ingredients. Carefully stir until just combined, being cautious not to overmix. The batter should remain light and airy, setting the stage for your whimsical Japanese Cotton Candy Cake Roll.
Step 4: Prepare the Meringue
In a clean mixing bowl, beat the egg whites along with cream of tartar until frothy. Gradually sprinkle in the remaining sugar while whipping, continuing until you achieve glossy, stiff peaks. This is a crucial step; the meringue’s airy texture is what will give your cake its light, fluffy body.
Step 5: Fold Meringue into Batter
Gently fold the prepared meringue into the cake batter in three additions. Use a spatula to carefully lift and turn the batter, ensuring you maintain the volume of the meringue. Once fully incorporated, the batter should look light and fluffy, ready to be spread into the prepared baking pan.
Step 6: Bake the Cake
Spread the batter evenly in the lined baking pan and place it in the preheated oven. Bake for 10–12 minutes, or until the cake is set and springs back lightly when touched. Keep an eye on it, as overbaking can lead to a dry cake, which may affect the fluffiness of your Japanese Cotton Candy Cake Roll.
Step 7: Cool the Cake
Once baked, remove the cake from the oven and allow it to cool in the pan for a few minutes. Gently flip it onto a wire rack, peeling away the parchment paper. It’s important to let it cool completely before moving on to the filling, ensuring the texture stays moist and prevents sogginess.
Step 8: Prepare the Whipped Filling
While the cake is cooling, bloom the unflavored gelatin in cold water according to package instructions. In a mixing bowl, whip the chilled heavy cream and sugar until soft peaks form. Add the bloomed gelatin and cotton candy extract, continuing to whip until you reach stiff peaks. The result should be a stable, fluffy filling perfect for your cake.
Step 9: Assemble the Cake Roll
Spread a generous layer of the whipped cream filling over the cooled cake. Using the parchment paper for support, carefully roll the cake from one short end to the other, creating a tight spiral. Wrap the rolled cake in plastic wrap and chill in the refrigerator for at least 1 hour to help it set properly.
Step 10: Finish and Serve
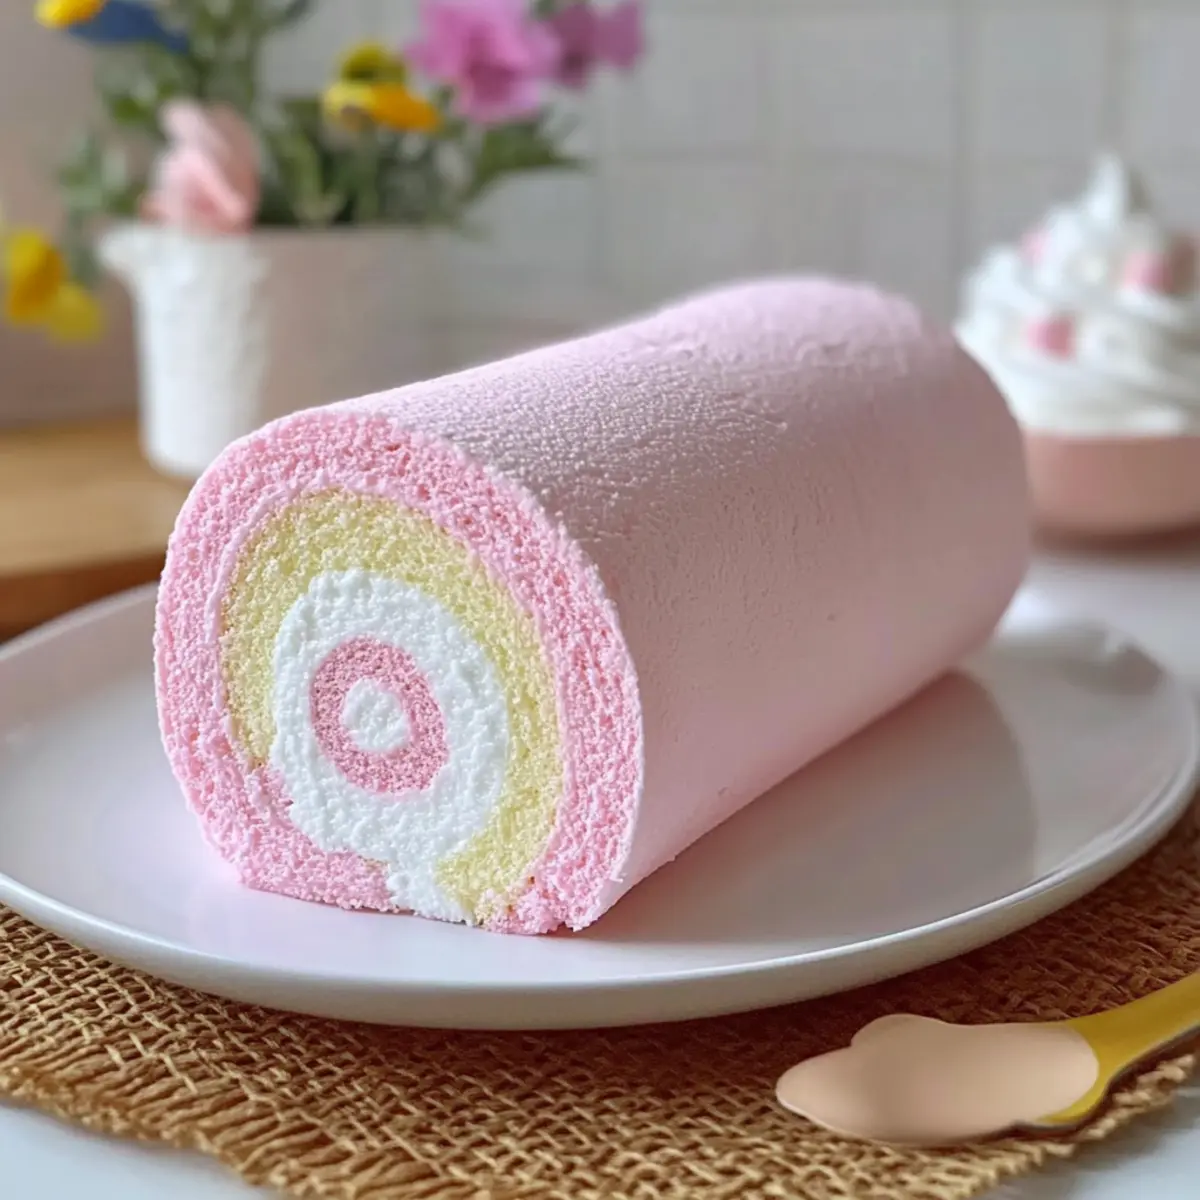
After chilling, unwrap your Japanese Cotton Candy Cake Roll and trim the edges for a clean presentation. Slice into beautiful rounds and serve, dusting with powdered sugar or drizzling with white chocolate for an added touch of whimsy. This delightful cake roll is now ready to be enjoyed at your next celebration!
Make Ahead Options
These Japanese Cotton Candy Cake Rolls are a delightful solution for busy home cooks looking to simplify their meal planning! You can prepare the chiffon cake up to 24 hours in advance; simply bake, cool, and then tightly wrap it in plastic wrap to keep it moist. The whipped cream filling can also be made ahead—just whip it up and store it in the refrigerator for up to 3 days. When ready to serve, spread the whipped cream over the cake, roll it up, and chill for at least 1 hour before slicing. This meal prep approach means you can enjoy this whimsical dessert without the last-minute rush, ensuring it’s just as delicious and ready to charm your guests!
Japanese Cotton Candy Cake Roll Variations
Feel free to get creative and personalize this charming dessert with these fun twists that will tantalize your taste buds!
- Dairy-Free: Substitute whole milk with almond milk and use coconut cream in the filling for a dairy-free delight.
- Flavored Filling: Swap cotton candy extract with strawberry or vanilla extract for a refreshing new flavor profile.
- Rainbow Swirl: Use different gel food coloring to create beautiful pastel swirls, adding a whimsical touch.
Add a delightful twist with fun flavors! Try mixing in mini marshmallows or bits of your favorite candy for an extra layer of sweetness and texture.
- Festive Colors: Celebrate holidays by changing the colors; for Christmas, opt for red and green pastels for a festive presentation.
Enhance the experience with some seasonal flair. A sprinkle of crushed peppermint can turn your cake roll into a delightful holiday treat!
- Decadent Drizzle: Drizzle with melted white chocolate or sprinkle with edible glitter for that extra special touch at a party.
- Extra Crunch: Incorporate crushed cookies or candy bits into the whipped filling for a delightful crunch.
Pair this whimsical dessert with a cup of jasmine tea or sparkling lemonade for a bright and refreshing contrast. Don’t forget, if you’re in the mood for other tempting desserts, you might enjoy making something like Pumpkin Cinnamon Roll or Heaven Earth Cake. Let your creativity flow and make this dessert uniquely yours!
Tips for the Best Japanese Cotton Candy Cake Roll
Whip Wisely: Ensure your meringue reaches glossy, stiff peaks. Overwhipping can lead to dryness, compromising the airy texture of the cake roll.
Color Correctly: Use gel food coloring only for vibrant pastels. Liquid colors may thin the batter, affecting the finished roll’s structure.
Chill Time: Don’t skip the chilling step! It lets the whipped cream stabilize, ensuring a perfect slice and keeping the flavors intact in your Japanese Cotton Candy Cake Roll.
Gentle Folding: When incorporating the meringue, fold gently. Excessive mixing can deflate the airy meringue, making the cake denser than intended.
Presentation Perks: For an eye-catching finish, dust with powdered sugar or drizzle white chocolate over your cake roll to hide any small cracks and elevate its whimsical appeal.
How to Store and Freeze Japanese Cotton Candy Cake Roll
Fridge: Store the cake roll tightly wrapped in plastic wrap in an airtight container for up to 2-3 days. This helps preserve the delightful texture and flavor of the cotton candy filling.
Freezer: For longer storage, freeze the cake roll wrapped tightly in plastic and then in aluminum foil for up to 1 month. Thaw in the fridge overnight before serving for best texture.
Reheating: If you prefer a slightly warm dessert, slice the roll and place it in the microwave for 10-15 seconds on low power. Do not overheat to avoid melting the filling.
Make-Ahead: You can prepare the Japanese Cotton Candy Cake Roll a day in advance. Just assemble it and refrigerate after rolling to allow the flavors to meld beautifully.
What to Serve with Japanese Cotton Candy Cake Roll
Create an enchanting dessert spread that complements your delightful creation and delights the senses!
- Jasmine Tea: The floral notes of jasmine tea beautifully balance the sweetness of the cake roll, enhancing its whimsical charm.
- Sparkling Lemonade: This refreshing beverage adds a zesty contrast, invigorating your palate between bites of the airy cake.
- Fresh Fruit Platter: A vibrant mix of berries and sliced citrus brings a refreshing tartness, refreshing the taste buds and adding color to your spread.
- Vanilla Ice Cream: A scoop of creamy vanilla provides a luscious contrast to the fluffy cake roll, making for a delightful combination of textures.
- Cotton Candy Fluff: Serve a bit of actual cotton candy on the side for a playful touch that mirrors the cake’s flavor, igniting delightful nostalgia.
- Chocolate Dip: A drizzle of melted white chocolate offers a touch of decadence, enhancing visual appeal while enriching the delightful cotton candy taste.
- Macarons: These light and airy treats can complement the cake roll’s texture while offering different flavors, creating variety and excitement on your dessert table.

Japanese Cotton Candy Cake Roll Recipe FAQs
How do I select the best ingredients for my cake roll?
When choosing ingredients, look for cake flour that is fine and light, which will yield that desired airy texture. For eggs, ensure they are fresh; a simple freshness test is to place them in water—fresh eggs will sink. Cotton candy extract is key for flavor, so if you can find the pure variety, it’ll enhance the nostalgic taste!
What is the best way to store the Japanese Cotton Candy Cake Roll?
Store the cake roll tightly wrapped in plastic wrap in an airtight container in the refrigerator for up to 2-3 days. This will keep the whipped filling fresh and the cake moist. If you want to save it for longer, wrap it securely in plastic and aluminum foil to freeze for up to 1 month. Remember to thaw it overnight in the fridge before serving for the best texture!
Can I freeze the Japanese Cotton Candy Cake Roll?
Absolutely! To freeze, wrap the cake roll tightly in plastic wrap and then in aluminum foil. This double-layer wrapping helps prevent freezer burn. When you’re ready to enjoy it, simply move it to the fridge for a slow thaw overnight. It’s a great way to prep in advance for celebrations.
What should I do if my meringue doesn’t form stiff peaks?
If your meringue isn’t reaching stiff peaks, first, ensure your bowl and beaters are completely clean and free of any fat, as even a small amount can prevent proper whipping. If the peaks are soft, continue whipping; it may just need more time. If it’s still not thickening, try adding a pinch more cream of tartar or continue to whip until glossy. The right texture should hold peaks that stand up without drooping.
Can I customize the flavors in my cake roll?
Very! While the traditional cotton candy flavor is delightful, you can absolutely swap out the extract for different flavors like vanilla, strawberry, or even a blend of citrus for something bright and fresh. Just remember to maintain the same quantity to keep the balance of wet ingredients when adjusting flavors.
Is this cake roll safe for people with allergies?
This cake roll is vegetarian, but it contains eggs and dairy, which are common allergens. For a dairy-free option, you can use almond milk and coconut cream in place of the whole milk and heavy cream. Ensure any extracts used are free from allergens as well, especially if you’re substituting flavors. Always double-check to ensure the safety of your guests when accommodating allergies!
Delightful Japanese Cotton Candy Cake Roll for Sweet Celebrations
Ingredients
Equipment
Method
- Preheat your oven to 325°F (165°C) and line an 8×12” baking pan with parchment paper.
- In a small bowl, whisk together the whole milk, vegetable oil, and granulated sugar until fully blended.
- Sift together the cake flour and sea salt in another bowl. Create a well and gently pour in the wet ingredients.
- Beat the egg whites with cream of tartar until frothy and gradually add remaining sugar until glossy and stiff peaks form.
- Gently fold the meringue into the batter in three additions, ensuring you maintain volume.
- Spread the batter in the prepared baking pan and bake for 10–12 minutes until set.
- Cool the cake in the pan for a few minutes before flipping onto a wire rack to cool completely.
- Bloom the gelatin in cold water. Whip the chilled heavy cream and sugar until soft peaks form, then add gelatin and cotton candy extract.
- Spread the whipped cream filling over the cooled cake and roll tightly. Wrap in plastic wrap and chill for at least 1 hour.
- Unwrap the cake roll, trim edges, slice, and serve with powdered sugar or white chocolate drizzle.
Leave a Reply