
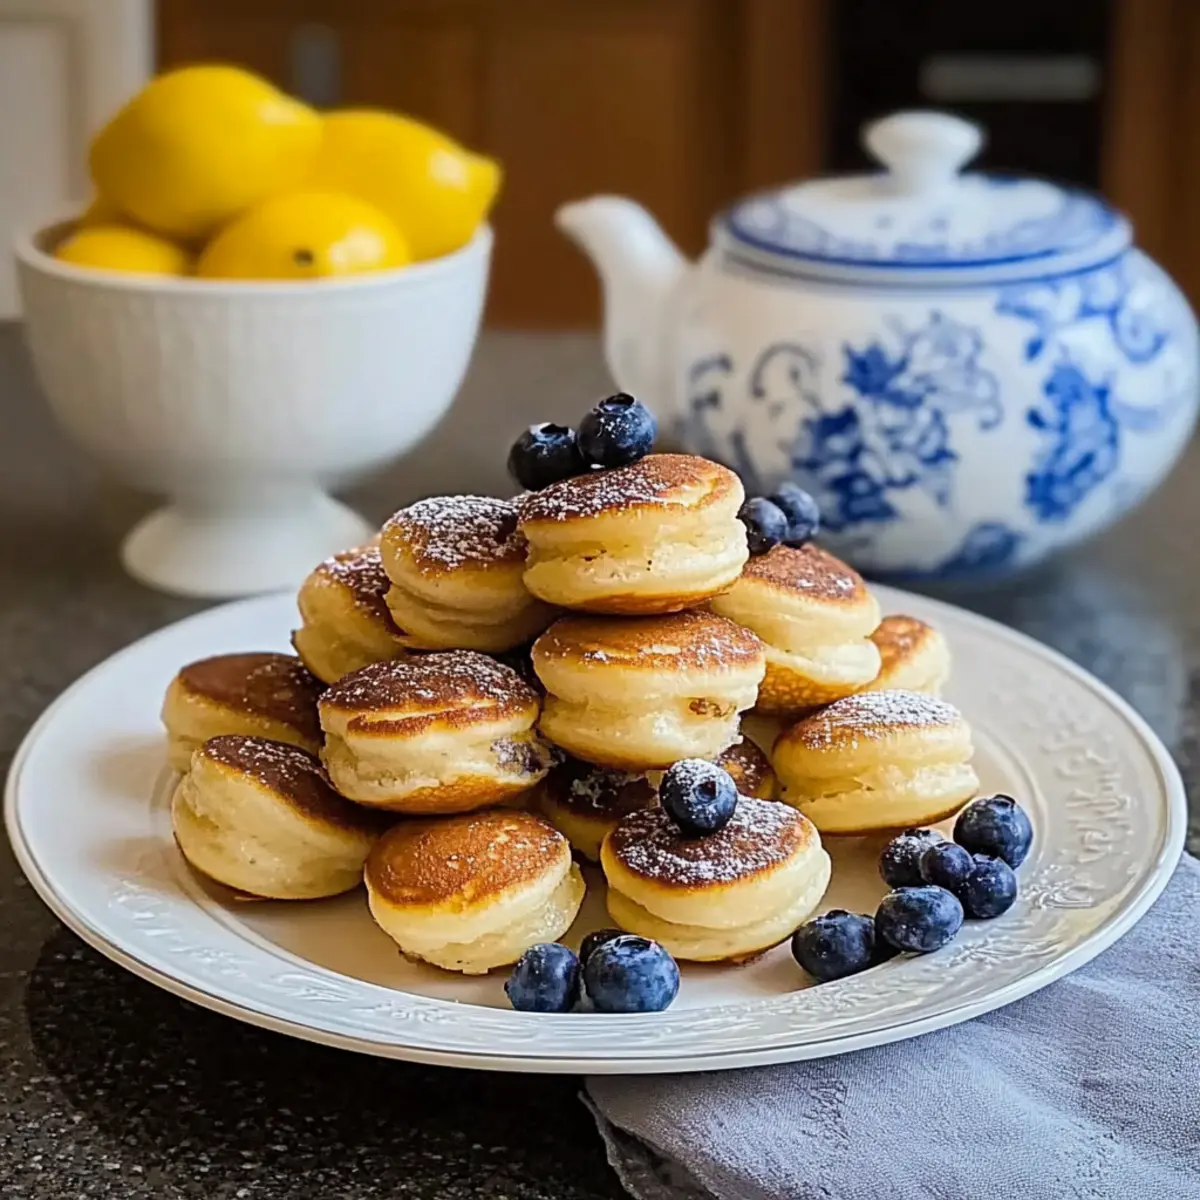
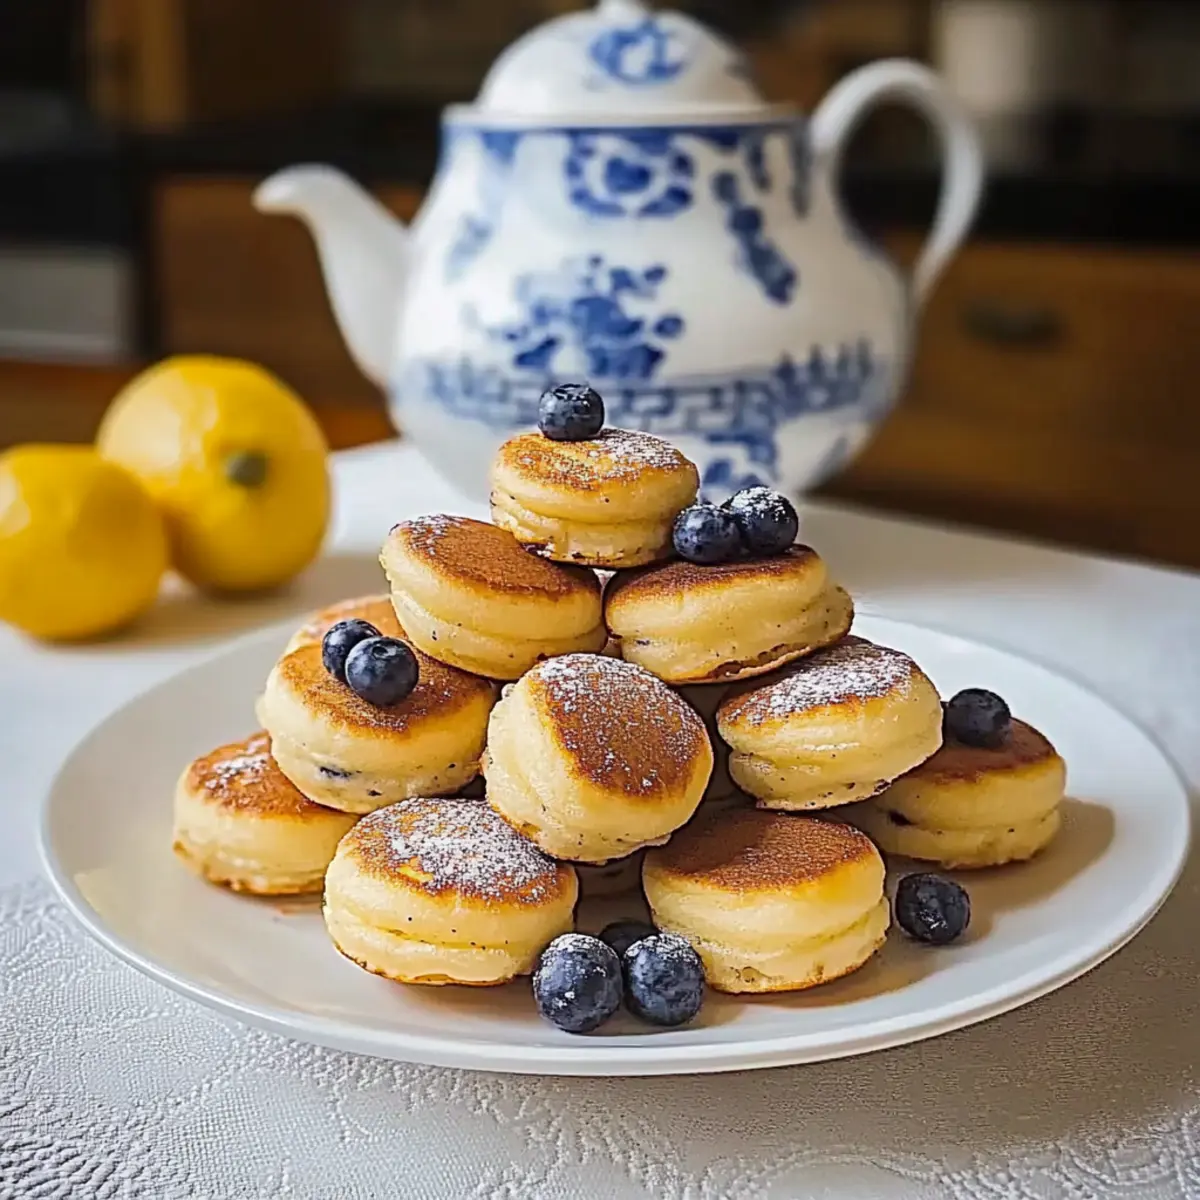
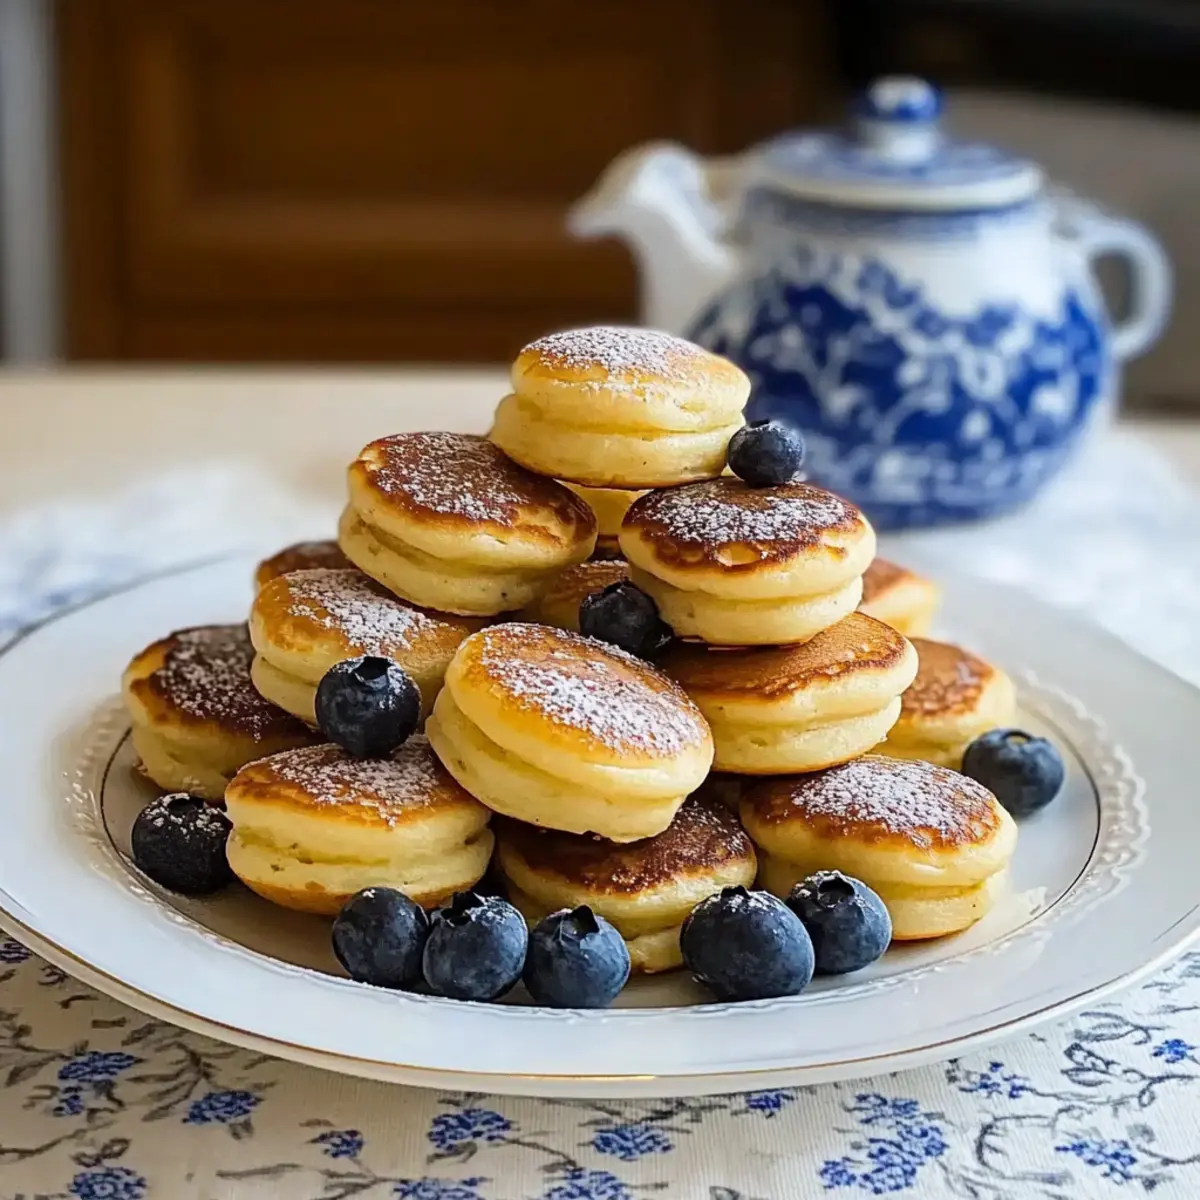
Every morning, the same dilemma: should I whip up another boring breakfast or try something new? When I stumbled across the idea of Pancake Poppers, it felt like pure genius! These bite-sized treats are small enough to grab on the go, yet large on possibility. Perfect for busy mornings, they can be easily customized with your favorite mix-ins—think chocolate chips, fresh fruit, or even crispy bacon and cheese for a savory twist. Not only do these pancake poppers bake effortlessly in a mini muffin tin, but they also double as a fun, family-friendly delight that kids adore. Whether you’re preparing breakfast for your family or meal-prepping for the week ahead, these fluffy poppers are a sure win. So, what mix-in will you choose to make them your own?
Why Are Pancake Poppers Perfect for You?
Endlessly Customizable: Choose your favorite mix-ins like chocolate chips, fruits, or savory options such as cheese or bacon to cater to every taste. Kid-Friendly Delight: These poppers are not just easy to make; they’re fun to eat, making them perfect for picky eaters. Time-Saving Treats: Bake ahead and store these poppers in the fridge or freezer for ready-to-go breakfasts throughout the week. Fluffy and Delicious: Enjoy the light, airy texture that resembles a pancake, but in the perfect bite-sized form! Make your mornings exciting with these pancake poppers, and don’t forget to check out other great breakfast ideas to keep your mornings fresh and wonderful!
Pancake Poppers Ingredients
For the Batter
• Milk – Provides moisture; you can substitute with any non-dairy milk.
• Vinegar – Creates homemade buttermilk when mixed with milk; skip if using buttermilk.
• Oil – Adds richness and moisture; substitute with melted butter for creaminess.
• Egg – Binds the mixture together and adds structure; can omit for a vegan recipe by using a flax egg instead.
• Flour – The main structure provider; whole wheat or gluten-free flour can be used as alternatives.
• Sugar – Adds sweetness; can reduce or substitute with honey or maple syrup for natural sweetness.
• Baking Powder & Baking Soda – Essential leavening agents that help the poppers rise; both are needed for best results.
• Salt – Enhances flavor and is important even in sweet recipes.
For Greasing
• Cooking Spray or Butter – Use to grease the muffin tin to prevent sticking.
These delicious pancake poppers are a go-to for any busy morning or snack time, so gather your ingredients and let’s get started!
Step‑by‑Step Instructions for Pancake Poppers
Step 1: Preheat and Prepare
Begin by preheating your oven to 375°F (190°C). While the oven warms, grab a mini muffin tin and generously grease each cup with cooking spray or butter to ensure your pancake poppers release easily after baking. This vital step sets you up for perfect, fluffy bites that won’t stick!
Step 2: Create Buttermilk
In a medium bowl, whisk together the milk and vinegar. Allow the mixture to sit for about 5 minutes to create a homemade buttermilk, which helps the pancake poppers achieve their signature lightness. The mixture should look slightly curdled, indicating it’s ready for the next step.
Step 3: Combine Wet Ingredients
Once your buttermilk is ready, add in the oil and egg to the bowl. Use a whisk to combine thoroughly until you have a smooth, consistent mixture. This step ensures all the wet ingredients are well incorporated, contributing to the wonderful fluffiness of your pancake poppers.
Step 4: Mix Dry Ingredients
In a separate large mixing bowl, combine the flour, sugar, baking powder, baking soda, and salt. Whisk the dry ingredients together until they are evenly mixed, making sure there are no lumps. This blend will provide the necessary structure and flavor to your pancake poppers, enhancing your overall breakfast experience.
Step 5: Combine Wet and Dry Ingredients
Gently fold the wet mixture into the bowl of dry ingredients using a spatula. Mix just until combined; it’s okay if there are some small flour pockets. Overmixing can lead to tough pancake poppers, so be careful! You want a slightly lumpy batter for that perfect fluffy texture.
Step 6: Fill Muffin Cups
Spoon approximately 1 tablespoon of batter into each greased muffin cup, filling them about three-quarters full. If you’re incorporating mix-ins like chocolate chips, fresh fruit, or savory options, add them into the batter now or sprinkle on top. This customization makes your pancake poppers truly special.
Step 7: Bake to Perfection
Carefully place the muffin tin in your preheated oven and bake for 8 to 12 minutes. Keep an eye on them; they should rise and turn a nice golden color when done. To check doneness, insert a toothpick; if it comes out clean, your pancake poppers are ready to come out.
Step 8: Cool and Serve
Once baked, remove the muffin tin from the oven and let it cool for about 5 minutes. Use a butter knife to gently loosen the edges before transferring the pancake poppers to a wire rack. Allow them to cool slightly before serving, and enjoy with your favorite toppings like syrup, yogurt, or fruit.
Expert Tips for Pancake Poppers
-
Mix Gently: Avoid overmixing the batter to ensure your pancake poppers remain fluffy and tender. A few lumps are perfectly okay!
-
Watch the Oven: Baking times vary by oven. Set a timer but stay close—check for doneness using a toothpick around the 8-minute mark.
-
Customize Wisely: When adding mix-ins, remember not to overfill the cups; about 1 tablespoon of batter is ideal. This helps maintain the right texture.
-
Proper Cooling: Let your pancake poppers rest in the tin for a few minutes before transferring them. This helps them firm up and prevents breaking.
-
Storage Savvy: Store leftover poppers in an airtight container in the fridge for up to 4 days, or freeze them for easy breakfasts later. Enjoy your pancake poppers, fresh or reheated!
Pancake Poppers: Flavorful Twists Await
Feel free to let your creativity shine as you customize these delightful pancake poppers with these fun and tasty twists!
-
Fruity Delight: Add fresh blueberries or banana slices to the batter for bursts of sweetness and flavor.
-
Chocolate Indulgence: Incorporate mini chocolate chips into the mix for a delightful sweet treat that kids will love.
-
Savory Kick: Mix in crumbled bacon or sharp cheddar cheese for a deliciously savory pancake experience.
-
Dairy-Free Option: Substitute almond or soy milk for the regular milk to create a lighter option that everyone can enjoy.
-
Whole Wheat Switch: Use whole wheat flour to make a heartier version that still retains the light, fluffy texture of traditional pancake poppers. This adds a perfect nutty flavor!
-
Spicy Surprise: Add a pinch of cayenne pepper or a dash of hot sauce for a warm twist that pairs beautifully with savory mix-ins.
-
Nutty Add-In: Stir in chopped nuts like pecans or walnuts for an added crunch and richness that elevates each popper.
-
Maple Sweetness: Drizzle the batter with a bit of maple syrup before baking for a hint of sweetness that caramelizes beautifully in the oven.
Pair these pancake poppers with a side of warm maple syrup or Greek yogurt, and you’ve got a breakfast that’s not only satisfying but also filled with exciting flavors! Don’t forget to explore more kid-friendly breakfast ideas to keep everyone in the family happy!
Make Ahead Options
Pancake Poppers are perfect for meal prep enthusiasts! You can mix the batter and refrigerate it for up to 24 hours before baking, which saves precious time on busy mornings. Simply whisk together the wet and dry ingredients separately, then combine them just before baking to keep the poppers fluffy. You can also bake the pancake poppers in advance and store them in an airtight container in the fridge for up to 4 days. When you’re ready to serve, just reheat them in the microwave for a quick breakfast treat or warm them in a toaster oven for that freshly baked taste. Enjoy these delicious bites with minimal effort!
How to Store and Freeze Pancake Poppers
Fridge: Store leftover pancake poppers in an airtight container for up to 4 days. This keeps them fresh and ready for quick snacks or breakfasts!
Freezer: For long-term storage, freeze the poppers in a single layer on a baking sheet, then transfer to a freezer-safe container. They can be kept for up to 3 months.
Reheating: When ready to enjoy, reheat in the microwave for about 30 seconds, or in a toaster oven until warmed through. This will help restore their fluffy texture!
Make-Ahead Tip: Bake a batch on the weekend, and you’ll have easy and delicious pancake poppers ready to go throughout the week!
What to Serve with Pancake Poppers
Kick-start your morning with a delightful spread of sides that elevate these fluffy bites to a whole new level!
- Maple Syrup: The classic choice, this sweet drizzle perfectly complements the pancake poppers, enhancing their fluffy texture with a touch of warmth.
- Fresh Berries: This vibrant mix of strawberries, blueberries, and raspberries adds a burst of juicy freshness that brightens up each bite.
- Greek Yogurt: Creamy and tangy, a dollop of Greek yogurt brings a delightful contrast to the sweetness of the poppers while offering a protein boost.
- Scrambled Eggs: Fluffy scrambled eggs create a hearty, satisfying breakfast experience that melds beautifully with the lighter pancake poppers. Enjoy them together for a complete meal!
- Fruit Salad: A refreshing assortment of seasonal fruits provides a crisp, refreshing balance to the warm pancake poppers, making for a well-rounded breakfast.
- Chocolate Hazelnut Spread: For those sweet mornings, a spread of nutella or chocolate hazelnut brings a rich, decadent twist that’s sure to please kids and adults alike.
- Savory Bacon: Crispy, savory bacon introduces a delightful crunch and umami flavor that pairs wonderfully with the sweetness of the pancake poppers.
- Iced Coffee: Sipping cold iced coffee alongside these poppers makes for a refreshing and energizing start to your day, keeping you alert and excited for breakfast!
Pancake Poppers Recipe FAQs
What type of milk can I use for pancake poppers?
You can use any milk you prefer! Whether it’s whole, almond, soy, or oat milk, it will work beautifully. If you want a bit of tang, mixing regular milk with a splash of vinegar creates a homemade buttermilk.
How should I store leftover pancake poppers?
Store leftover pancake poppers in an airtight container in the fridge for up to 4 days. This way, they remain fresh and perfect for quick breakfasts or snacks during the week.
Can I freeze pancake poppers for later?
Absolutely! To freeze, place the pancake poppers in a single layer on a baking sheet and freeze them for about 1 hour. Once frozen, transfer them to a freezer-safe container or bag. They can be kept for up to 3 months. Just reheat them in the microwave or toaster oven when you’re ready to enjoy!
What if my pancake poppers are too dense?
If your pancake poppers are coming out dense, it might be due to overmixing the batter. When combining wet and dry ingredients, mix just until combined to keep the texture light and fluffy. Also, make sure your baking powder and baking soda are fresh, as they are key leavening agents!
Are pancake poppers suitable for kids with allergies?
Yes, pancake poppers can be adjusted to suit various dietary needs! For egg allergies, a flax egg is a great substitute. Additionally, using gluten-free flour can accommodate those with gluten sensitivities. Just keep an eye on any mix-ins like chocolate or certain fruits, which might not be suitable.
How do I tell if my pancake poppers are fully baked?
To check for doneness, insert a toothpick in the center of a popper around the 8-minute mark. If it comes out clean or with a few crumbs, they are ready to come out. If the toothpick is wet, give them another minute or two and check again!

Pancake Poppers: Fluffy Bites for Every Morning Mood
Ingredients
Equipment
Method
- Preheat your oven to 375°F (190°C) and grease each cup of a mini muffin tin with cooking spray or butter.
- Whisk together the milk and vinegar in a medium bowl and let sit for 5 minutes to create buttermilk.
- Add the oil and egg to the buttermilk mixture and whisk until smooth.
- In a separate bowl, whisk together the flour, sugar, baking powder, baking soda, and salt.
- Fold the wet ingredients into the dry ingredients until just combined; a few lumps are okay.
- Spoon about 1 tablespoon of batter into each muffin cup, filling them 3/4 full and adding mix-ins if desired.
- Bake for 8 to 12 minutes until golden and a toothpick comes out clean.
- Cool in the tin for 5 minutes, loosen with a knife, and transfer to a wire rack.
Leave a Reply