
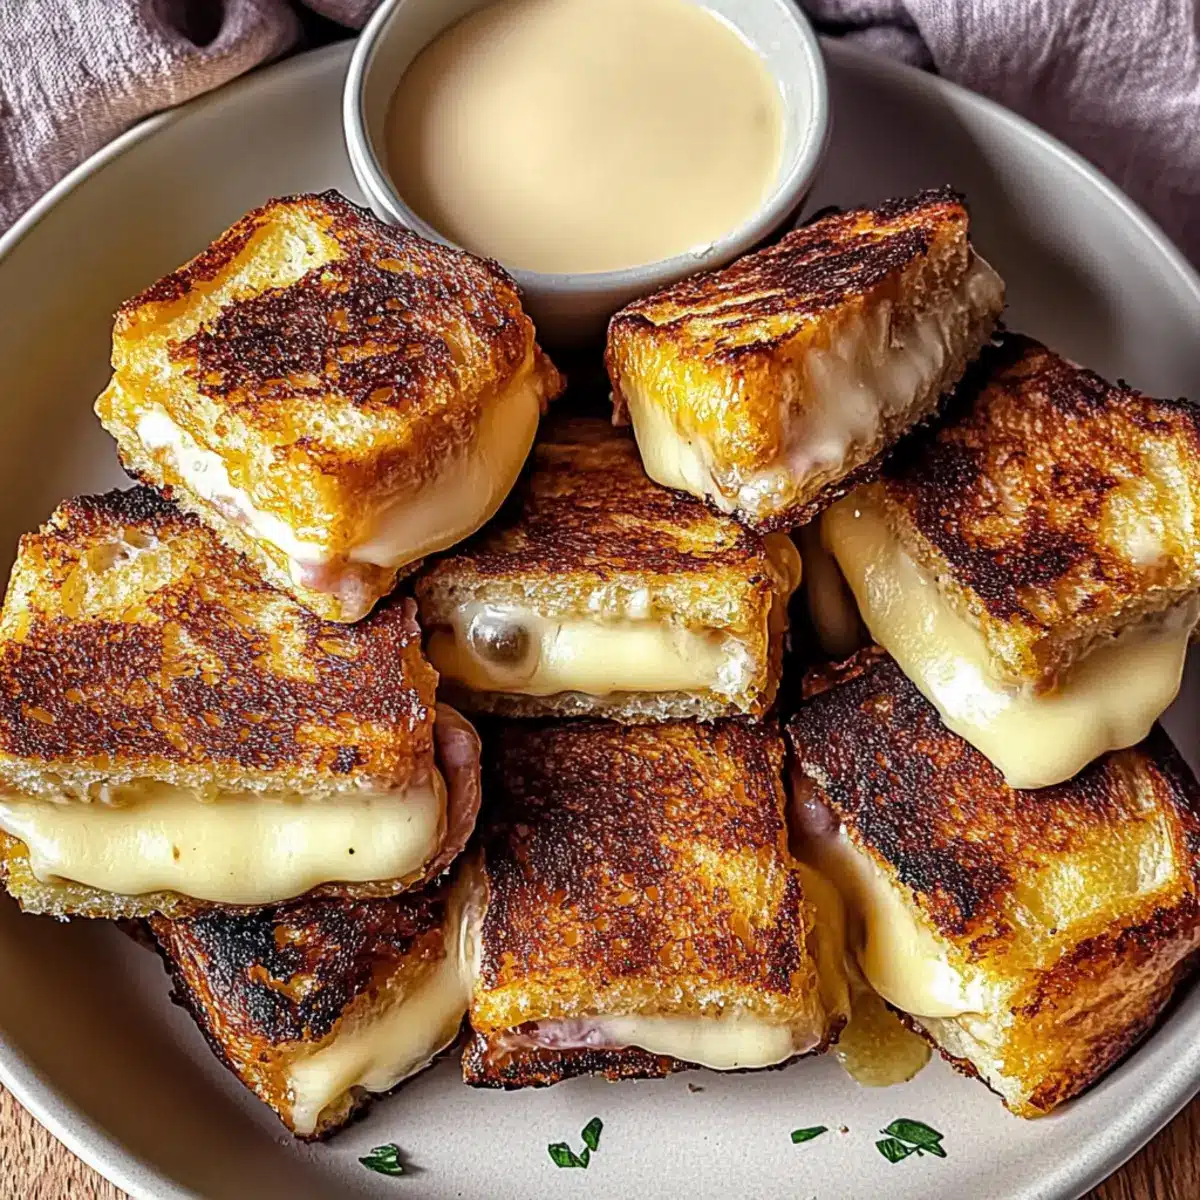
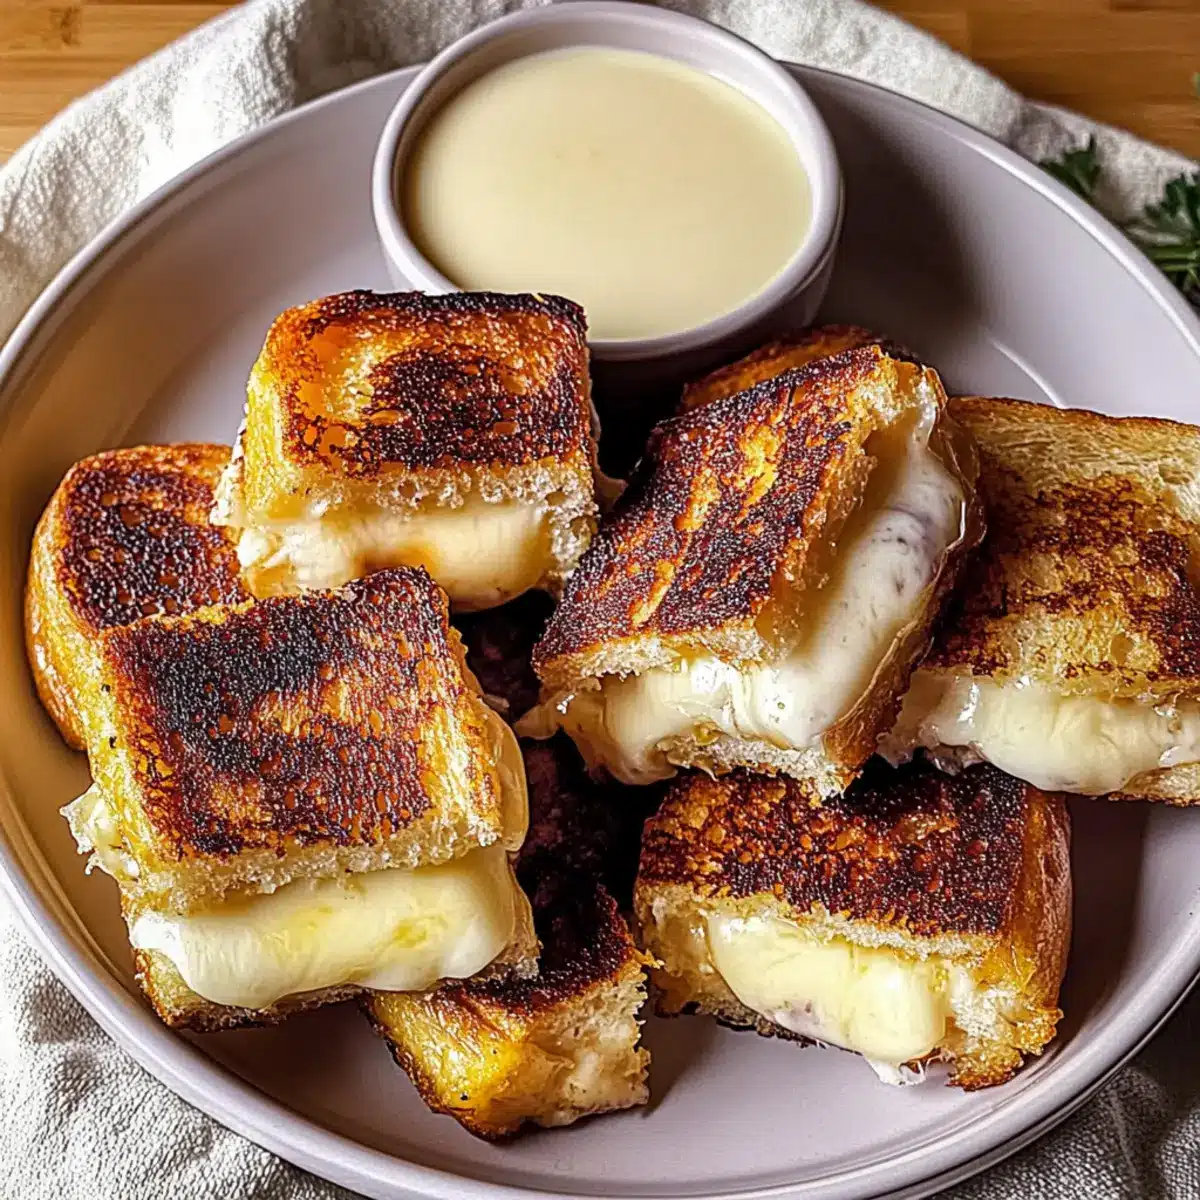
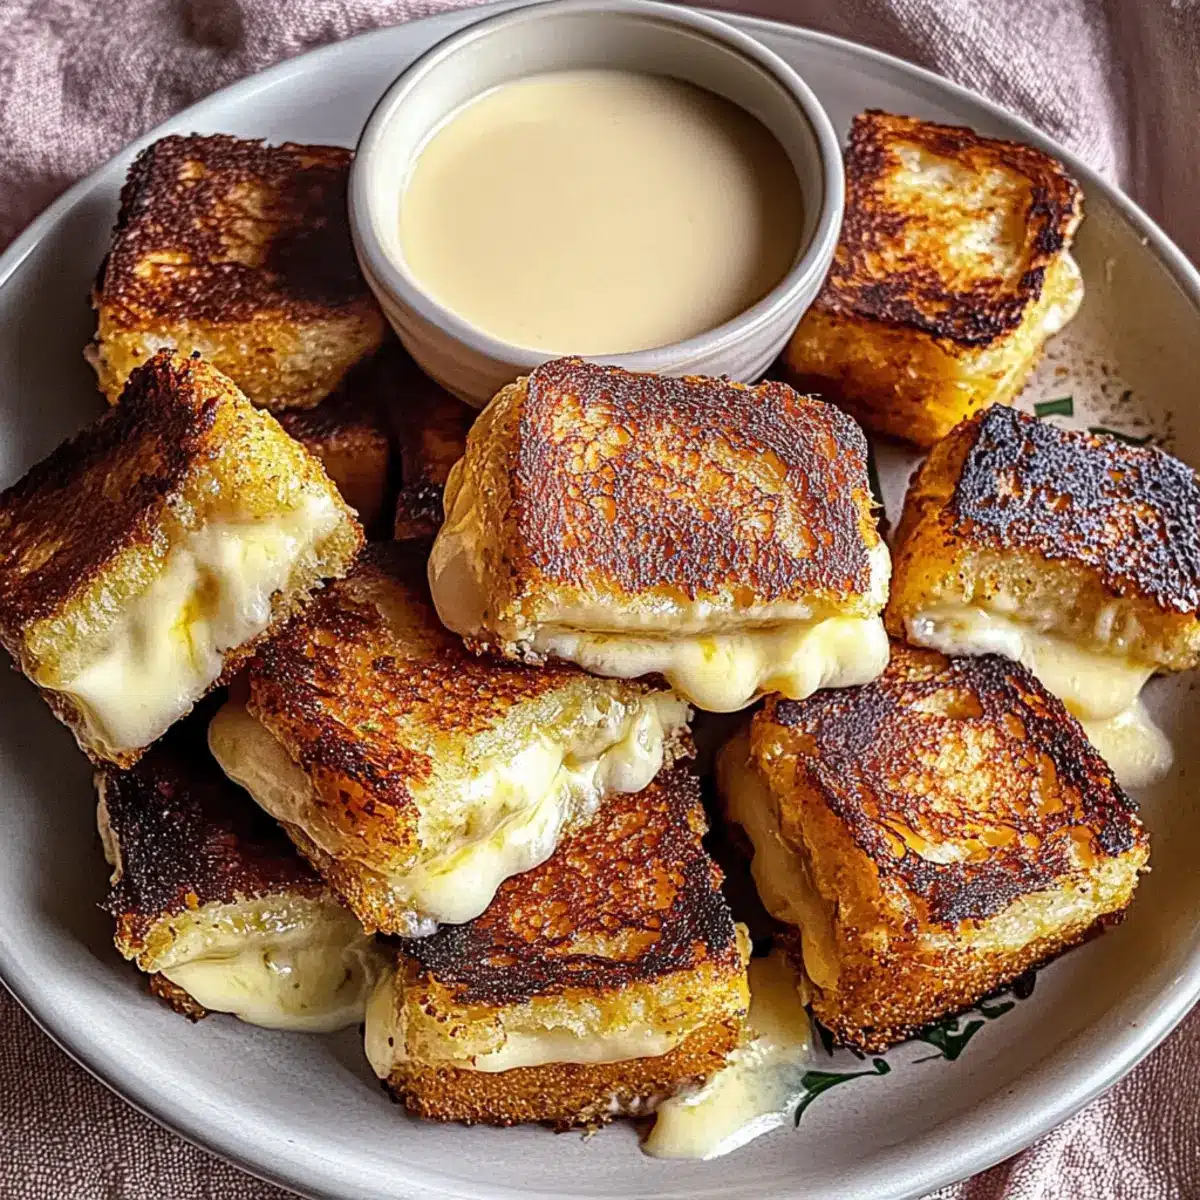
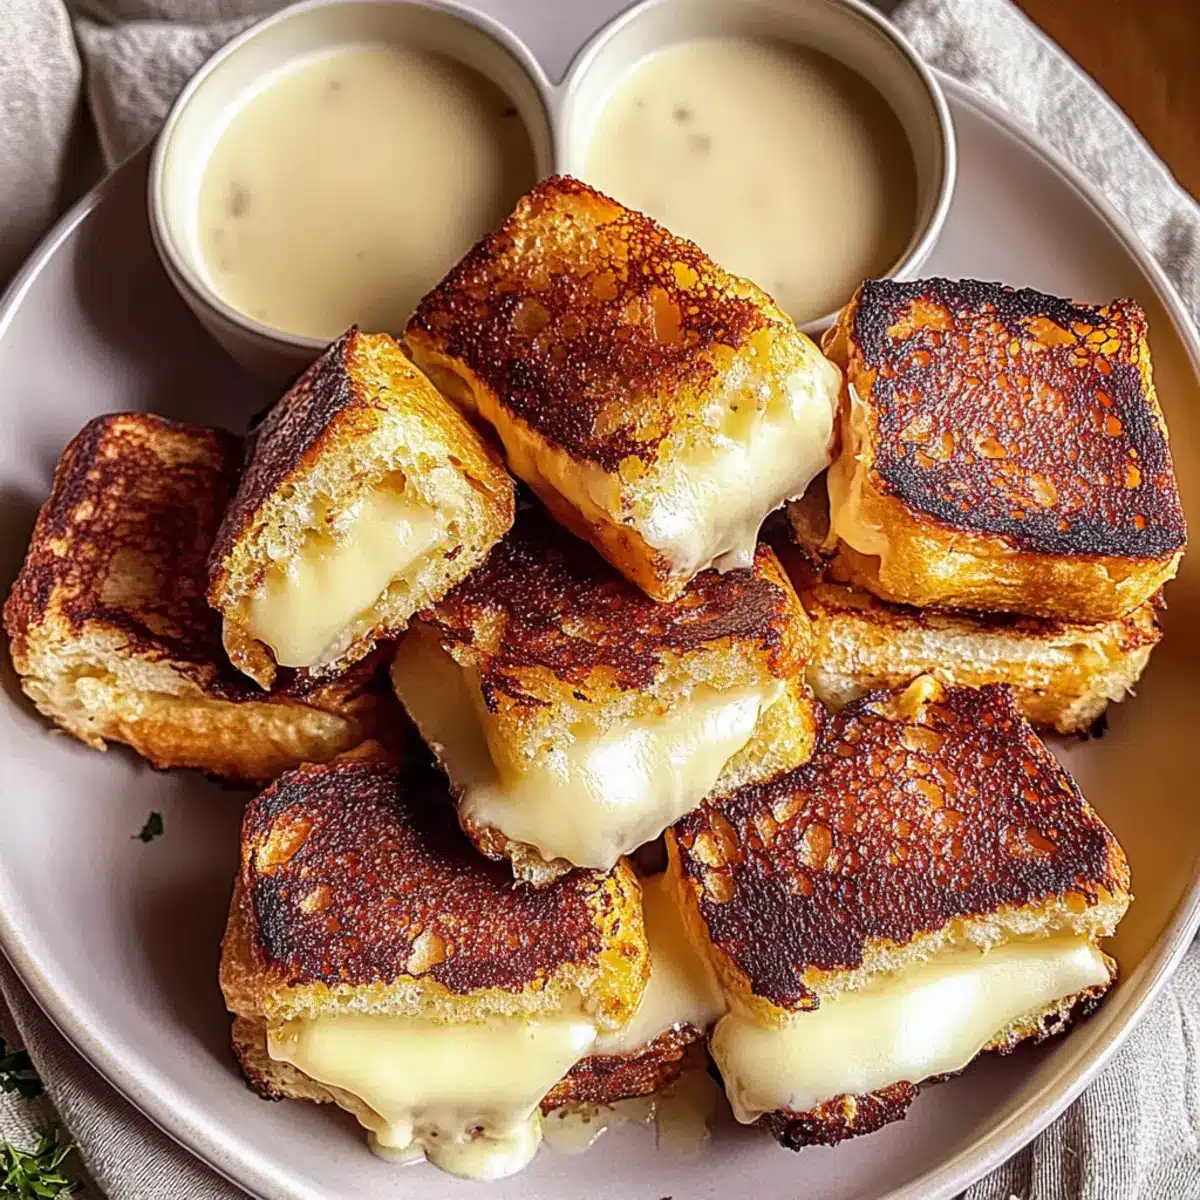
There’s something undeniably comforting about the aroma of melting cheese and warm bread filling the kitchen. Enter the Hawaiian Roll Grilled Cheese—a delightful twist that takes this all-time favorite to tropical heights! It combines the sweet, fluffy allure of Hawaiian rolls with gooey cheese melty perfection, creating a kid-friendly dish that’s not only quick to whip up, but also customizable to your taste buds. Whether it’s a cozy family movie night or a spontaneous late-night snack, this grilled cheese sandwich brings warmth and joy in every golden-brown bite. So why settle for ordinary when you can enjoy a scrumptious twist on a classic? What flavor combination will you choose for your next sandwich adventure?
Why This Hawaiian Roll Grilled Cheese?
Comforting and oh-so-satisfying, this Hawaiian Roll Grilled Cheese elevates a beloved classic with its soft, sweet rolls. Customizable to fit your cravings, you can mix and match cheeses or add toppings like crispy bacon or herbs. Quick to make, it’s perfect for busy weeknights or lazy weekends. Kid-friendly delight means everyone will gather around the table for this meal! Serve it alongside a light salad or classic tomato soup for a complete experience that’s unbeatable. Don’t miss out on this tropical twist—your taste buds will thank you!
Hawaiian Roll Grilled Cheese Ingredients
• Gather these delightful ingredients to create your very own Hawaiian Roll Grilled Cheese.
For the Sandwich
- Hawaiian Rolls – These sweet, fluffy rolls provide the perfect base; you can substitute with brioche or sourdough for different textures.
- Cheese of Choice – Choose your favorite melting cheese; pepper jack adds a lovely spice, while cheddar offers the classic taste that everyone loves.
- Butter – This rich spread ensures a crispy, golden crust on the outside of your sandwich.
Optional Toppings
- Crispy Bacon – Adds a savory crunch that pairs beautifully with the sweetness of the rolls.
- Caramelized Onions – These create a sweet, rich flavor that elevates your grilled cheese game to the next level.
- Fresh Herbs – Try adding basil or thyme for a fresh, aromatic touch that enhances the overall flavor profile.
This Hawaiian Roll Grilled Cheese recipe is all about bringing joy and comfort to your meal!
Step‑by‑Step Instructions for Hawaiian Roll Grilled Cheese
Step 1: Prepare Ingredients
Start by gathering your Hawaiian rolls and cheese of choice. Carefully slice the rolls in half without cutting all the way through, creating a pocket for the ooey-gooey cheese. Lay out your butter and any optional toppings you may want to add later, setting the stage for a delicious Hawaiian Roll Grilled Cheese.
Step 2: Heat Skillet
Preheat a non-stick skillet over medium heat, allowing it to warm up for about 3 minutes. A hot skillet ensures that your Hawaiian Roll Grilled Cheese will grill evenly and develop that gorgeous golden-brown crust. Keep an eye on the heat; adjusting if needed is key to avoiding burnt bread.
Step 3: Butter Rolls
Generously butter the insides of each roll with softened butter, making sure every corner is covered. This will create a deliciously crispy crust that contrasts perfectly with the melted cheese inside. Don’t rush this step—get a nice, even layer for the best results when grilling your sandwiches.
Step 4: Assemble Sandwiches
Place the bottom half of each roll onto the preheated skillet, followed by your chosen cheese. If you’re feeling adventurous, you can add toppings like caramelized onions or crispy bacon at this point. Gently press the top half of the roll down, ensuring the fillings are snug before you start grilling.
Step 5: Grill
Cook the sandwiches for about 3-4 minutes or until the first side turns a beautiful golden brown. Peek underneath to check the color; it should be crispy and inviting. Carefully flip the sandwiches over using a spatula, and grill the second side for an additional 3-4 minutes until the crust is crispy and the cheese has melted beautifully.
Step 6: Serve
Once cooked, remove the Hawaiian Roll Grilled Cheese from the skillet and allow them to cool for about a minute. Slice the sandwiches diagonally for that classic presentation, revealing the molten cheese inside. Serve hot, either with a side of marinara for dipping or enjoy plain to savor every cheesy bite.
Storage Tips for Hawaiian Roll Grilled Cheese
Fridge: Store leftovers in an airtight container for up to 2 days to keep them fresh. Avoid stacking to prevent sogginess.
Freezer: Freeze ungrilled sandwiches wrapped tightly in plastic wrap or foil for up to 2 months. Thaw in the fridge before grilling for the best texture.
Reheating: Heat in a skillet over low heat to bring back crispiness and ensure the cheese melts nicely. Avoid microwaving to prevent a soggy sandwich.
Serving Suggestion: Enjoy reheated Hawaiian Roll Grilled Cheese alongside fresh sides like a light salad or a cup of tomato soup for a comforting meal.
Make Ahead Options
These Hawaiian Roll Grilled Cheese sandwiches are perfect for meal prep enthusiasts who want to save time during busy weeknights! You can assemble the sandwiches up to 24 hours in advance by buttering the rolls and adding the cheese (and any toppings you’d like) before wrapping each sandwich tightly in plastic wrap. This not only prevents the rolls from drying out but also keeps the cheese fresh and ready to melt. On the day you’re ready to serve, simply unwrap and grill them as instructed, cooking for about 3-4 minutes per side until golden brown and ooey-gooey inside. With this make-ahead approach, you’ll enjoy restaurant-quality Hawaiian Roll Grilled Cheese with minimal effort!
Expert Tips for Hawaiian Roll Grilled Cheese
- Perfect Heat Control: Keep your skillet on medium-low heat to avoid burning the rolls, ensuring a lovely golden-brown crust without undercooked cheese.
- Cheesy Melts: If the cheese isn’t melting properly, cover the skillet with a lid briefly. This traps heat and helps achieve gooey, melted perfection.
- Topping Timing: Add toppings like bacon or caramelized onions before grilling, so they meld beautifully with the cheese while cooking.
- Roll Handling: Be gentle when cutting the Hawaiian rolls; cut too deeply, and you risk them falling apart during assembly.
- Serving Ideas: Pair your Hawaiian Roll Grilled Cheese with a light salad or a warm bowl of tomato soup for a comforting, balanced meal.
What to Serve with Hawaiian Roll Grilled Cheese
There’s nothing quite like the mouthwatering experience of a sweet, buttery roll cradling melted cheese, and pairing it perfectly can take your meal to new heights.
- Tomato Soup: The classic companion adds a comforting warmth and acidity that complements the grilled cheese’s richness beautifully.
- Caesar Salad: Crisp romaine and creamy dressing offer a refreshing balance to the gooey cheer of your sandwich—perfect for crunch lovers!
- Fresh Fruit Salad: Bright and juicy fruits provide a refreshing contrast to the richness of the grilled cheese, making every bite feel light and delightful.
- Sweet Potato Fries: The earthy sweetness of these crispy fries harmonizes with the tropical vibe of the Hawaiian rolls, creating a delightful bite.
- Pickles: Their tangy crunch cuts through the richness of melted cheese, making each mouthful of the grilled cheese more appetizing.
- Sparkling Lemonade: A refreshing drink option that adds a zesty sparkle, keeping your meal lively and invigorating—perfect for any sunny day.
- Dessert: Coconut Macaroons: Their chewy texture and sweet coconut flavor echo the Hawaiian influence, providing a lovely finale to your meal.
- Avocado Salad: Creamy avocados and fresh herbs bring a light, creamy element that pairs harmoniously with the rich grilled cheese.
Elevate your dining experience by mixing and matching these vibrant pairings and savor every bite!
Hawaiian Roll Grilled Cheese Variations
Feel free to get creative and make this Hawaiian Roll Grilled Cheese your own masterpiece with these delicious twists!
-
Cheese Swap: Use Gruyère or mozzarella for a unique flavor and melt experience. The richness of Gruyère brings a touch of elegance, while mozzarella gives that gooey stretch we all adore.
-
Dairy-Free Option: Substitute with dairy-free cheese for a creamy, non-dairy delight. Brands like Daiya or Violife melt beautifully, ensuring everyone can enjoy a cheesy bite.
-
Flavor Boost: Add a splash of hot sauce or a sprinkle of chili flakes to the cheese for a spicy kick. This sunny twist can awaken your taste buds, transforming your sandwich into a fiery delight.
-
Herb-Infused: Mix in fresh herbs like basil or arugula between the cheese and rolls for a fresh flavor enhancer. The herbs add bright, aromatic notes that perfectly complement the sweetness of the Hawaiian rolls—an herb garden in every bite!
-
Add Proteins: Layer in slices of crispy bacon or savory ham for a hearty option. The salty crunch of bacon mingling with gooey cheese will take your sandwich to new heights of deliciousness.
-
Veggie Lovers: Slice up ripe tomatoes or add sautéed spinach for an extra veggie boost. This addition not only enhances the flavor but also gives your sandwich a nutrient-packed upgrade.
-
Sweet Surprise: Try adding a dollop of pineapple relish or sliced peaches for unexpected sweetness. These vibrant toppings introduce a delightful contrast to the savory cheese, creating an exciting flavor journey.
Feeling inspired? You can discover more creativity in dishes like Caramelized Onion Grilled or Savory Herb Cheese to see how versatile your recipes can be!
Hawaiian Roll Grilled Cheese Recipe FAQs
What kind of Hawaiian rolls should I use?
Absolutely! Look for fresh Hawaiian rolls that are sweet and fluffy. They should be soft without any dark spots or signs of drying out. If you can’t find them, brioche or sourdough can be delightful substitutes that add a different texture and flavor to your grilled cheese.
How should I store leftover Hawaiian Roll Grilled Cheese?
Very important! Leftovers can be stored in an airtight container in the fridge for up to 2 days. To keep them from getting soggy, avoid stacking the sandwiches. When you’re ready to enjoy them again, simply reheat in a skillet over low heat to maintain that crispy texture.
Can I freeze Hawaiian Roll Grilled Cheese sandwiches?
Absolutely! To freeze, assemble the sandwiches without grilling them. Wrap each sandwich tightly in plastic wrap or foil and place them in a freezer-safe bag. They can be stored for up to 2 months. When you’re ready to eat, thaw them in the fridge overnight before grilling. This will help preserve the perfect texture.
What if my cheese isn’t melting properly?
The more the merrier when it comes to cheese! If you find that it’s not melting well during grilling, try covering the skillet with a lid for a minute. This traps the heat and ensures the cheese melts into that gooey deliciousness. It’s a simple trick that works wonders!
Is this recipe suitable for kids with allergies?
It’s great that you’re thinking of dietary needs! If your child has allergies, I recommend using cheese alternatives that are safe for them. Additionally, always check the labels of your Hawaiian rolls and butter for any hidden allergens. You can also customize the toppings to avoid any ingredients that may cause issues.
What toppings can I add to my Hawaiian Roll Grilled Cheese?
Oh, there’s so much you can do! Try caramelized onions for a sweet addition, or add crispy bacon for that savory crunch. Fresh herbs like basil or thyme bring in freshness and excitement. Mix and match based on your personal preference for a truly customized experience!
Melt-in-Your-Mouth Hawaiian Roll Grilled Cheese Delight
Ingredients
Equipment
Method
- Gather your Hawaiian rolls and cheese of choice. Slice the rolls in half to create a pocket.
- Preheat a non-stick skillet over medium heat for about 3 minutes.
- Butter the insides of each roll generously with softened butter.
- Place the bottom half of each roll in the skillet and add cheese, then press down the top half.
- Cook for 3-4 minutes on one side until golden brown, then flip and cook the other side for another 3-4 minutes.
- Remove from skillet, cool for a minute, slice diagonally, and serve hot.
Leave a Reply