
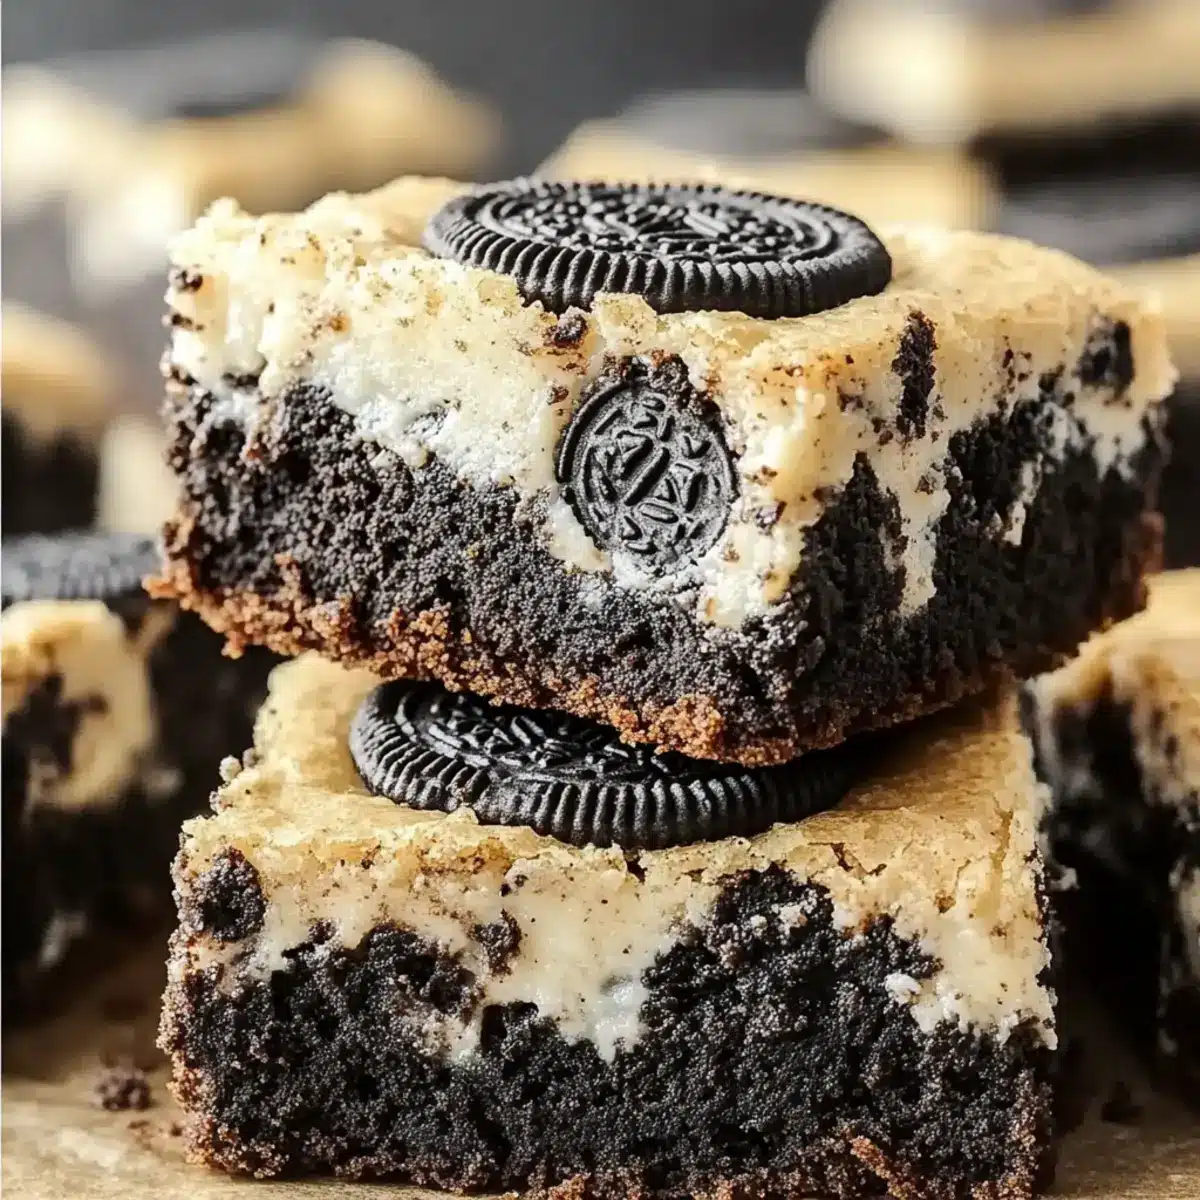
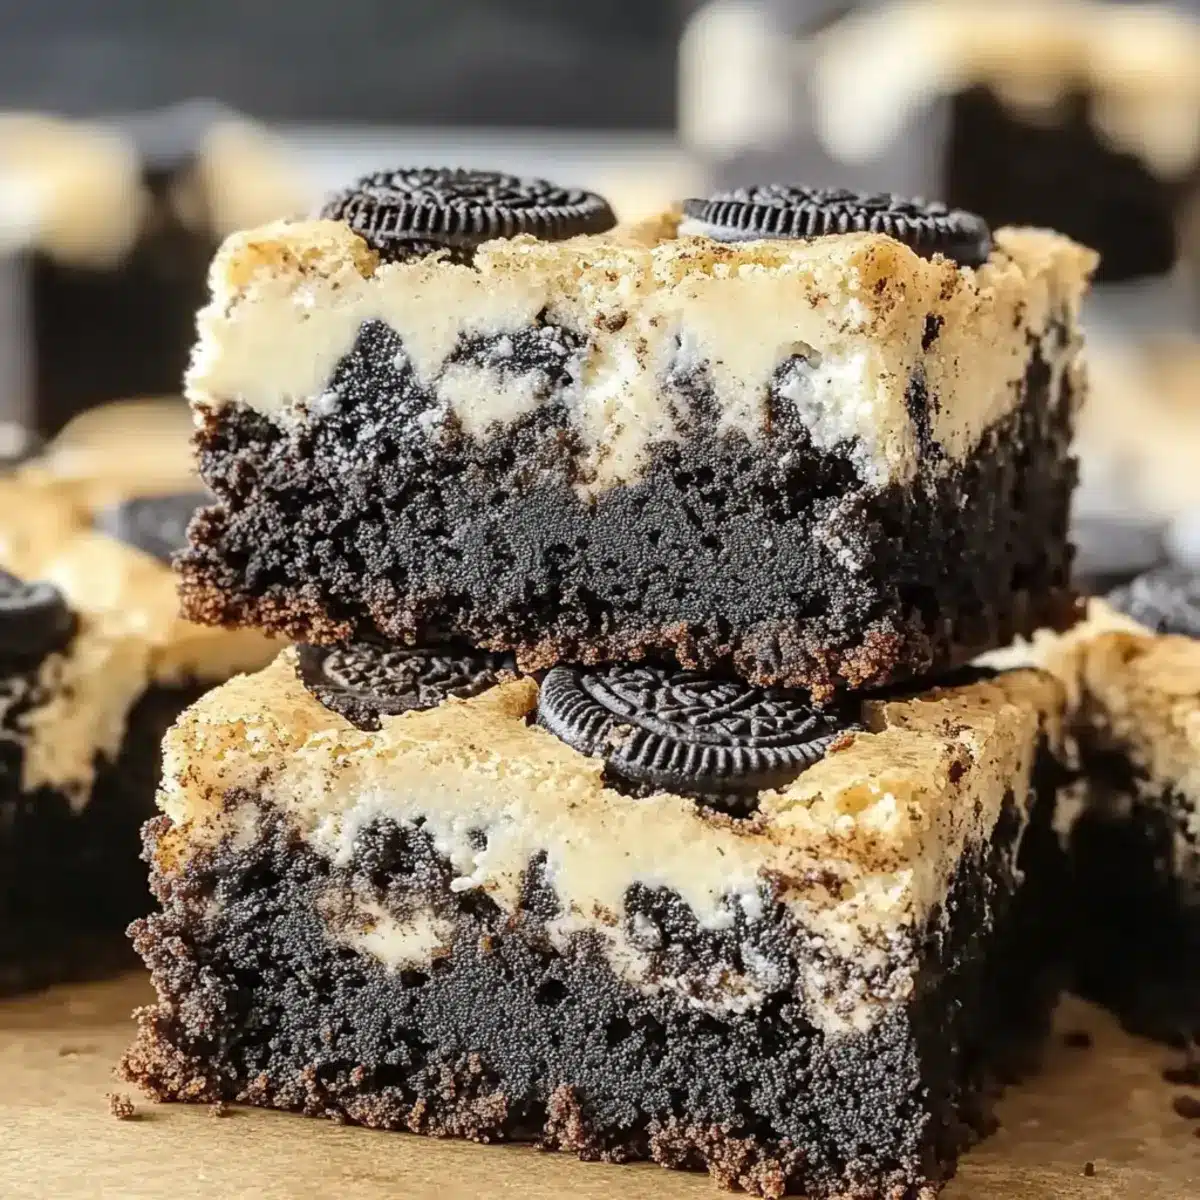
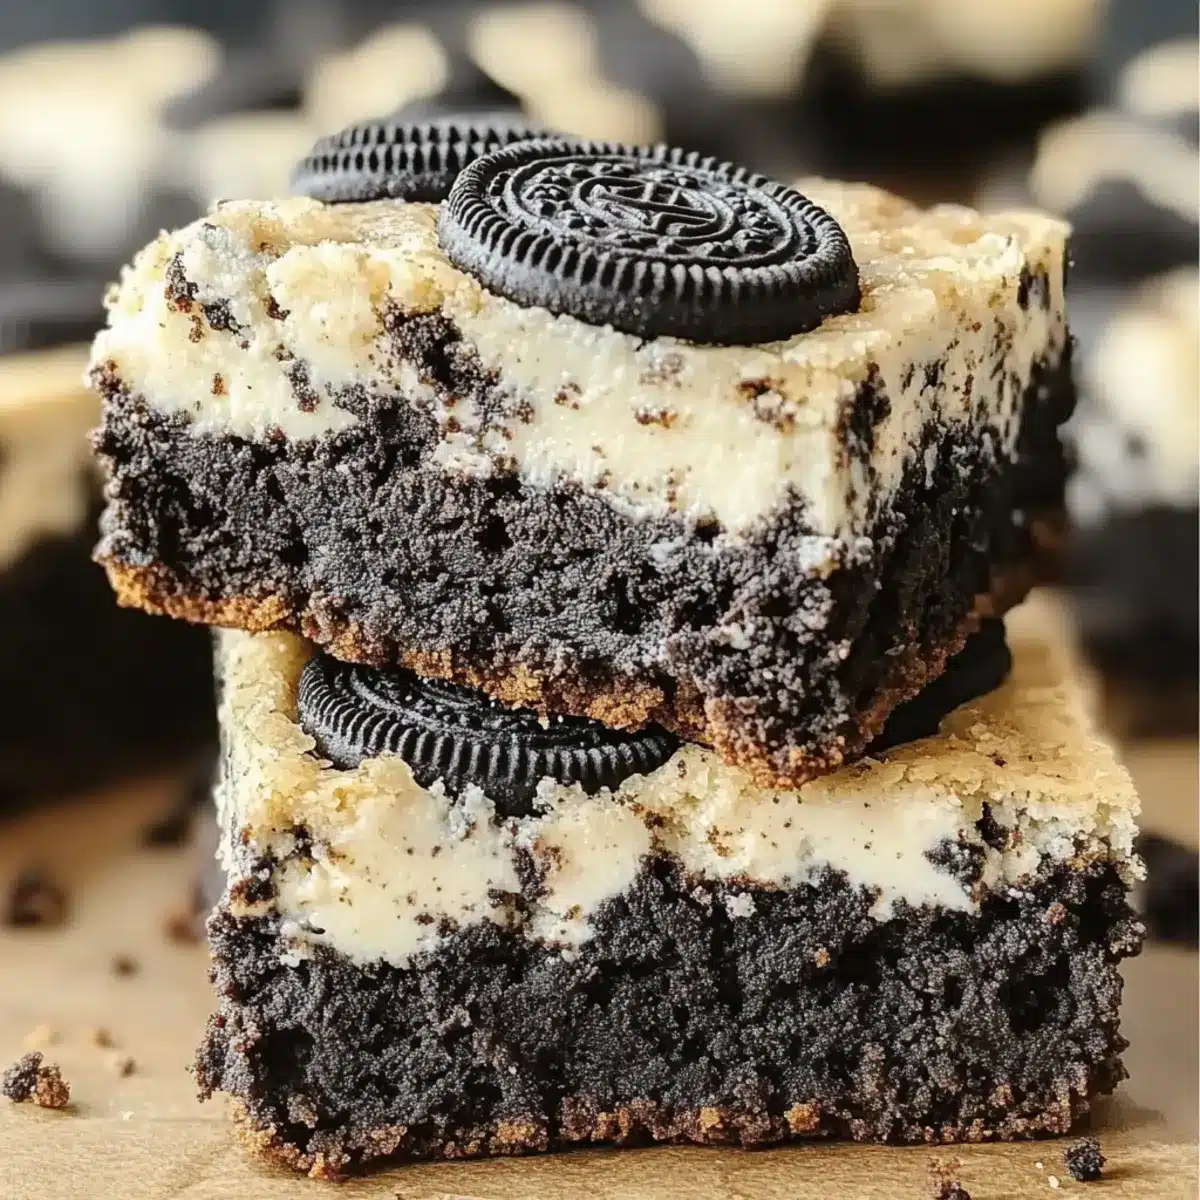
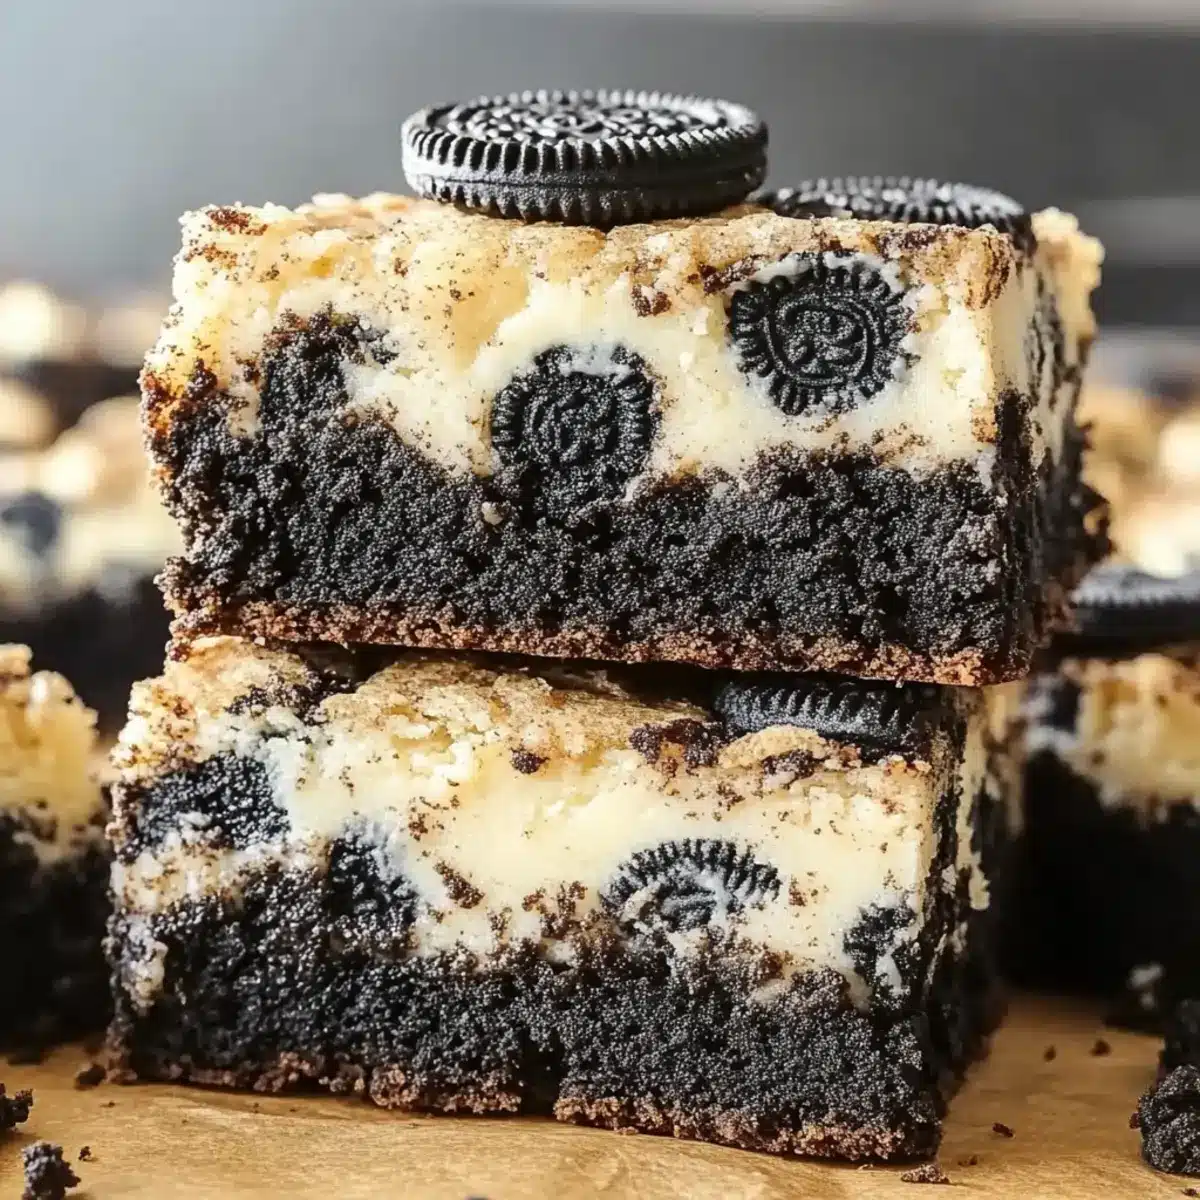
As I sift through my pantry, searching for a sweet fix, I stumble upon an irresistible combination: Oreos and chocolate. Instantly, the thought of whipping up a batch of Cookies and Cream Brownies dances in my mind. Not only are these fudgy delights easy to make, requiring just one bowl, but they also bring comfort in their rich, chocolatey goodness. With a few simple variations, like switching up the chocolate or making them vegan-friendly, they can be tailored to suit any craving. Whether it’s a cozy night in or a gathering with friends, these brownies are sure to melt hearts (and mouths!). Are you ready to bake some magic that will leave everyone asking for seconds?
Why Are These Brownies So Irresistible?
Irresistible Flavor: These Cookies and Cream Brownies combine rich chocolate and creamy Oreo goodness for a taste explosion.
Effortless Baking: With only one bowl needed, clean-up is a breeze—perfect for busy days!
Customizable Delight: Swap out chocolate types or Oreos for endless variations, ensuring there’s a favorite for everyone.
Vegan Friendly: Easily modify the recipe for a vegan option by using a flax egg and plant-based butter, so nobody misses out.
Whether you’re indulging with a scoop of ice cream or enjoying them fresh out of the oven, these brownies will be the highlight of any gathering! If you’re in need of more sweet ideas, check out my Winter Wonderland Cookies or try some Apple Cider Cookies for a delightful twist.
Cookies and Cream Brownies Ingredients
• Here’s what you’ll need to create these mouthwatering brownies!
For the Brownie Base
- Unsalted Butter – Base fat for moisture and richness; substitute with margarine if necessary.
- White Chocolate Chips – Provides sweetness and richness; can be swapped with milk chocolate chips for a deeper flavor.
- Large Egg – Acts as a binder for structure; a flax egg can replace it for a vegan version.
- Sweetened Condensed Milk – Adds sweetness and moisture, ensuring a fudgy texture; essential for the cookies and cream flavor profile.
- Salt – Enhances the overall flavor; optional to omit.
- All-Purpose Flour – Provides structure to the brownies; substitute with gluten-free flour for a gluten-free option.
For the Cookies and Cream Flavor
- Oreos (crushed) – Adds that iconic cookies and cream flavor; use different flavored Oreos for a fun twist.
- Additional Crushed Oreos (for topping) – Sprinkled on top for an extra crunch and flavor boost; can add chocolate drizzle for decadence.
Step‑by‑Step Instructions for Cookies and Cream Brownies
Step 1: Preheat Oven
Start by preheating your oven to 350°F (175°C). While waiting, line an 8″x8″ baking pan with parchment paper, allowing some overhang for easy removal later. This preparation ensures your Cookies and Cream Brownies have the perfect crust and are ready for baking as soon as you’ve mixed your batter.
Step 2: Melt Butter and Chocolate
In a microwave-safe bowl, combine unsalted butter and white chocolate chips. Heat the mixture in the microwave in 30-second intervals, stirring after each, until it’s smooth and fully melted—about 1-2 minutes total. This step creates a luscious base for your fudgy brownies, rich in flavor and sweetness.
Step 3: Mix Wet Ingredients
Allow the melted mixture to cool for a moment before whisking in one large egg, sweetened condensed milk, and a pinch of salt. Blend these ingredients until smooth and well combined, creating a creamy mixture. This will help ensure a delightful fudginess throughout your Cookies and Cream Brownies.
Step 4: Incorporate Dry Ingredients
Gently fold in the all-purpose flour until just combined, being careful not to overmix. You’ll want to see a few flour streaks remaining as you mix. This step is crucial to maintaining the tender texture of your brownies, giving them that melt-in-your-mouth quality you love.
Step 5: Add Crushed Oreos
Now it’s time to introduce the star of the show! Gently stir in five crushed Oreos into the brownie batter, ensuring they’re evenly distributed. This adds that iconic cookies and cream flavor and delightful bites of texture throughout your mixture, elevating your Cookies and Cream Brownies to the next level.
Step 6: Top with More Oreos
Pour the brownie batter into the prepared pan and smooth it evenly. Then, scatter the remaining crushed Oreos on top, pressing them gently into the batter. These chunks will create a tasty topping that gets slightly crisp while baking, making your brownies even more irresistible.
Step 7: Bake
Place your brownie-filled pan into the preheated oven and bake for 30-35 minutes. To check for doneness, insert a toothpick into the center; it should come out with a few moist crumbs but not wet batter. Baking them just right ensures your Cookies and Cream Brownies maintain that fudgy center.
Step 8: Cool and Cut
Once baked to perfection, remove the pan from the oven and let it cool for at least 1 hour. This cooling period allows the brownies to set properly. Once cool, carefully lift them out using the parchment paper and cut them into squares for serving, revealing the delightful goodies inside.
Make Ahead Options
These Cookies and Cream Brownies are a fantastic choice for meal prep enthusiasts! You can prepare the brownie batter up to 24 hours in advance by mixing all the ingredients as instructed and storing it in an airtight container in your refrigerator. This not only saves time but ensures you have a fresh, fudgy treat whenever you’re ready to bake. When it’s time to cook, simply pour the chilled batter into the lined baking pan, top with crushed Oreos, and bake as directed. For optimal freshness, avoid refrigerating the baked brownies, as they are best enjoyed within 3 days at room temperature, maintaining their delicious texture and flavor.
How to Store and Freeze Cookies and Cream Brownies
Room Temperature: Store your Cookies and Cream Brownies in an airtight container at room temperature for up to 3 days to maintain their wonderful fudgy texture.
Fridge: If you prefer firmer brownies, refrigerate them in an airtight container. They’ll last up to 5 days, providing even more decadence with a chilled treat.
Freezer: For longer storage, freeze the brownies. Wrap them tightly in plastic wrap and then in aluminum foil to avoid freezer burn, and enjoy them for up to 3 months.
Reheating: To enjoy a freshly baked feel, reheat individual squares in the microwave for about 10-15 seconds until warm and gooey—pure bliss with each bite!
Expert Tips for Cookies and Cream Brownies
Monitor Mixing: Avoid overmixing the batter; it leads to tougher brownies. Stop mixing as soon as the flour is incorporated for a perfect fudgy texture.
Non-Stick Pan: Use a non-stick pan to prevent any sticking; consider using parchment paper as noted to make removal easier.
Cooling Time: Allow the brownies to cool completely before cutting. This helps them set and ensures clean, even squares—no crumbling!
Storage Savvy: Store your Cookies and Cream Brownies in an airtight container for up to 3 days at room temperature. For longer shelf life, freeze them for up to 3 months.
Vegan Modifications: Remember to swap butter for a plant-based alternative and use a flax egg to keep the recipe vegan-friendly without compromising taste!
What to Serve with Cookies and Cream Brownies?
There’s nothing quite like pairing these fudgy delights with sweet companions to elevate your dessert experience.
-
Vanilla Ice Cream: A classic choice that complements the rich chocolate flavor while adding a creamy contrast. Nothing beats warm brownies topped with a scoop of ice cream drizzled in chocolate sauce!
-
Chocolate Whipped Cream: Add a fluffy, chocolate-infused topping that enriches the brownie experience and adds an extra layer of indulgence.
-
Fresh Berries: The tartness of raspberries or strawberries cuts through the richness perfectly, providing a refreshing pop of flavor. Serve them alongside or on top for a stunning presentation.
-
Mint Chocolate Chip Ice Cream: For a fresh and exciting twist, this ice cream adds minty notes that balance the sweetness beautifully.
-
Caramel Sauce: Drizzling warm caramel sauce over the brownies enhances their deliciousness and adds a touch of gooeyness that’s simply irresistible.
-
Coffee: A warm cup of coffee or espresso serves as the perfect drink to bring out the deep chocolate flavors, making for a delightful pairing.
-
Peanut Butter Swirl: Incorporate a creamy peanut butter swirl on top for an irresistible sweet and salty combination that will have everyone clamoring for more.
-
Milk: Classic whole or almond milk quenches your thirst and enhances the chocolate experience with each bite!
Cookies and Cream Brownies Variations
Feel free to get creative with these brownies and make them perfectly yours!
-
Chocolate Swap: Replace white chocolate chips with dark chocolate for a bolder flavor that intensifies every bite.
-
Nutty Crunch: Add chopped walnuts or pecans into the batter for a delightful nutty crunch that complements the creamy texture.
-
Caramel Drizzle: For an indulgent twist, swirl warm caramel sauce into the batter before baking, adding blissful pockets of sweetness.
-
Flavored Oreos: Experiment with different Oreo flavors like mint or peanut butter for a unique take that’s sure to surprise your taste buds.
-
Cheesecake Filling: Create a cheesecake swirl by mixing cream cheese with a bit of sugar and dolloping it into the batter before baking. This adds a luscious layer for an unforgettable treat.
-
Vegan Delight: Swap out butter for a plant-based version and use a flax egg to enjoy fudgy brownies that everyone can savor, regardless of dietary needs.
-
Spicy Kick: Toss in a pinch of cayenne pepper or chili powder for a surprising warmth that complements the chocolatey goodness beautifully.
When you’re in the mood for more cookie-inspired delights, don’t forget to try my delicious Snowball Cookies Melt or indulge in the festive flavors of Soft Christmas Cookies for a change of pace. Enjoy baking!
Cookies and Cream Brownies Recipe FAQs
How should I select my Oreos for the best flavor?
Absolutely! When choosing Oreos, opt for fresh ones without any dark spots, as these can indicate age and staleness. Depending on your preference, you could also experiment with different flavored Oreos like mint or peanut butter for unique twists in your cookies and cream brownies.
How should I store my Cookies and Cream Brownies?
To keep your brownies fresh, store them in an airtight container at room temperature for up to 3 days. If you want a firmer texture, I recommend refrigerating them for up to 5 days. Just be sure to let them come to room temperature for a bit before enjoying to restore some of that melted goodness!
Can I freeze my Cookies and Cream Brownies?
Absolutely! To freeze your brownies, first, allow them to cool completely. Then, wrap the squares tightly in plastic wrap, followed by aluminum foil to prevent freezer burn. They’ll stay fresh for up to 3 months! When you’re ready to indulge, reheat them in the microwave for about 10-15 seconds to revive that fudgy texture.
What should I do if my brownies are too tough?
Very! If you find your cookies and cream brownies are too tough, it might be due to overmixing the batter. Mix just until the flour is incorporated and no more! Additionally, ensure your baking pan is properly greased or lined to prevent sticking, as this can affect your brownies’ texture as well.
Are there any allergy considerations for this recipe?
Definitely! If you or your guests have allergies, keep in mind that Oreos contain gluten and dairy. For a gluten-free option, you could substitute the all-purpose flour with a gluten-free blend. If someone has a dairy allergy, use plant-based butter and a flax egg for a fully vegan modification without sacrificing taste.
Decadent Cookies and Cream Brownies That You’ll Crave
Ingredients
Equipment
Method
- Preheat your oven to 350°F (175°C) and line an 8"x8" baking pan with parchment paper.
- In a microwave-safe bowl, combine unsalted butter and white chocolate chips, heating in intervals until smooth.
- Once melted, whisk in the egg, sweetened condensed milk, and salt.
- Gently fold in the all-purpose flour until just combined.
- Stir in crushed Oreos, ensuring even distribution.
- Pour the batter into the prepared pan, topping with additional crushed Oreos.
- Bake for 30-35 minutes until a toothpick comes out with a few moist crumbs.
- Let the brownies cool in the pan for at least 1 hour before cutting.
Leave a Reply