
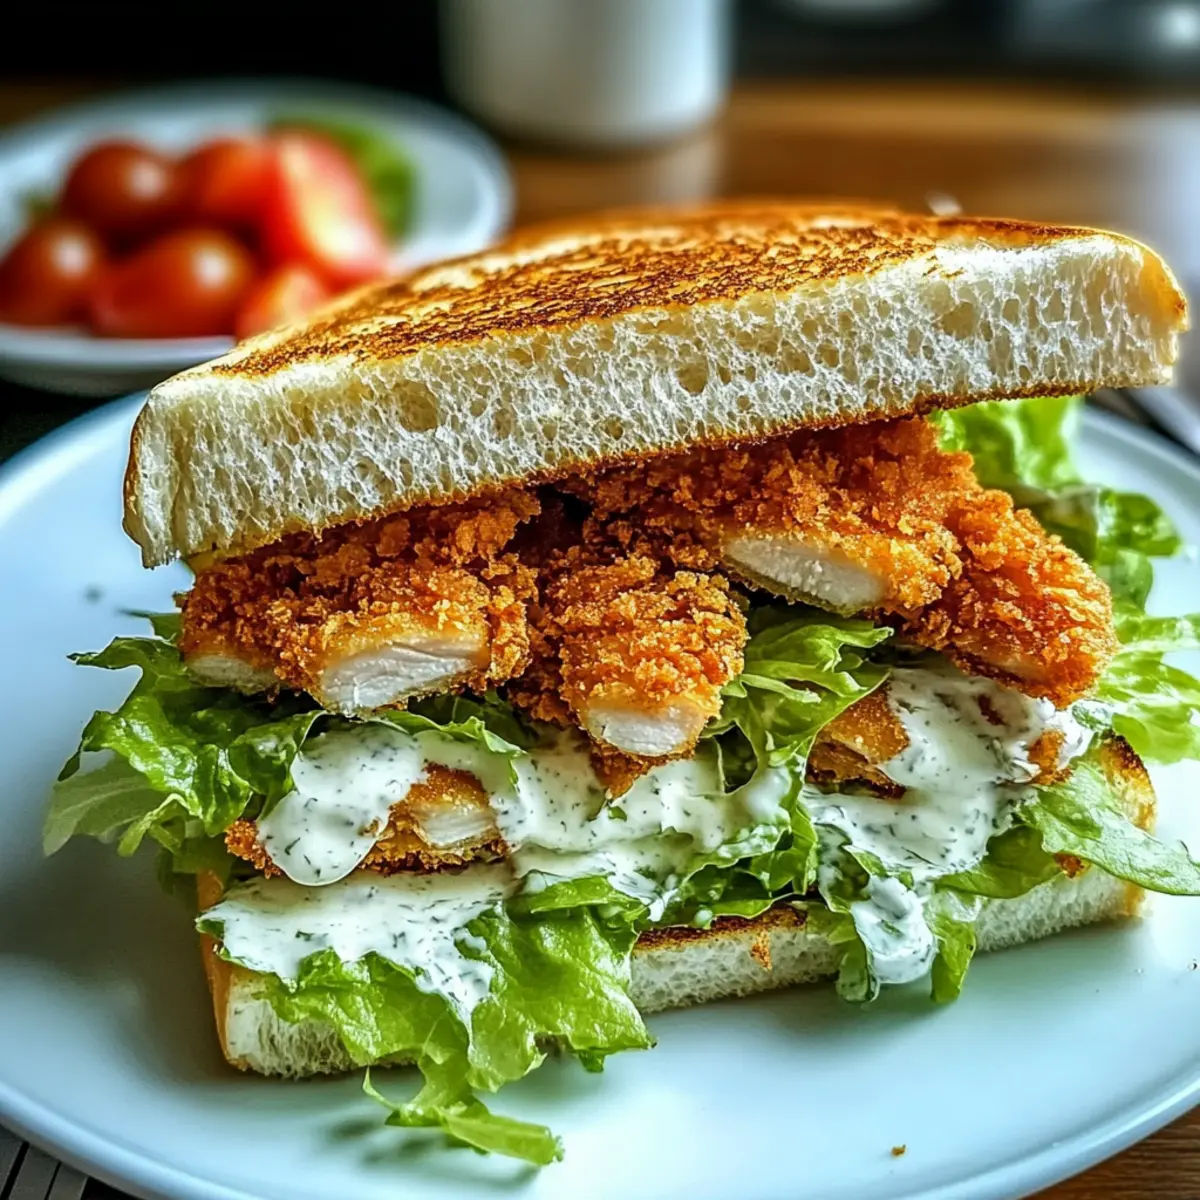
As I pulled out the golden-brown chicken from the oven, the crispy aroma wafted through my kitchen, instantly transporting me to a bustling bistro. This Crunchy Chicken Caesar Sandwich is my go-to recipe when I crave something hearty yet easy to whip up. With juicy, panko-coated chicken nestled between perfectly grilled sourdough slices, this sandwich not only satisfies hunger but also elevates weeknight dinners into a gourmet experience. Plus, it’s a fantastic way to introduce your loved ones to homemade flavors that are far better than fast food. Are you ready to bring a taste of restaurant-style dining into your home?

Why is this Chicken Caesar Sandwich irresistible?
Crunchy Texture: The panko breadcrumbs create a satisfyingly crispy outer layer that’s simply addictive.
Flavor Explosion: Creamy Caesar dressing combined with Parmesan cheese adds a burst of savory goodness.
Easily Customizable: Feel free to swap chicken thighs or add toppings like avocado to fit your taste.
Quick to Make: This dish comes together seamlessly, making it perfect for busy weeknights.
Crowd-Pleaser: With its delicious layers, this sandwich will impress family and friends, outshining any fast food option. If you love flavorful meals, try pairing it with a refreshing side salad, or if you’re in the mood for something comforting, a bowl of vegetable soup might be your best bet!
Crunchy Chicken Caesar Sandwich Ingredients
For the Chicken
- Chicken Breasts – Lean yet juicy, they provide a tender base for the crunchy coating. Substitute with boneless, skinless chicken thighs for more flavor and moisture.
- Panko Breadcrumbs – Light, airy breadcrumbs that create a crispy texture without absorbing too much oil. Use regular breadcrumbs if panko is unavailable.
- Grated Parmesan Cheese – Adds nutty flavor and helps bind the breadcrumb coating. Substitute with Pecorino Romano for a sharper taste.
- Salt and Black Pepper – Essential for enhancing the chicken’s natural flavor. Adjust based on personal taste.
- Olive Oil – Used for browning the chicken; its fruity flavor complements the dish. Can be substituted with vegetable oil if necessary.
For the Sandwich Assembly
- Romaine Lettuce – Fresh and crunchy, it offers a light contrast to the rich chicken and dressing. Other greens like iceberg or kale can work as alternatives.
- Caesar Dressing – Creamy, tangy, and garlicky, it enhances the flavor profile of the sandwich. Opt for homemade or store-bought varieties.
- Sourdough Bread – Provides a sturdy base that crisps beautifully. Whole-grain or gluten-free breads can be used as healthier alternatives.
- Butter – Brushed on the bread for grilling; it adds richness. Can be omitted for a lighter option.
- Cherry Tomatoes (optional) – Adds sweetness and freshness; can be replaced with slices of cucumber or omitted entirely.
Are you ready to gather these ingredients and create your very own Crunchy Chicken Caesar Sandwich that’s bound to become a family favorite? Let’s make it happen!
Step‑by‑Step Instructions for Crunchy Chicken Caesar Sandwich
Step 1: Preheat the Oven
Begin by preheating your oven to 375°F (190°C). This ensures an even cooking temperature for the chicken, which is crucial for achieving that perfectly crunchy coating. Prepare a baking sheet lined with parchment paper to place the chicken on after browning, creating an easy cleanup later.
Step 2: Prepare the Coating
In a shallow dish, mix together the panko breadcrumbs and grated Parmesan cheese until well combined. This mixture will create a crispy exterior for your chicken. Make sure the dish is wide enough to accommodate the chicken breasts, allowing for an even coat of the crunchy mixture.
Step 3: Season the Chicken
Season both sides of your chicken breasts generously with salt and black pepper. This step enhances the natural flavor of the chicken and ensures that every bite of your Crunchy Chicken Caesar Sandwich is savory and satisfying. The seasoning serves as a flavorful foundation for your crispy coating.
Step 4: Coat the Chicken
Dredge each seasoned chicken breast in the panko and Parmesan mixture, pressing gently to ensure an even coat. Make sure the chicken is completely covered to achieve maximum crunchiness when cooked. This step creates a tantalizing golden-brown crust that will elevate your sandwich.
Step 5: Brown the Chicken
In a skillet, heat a tablespoon of olive oil over medium heat until shimmering. Add the coated chicken breasts and cook for about 3 minutes per side, or until they turn a beautiful golden brown. This step locks in moisture while building flavor, showcasing the irresistibly crunchy texture essential for the sandwich.
Step 6: Bake the Chicken
Carefully transfer the browned chicken to your preheated baking sheet. Bake in the oven for 15–20 minutes, or until the internal temperature reaches 165°F (74°C). This ensures that your chicken is thoroughly cooked and juicy, creating the ideal filling for your Crunchy Chicken Caesar Sandwich.
Step 7: Prepare the Bread
While the chicken is baking, take the sourdough bread slices and butter one side of each. This step is crucial for achieving a beautifully grilled, crispy exterior. Set the bread aside while waiting for the chicken, allowing you to focus on perfecting the next step.
Step 8: Grill the Bread
In a pan over medium heat, place the slices of sourdough bread, butter-side down. Grill until golden and crispy, approximately 3-4 minutes. Keep an eye on the bread to prevent burning; a perfectly grilled slice enhances the overall texture of your Crunchy Chicken Caesar Sandwich.
Step 9: Slice the Chicken
Once the chicken is done baking, let it rest for a couple of minutes to retain moisture. Then, slice the chicken breasts into strips. This technique makes it easy to layer in your sandwich while also allowing every bite to be filled with delicious flavors and texture.
Step 10: Toss the Lettuce
In a large bowl, combine chopped Romaine lettuce with your Caesar dressing, tossing until well-coated. This step not only adds fresh crunch but also infuses every bite of your Crunchy Chicken Caesar Sandwich with creamy, garlicky goodness that complements the crispy chicken.
Step 11: Assemble the Sandwich
To build your Crunchy Chicken Caesar Sandwich, start with a slice of grilled sourdough. Layer it with dressed Romaine, followed by the sliced chicken. For added freshness, you can throw in optional cherry tomatoes or more greens, and finish with another slice of bread, creating a hearty meal.
Step 12: Serve Immediately
Serve your delicious Crunchy Chicken Caesar Sandwich right away while everything is warm and crispy. The delightful contrast between the crunchy chicken, creamy dressing, and toasted bread is an experience best enjoyed fresh, out of the skillet and oven!

Expert Tips for Crunchy Chicken Caesar Sandwich
-
Perfect Coating: Ensure the chicken is thoroughly coated in breadcrumbs to achieve an even crunch; this is essential for your Crunchy Chicken Caesar Sandwich.
-
Rest for Juiciness: After baking, let the chicken rest briefly. This simple step helps retain its moisture, ensuring every bite is juicy.
-
Use a Thermometer: Employ a meat thermometer to confirm chicken doneness. Aim for an internal temperature of 165°F (74°C) for safety and perfect results.
-
Avoid Skillet Crowding: When browning the chicken, don’t overcrowd the skillet; this ensures maximum crispiness and even cooking.
-
Customize Greens: Feel free to swap Romaine for other greens, such as arugula or spinach, adding a unique flavor twist to your sandwich.
-
Grill with Care: Watch the bread closely while grilling it to a golden brown—nobody enjoys burnt sandwiches!
Make Ahead Options
These Crunchy Chicken Caesar Sandwiches are perfect for busy weeknights! You can prepare the chicken by coating it in the panko and Parmesan mixture up to 24 hours in advance and refrigerate it in an airtight container. Additionally, slice the sourdough bread and wash the Romaine lettuce so they’re ready to go when you’re set to assemble. Just before serving, sear the chicken and bake as directed—this ensures the coating remains crispy. Toss the lettuce with Caesar dressing just before filling the sandwiches to keep everything fresh and crunchy. Enjoy delicious homemade flavors with minimal effort by preparing ahead!
What to Serve with Crunchy Chicken Caesar Sandwich
Elevate your meal experience with delightful sides that complement the crispy magic of this sandwich.
-
Crispy Sweet Potato Fries: Their natural sweetness and contrasting crunch make them the perfect companion to your savory sandwich, enhancing your dining experience. Dip them in a garlic aioli for an extra punch!
-
Fresh Garden Salad: A light salad dressed with a vinaigrette adds freshness and balances the hearty flavors of the sandwich. Toss in seasonal vegetables for a colorful touch.
-
Classic Tomato Soup: Serve alongside a warm, comforting bowl of tomato soup for a delightful dip. The creamy texture complements the crispy chicken beautifully, creating a cozy vibe.
-
Zesty Coleslaw: Crunchy coleslaw offers a tangy crunch that beautifully pairs with the rich flavors of the chicken. Its refreshing essence brightens the overall meal experience.
-
Garlic Bread: Pairing with warm, buttery garlic bread adds a rich and satisfying element, making every bite simply irresistible. The aroma alone is enough to make your mouth water!
-
Chilled White Wine: A glass of crisp white wine will elevate your meal further, balancing out the savory notes of the sandwich with its refreshing acidity. For a non-alcoholic option, sparkling water with a slice of lemon is divine!
Crunchy Chicken Caesar Sandwich Variations
Feel free to get creative with this delightful recipe and make it truly your own!
-
Chicken Thighs: Swap chicken breasts for thighs for a richer, juicier flavor that takes your sandwich to the next level. Thighs are forgiving and maintain moisture beautifully during cooking.
-
Different Cheeses: Try using Mozzarella or Gouda for a creamier texture that melds wonderfully with the crunchy chicken. Each cheese offers a unique depth of flavor that elevates the overall experience.
-
Bacon Blast: Adding crispy bacon slices introduces a smoky layer to the flavor profile of your sandwich. The savory crunch melds perfectly with the Caesar dressing, creating an indulgent treat.
-
Heat Level: Spice it up with a sprinkle of cayenne pepper or a drizzle of hot sauce in the dressing. This addition brings a satisfying warmth that contrasts beautifully with the creamy elements of the sandwich.
-
Extra Greens: Instead of just Romaine, combine various greens like arugula or spinach for a peppery bite. Mixing greens not only enhances health benefits but adds an exciting crunch that will surprise your taste buds!
-
Avocado Creaminess: Daily life can be hectic, so adding creamy avocado slices boosts the heartiness and keeps the sandwich moist. As a bonus, it provides healthy fats that enhance flavor and nutrition.
-
Pickled Veggies: For a tangy twist, layer in some pickled red onions or cucumbers. Their acidity cuts through the richness, offering a delightful contrast that brightens every bite of your sandwich.
-
Flavor Packed Sandwich: While you’re at it, consider trying a rich, satisfying Flavor Packed Sandwich to indulge other preferences in your family’s culinary journey!
No matter the path you choose for your Crunchy Chicken Caesar Sandwich, the magical blend of flavors will surely warm hearts and create lasting memories around the table!
Storage Tips for Crunchy Chicken Caesar Sandwich
Fridge: Store leftover chicken, lettuce, and dressing in airtight containers separately for up to 3 days to maintain freshness and crispness.
Freezer: If you want to freeze the chicken, wrap it tightly in plastic wrap and then in aluminum foil. It can be stored for up to 2 months; reheat in the oven for best results.
Reheating: When it’s time to enjoy leftovers, reheat the chicken in the oven to restore its crunch. Add fresh lettuce and dressing just before serving for your Crunchy Chicken Caesar Sandwich.
Crunchy Chicken Caesar Sandwich Recipe FAQs
How can I select the best chicken for this recipe?
Absolutely! For the Crunchy Chicken Caesar Sandwich, choose lean, boneless, skinless chicken breasts for a tender bite. If you prefer more flavor and moisture, boneless, skinless chicken thighs are a fantastic substitute. Look for chicken that is pink in color and firm to the touch, avoiding any that has dark spots or an off smell.
What is the best way to store leftover components of the sandwich?
To keep your leftovers fresh, store the chicken, lettuce, and Caesar dressing separately in airtight containers. Refrigerate them for up to 3 days. This will ensure that the bread doesn’t get soggy and that the chicken retains its crunch when reheated, providing a delightful meal even days later!
Can I freeze the chicken for later use?
Yes! To freeze the chicken, wrap it tightly in plastic wrap, and then place it in a freezer-safe bag or container to prevent freezer burn. It can be stored for up to 2 months. When you’re ready to enjoy it, simply thaw in the refrigerator overnight and reheat in the oven at 375°F (190°C) until warmed through and crispy again.
What if my chicken isn’t browning properly in the skillet?
Very well! If your chicken isn’t browning as expected, ensure that your skillet is preheated adequately before adding the chicken. Avoid overcrowding the skillet, as too much chicken at once can trap steam and prevent browning. If needed, cook the chicken in batches. A good golden-brown crust is key to the Crunchy Chicken Caesar Sandwich!
Are there any dietary considerations for this recipe?
Absolutely! This Crunchy Chicken Caesar Sandwich can be tailored to meet various dietary needs. If you’re avoiding gluten, opt for gluten-free breadcrumbs and bread. For dairy-free options, use a dairy-free cheese alternative and a vinaigrette in place of Caesar dressing. Always ensure to check for potential allergens if you’re serving guests with allergies, like any for the cheese or dressing ingredients.
How can I elevate the flavor more in this sandwich?
The more the merrier! Consider adding freshly squeezed lemon juice or zest to the Caesar dressing for a refreshing twist. You can also include toppings like crispy bacon, avocado slices, or even a sprinkle of red pepper flakes for a spicy kick. Experimenting with different greens, like kale or arugula, can also give your Crunchy Chicken Caesar Sandwich a new spin!

Crunchy Chicken Caesar Sandwich
Ingredients
Equipment
Method
- Preheat your oven to 375°F (190°C) and prepare a baking sheet lined with parchment paper.
- Mix together the panko breadcrumbs and grated Parmesan cheese in a shallow dish.
- Season both sides of the chicken breasts with salt and black pepper.
- Dredge each chicken breast in the panko and Parmesan mixture, ensuring an even coat.
- Heat olive oil in a skillet over medium heat and brown the chicken breasts for 3 minutes per side.
- Transfer the browned chicken to the baking sheet and bake for 15-20 minutes, until the internal temperature reaches 165°F (74°C).
- Butter one side of each slice of sourdough bread and set aside.
- Grill the slices of sourdough bread, butter-side down, until golden and crispy.
- Slice the baked chicken breasts into strips after resting for a couple of minutes.
- In a large bowl, combine chopped Romaine lettuce with Caesar dressing.
- Assemble the sandwich by layering the grilled sourdough, dressed Romaine, sliced chicken, cherry tomatoes, and finishing with another slice of bread.
- Serve immediately while warm.
Leave a Reply