
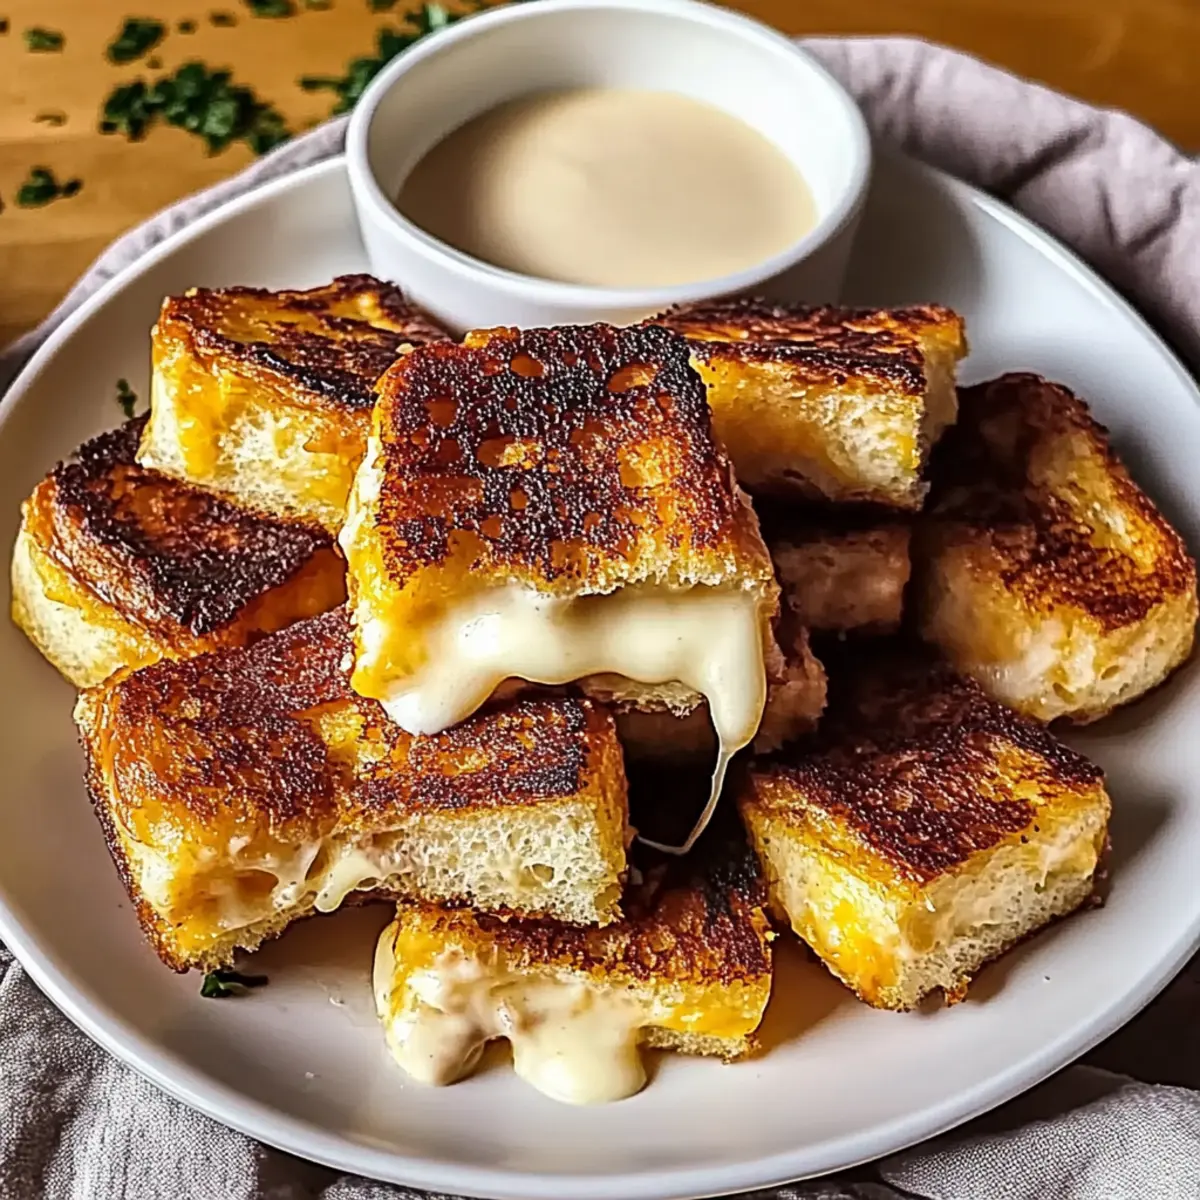
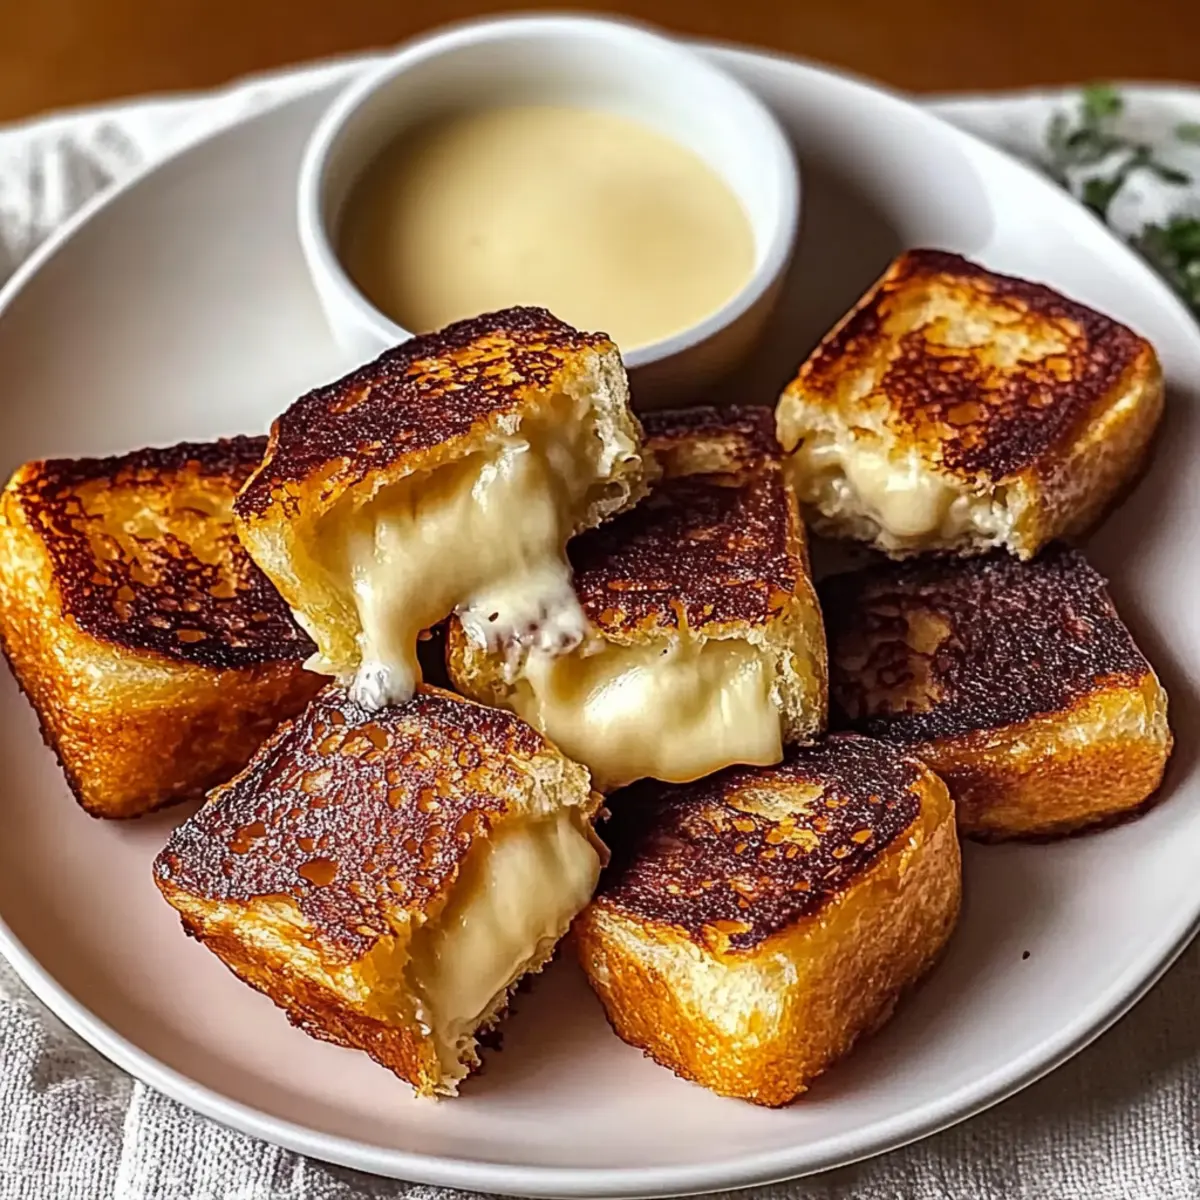
As I flipped through my favorite cookbook nestled on the kitchen counter, a moment of inspiration hit me—what if I transformed my go-to grilled cheese into something extraordinary? Enter the Hawaiian Roll Grilled Cheese, a delicious twist that combines fluffy Hawaiian rolls with melted cheese. This irresistible recipe offers not just an easy, comforting meal but also a customizable canvas for your culinary creativity. Whether you’re seeking a quick snack or an indulgent treat for cozy movie nights, this grilled cheese will surely delight! So grab your favorite cheese and let’s dive into this sweet and savory experience. What delicious twist will you add to your sandwich creation?

Why is Hawaiian Roll Grilled Cheese a Must-Try?
Irresistible Comfort Food: The Hawaiian Roll Grilled Cheese elevates the classic sandwich to a new level of deliciousness. Customizable Flavors: Experiment with various cheeses like gouda or pepper jack, and add fun toppings such as jalapeños or crispy bacon for extra flair. Quick & Easy: With minimal prep time and simple ingredients, this recipe is perfect for busy evenings when you crave something wholesome. Texture Perfection: Enjoy the crunchy, golden-brown exterior that gives way to a gooey, cheesy center, making every bite a delightful experience. For a satisfying pairing, try serving it with a side of Broccoli Potato Cheese—a comforting complement to this sweet and savory treat!
Hawaiian Roll Grilled Cheese Ingredients
For the Sandwich
• Hawaiian Rolls – The sweet, fluffy base that makes this grilled cheese extra special. Substitute with brioche or sourdough for a twist!
• Cheese of Choice (e.g., cheddar, pepper jack) – Provides that ooey-gooey meltiness. Mix cheeses for added depth of flavor or add spice with pepper jack.
• Butter – Essential for achieving a deliciously golden-brown crust. Don’t skimp—generous amounts are key for the best results!
Optional Toppings
• Jalapeños – Add a spicy kick to your sandwich; perfect for those who enjoy a little heat!
• Caramelized Onions – Sweet and savory, these elevate the flavor profile and add a delightful texture.
• Crispy Bacon – A crunchy, smoky addition that pairs perfectly with the sweet rolls.
Enjoy crafting your Hawaiian Roll Grilled Cheese with these ingredient options!
Step‑by‑Step Instructions for Hawaiian Roll Grilled Cheese
Step 1: Prepare Ingredients
Start by gathering your Hawaiian rolls and cheese of choice, as well as some butter for that perfect crispy crust. Carefully slice each roll in half, taking care not to cut all the way through—this will create a delightful pocket for the cheese. Set your ingredients aside and prepare for the delicious assembly of your Hawaiian Roll Grilled Cheese.
Step 2: Heat Pan
Preheat a non-stick skillet over medium heat—this is key to achieving that golden-brown crust. While the pan heats up, generously butter the insides of each half of the Hawaiian rolls. Ensure every corner is covered to infuse richness and flavor, guaranteeing an extraordinary grilling experience for your Hawaiian Roll Grilled Cheese.
Step 3: Assemble Sandwich
Once your skillet is hot, place one buttered roll half in the pan, cut side up. Layer generously with your favorite cheese, allowing for some melting overflow, then top with the other roll half, pressing down slightly. This step is crucial for melding those delicious flavors and achieving the iconic gooeyness that makes a Hawaiian Roll Grilled Cheese so comforting.
Step 4: Grill
Cook the sandwich in the skillet for about 3-4 minutes or until the bottom side is golden brown and crispy. Keep an eye on it to avoid burning; you want that ideal toasty exterior. Once beautifully brown, flip the sandwich carefully and let it cook on the other side, repeating the process until it achieves a glorious golden finish.
Step 5: Melt Cheese
If the cheese isn’t melting evenly on the second side, cover the skillet with a lid for a minute or two. This will trap heat and help the cheese melt thoroughly while the bread continues to brown. After another 3-4 minutes, you should have a perfectly golden Hawaiian Roll Grilled Cheese with a gooey, delicious center.
Step 6: Slice and Serve
Let your sandwich cool for a minute before gently slicing it in half to reveal that irresistible melting interior. Serve it hot, perhaps accompanied by your favorite dipping sauce or just enjoy it as is. Dive into your Hawaiian Roll Grilled Cheese, savoring the sweetness of the rolls balanced with the rich, melted cheese—a truly delightful homemade treat!
Expert Tips for Hawaiian Roll Grilled Cheese
• Heat Management: Cook on medium-low heat to prevent burning. Patience is key for achieving that perfect golden-brown crust without sacrificing flavor.
• Cheese Combinations: Try mixing different cheese varieties for a gourmet touch. Cheddar, gouda, and smoky cheeses work wonders together for your Hawaiian Roll Grilled Cheese!
• Creative Toppings: Experiment with toppings like avocado, sliced tomatoes, or even a drizzle of balsamic reduction to elevate your sandwich’s flavor profile.
• Keep it Fluffy: Don’t press the sandwich too hard while grilling; you want to maintain that fluffy texture of the Hawaiian rolls while achieving gooeyness.
• Quick Clean-Up: Use parchment paper or let the skillet cool before cleaning. It makes for an easier clean-up, especially if the cheese melts over the sides!
Hawaiian Roll Grilled Cheese Variations
Feel free to get creative with your Hawaiian Roll Grilled Cheese and explore these delicious twists!
- Cheese Variety: Mix different cheeses like gouda or mozzarella for a delightful flavor experience. Each cheese brings its unique melting qualities, enhancing the overall indulgence of the sandwich.
- Spicy Kick: Add jalapeños or a dash of hot sauce for those who love a little heat. The warmth adds depth, contrasting beautifully with the sweetness of the rolls!
- Savory Bread Swap: Try using crusty sourdough or a savory brioche to elevate the flavors. The change in texture will offer a delightful surprise in every bite.
- Caramelized Onions: These sweet, tender additions can elevate your grilled cheese to gourmet status, creating a beautiful balance of flavor. The warm sweetness melds perfectly with the melted cheese, making your sandwich simply irresistible.
- Avocado Slice: Add fresh avocado for a creamy texture and refreshing taste. It’s a wonderful way to pack in healthy fats and a splash of green color!
- Herb and Garlic Butter: Instead of plain butter, mix in garlic and fresh herbs. The aromatic infusion will take your grilled cheese to a whole new level of deliciousness. Think of that delightful aroma while it cooks!
- Loaded Topper: Top your grilled cheese with some crispy bacon and fresh arugula after it’s cooked. This gives a fantastic crunch and a peppery bite that brightens up the flavors.
- Sweet Add-ons: For a unique twist, sprinkle some crumbled feta cheese or add a drizzle of honey after grilling. The sweet-salty combination is perfect for adventurous eaters.
Each variation opens a world of flavors waiting to be explored. And if you’re on the lookout for more ideas, consider pairing your grilled cheese with a side of Savory Herb Cheese or a comforting bowl of Broccoli Potato Cheese. Happy cooking!
Make Ahead Options
These Hawaiian Roll Grilled Cheese sandwiches are fantastic for meal prep! You can assemble the sandwiches up to 24 hours in advance. Simply prepare the sandwich by buttering and layering cheese in between the Hawaiian rolls, then press them together (without grilling). Wrap each sandwich tightly in plastic wrap and place them in the refrigerator to maintain freshness. When you’re ready to enjoy, heat your skillet over medium low and grill the sandwiches for about 3-4 minutes on each side until golden brown. Covering the skillet for a brief period can help melt the cheese evenly. This way, you’ll have a delightful homemade grilled cheese ready in a flash, perfect for busy weeknights!
How to Store and Freeze Hawaiian Roll Grilled Cheese
Fridge: Keep leftovers in an airtight container for up to 2 days to maintain freshness and avoid sogginess. Simply reheat on low in a skillet for the best texture.
Freezer: If you’ve made extra sandwiches, wrap them tightly in plastic wrap followed by aluminum foil, and you can freeze them for up to 3 months. Thaw overnight in the fridge before reheating.
Reheating: For the best results, reheat in a skillet over low heat. This method helps retain that crispy crust while ensuring the cheese melts beautifully inside.
Enjoying Leftovers: Consider dipping them in tomato soup or a spicy aioli for a delightful twist on your homemade Hawaiian Roll Grilled Cheese!
What to Serve with Hawaiian Roll Grilled Cheese?
Creating a memorable meal is all about delightful pairings that enhance every bite of your comforting sandwich.
-
Tomato Soup: This classic pairing creates a comforting balance of flavors, perfectly complementing the richness of the cheese. Dipping your sandwich into the warm, tangy soup makes for a nostalgic experience.
-
Crispy Side Salad: A light, fresh salad with mixed greens and a zesty vinaigrette cuts through the heaviness of the cheese. The crunchy texture and vibrant flavors elevate the overall dish, inviting more joy to your table.
-
Roasted Sweet Potatoes: Their natural sweetness pairs beautifully with the Hawaiian Roll Grilled Cheese. The contrasting textures—crispy on the outside, tender inside—bring an exciting variety to your meal.
-
Sweet Pickles or Relish: Offering tangy crunch, sweet pickles provide a delightful contrast to the creamy, cheesy goodness in every bite. The sharpness cuts through the richness, making each mouthful more dynamic.
-
Hawaiian Fruit Salad: Bright and tropical, a mix of pineapple, mango, and coconut echoes the Hawaiian flavor in your sandwich. It’s a refreshing and colorful side that adds a burst of sweetness to your meal.
-
Sparkling Lemonade: A crisp, refreshing drink that counterbalances the richness of the grilled cheese. The zesty notes awaken your palate, making each bite and sip a delightful experience!
Hawaiian Roll Grilled Cheese Recipe FAQs
What type of Hawaiian rolls should I use for this recipe?
You can use traditional Hawaiian rolls, which bring that sweet and fluffy texture that makes this grilled cheese super special. Alternatively, brioche or sourdough can add varied flavors and textures, so feel free to experiment!
How should I store leftovers of the Hawaiian Roll Grilled Cheese?
Absolutely! Store your leftover Hawaiian Roll Grilled Cheese in an airtight container in the fridge for up to 2 days. When you’re ready to enjoy, reheat it in a skillet over low heat to maintain that crispy crust while ensuring the cheese inside gets nice and melty.
Can I freeze the Hawaiian Roll Grilled Cheese?
Yes, you can! Wrap each sandwich tightly in plastic wrap followed by aluminum foil to prevent freezer burn. They can be frozen for up to 3 months. When you’re ready to eat, thaw them overnight in the fridge and reheat in a skillet for the best texture!
What are some common issues when making this grilled cheese?
One common issue is the cheese not melting properly. If this happens, simply cover your skillet with a lid after flipping the sandwich. This traps heat inside, helping the cheese to melt evenly without burning the bread. Remember also not to cook on too high a heat—you want those perfect grill marks without a charred flavor.
Are there any dietary considerations for the Hawaiian Roll Grilled Cheese?
Definitely! If you’re cooking for someone with dietary restrictions, you can make it vegetarian by using plant-based cheese options and ensuring your rolls are free from dairy. Also, keep an eye on any allergens in your toppings—jalapeños or certain cured meats may not be suitable for all diets. Always double-check labels if allergies are a concern!
Can I customize the toppings on my Hawaiian Roll Grilled Cheese?
Very much! The beauty of this recipe is in its customization. Add toppings like jalapeños for heat, caramelized onions for sweetness, or even crispy bacon for that savory bite! Experiment with whatever flavors you love, and make it your own.

Irresistible Hawaiian Roll Grilled Cheese: Your New Comfort Food
Ingredients
Equipment
Method
- Start by gathering your Hawaiian rolls and cheese of choice, as well as some butter for that perfect crispy crust. Carefully slice each roll in half, setting your ingredients aside.
- Preheat a non-stick skillet over medium heat. Generously butter the insides of each half of the Hawaiian rolls.
- Place one buttered roll half in the pan, cut side up. Layer with your favorite cheese and top with the other roll half, pressing down slightly.
- Cook the sandwich for about 3-4 minutes until golden brown and crispy, then flip carefully and cook the other side until browned.
- If the cheese isn't melting evenly, cover the skillet with a lid for a minute or two, then continue to cook until golden.
- Let your sandwich cool for a minute before gently slicing in half. Serve hot, enjoying the sweetness balanced with rich, melted cheese.
Leave a Reply