
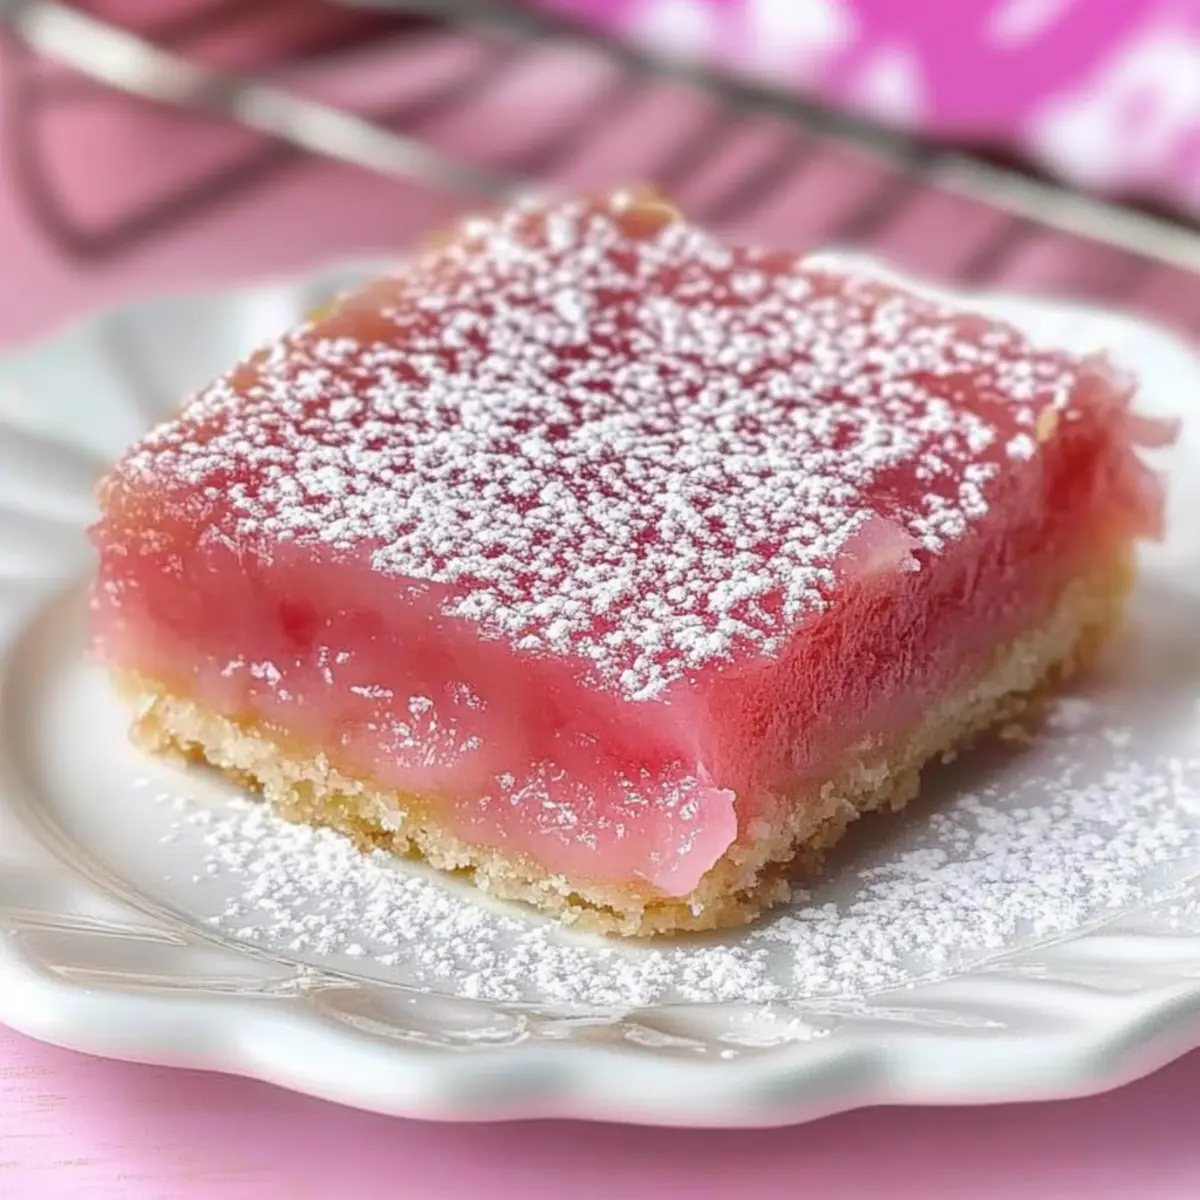
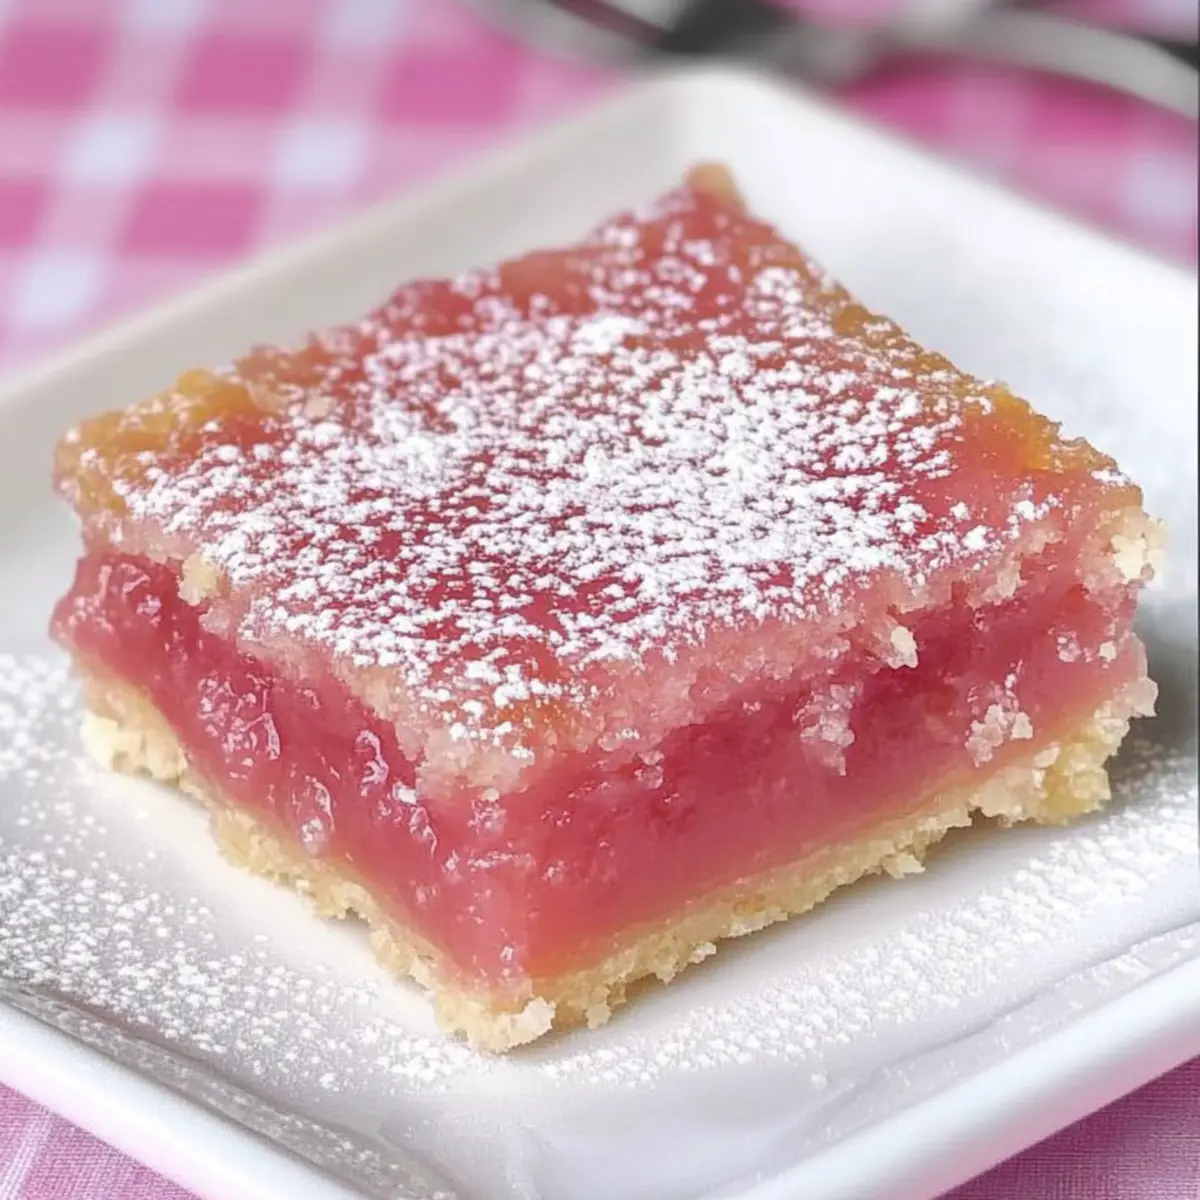
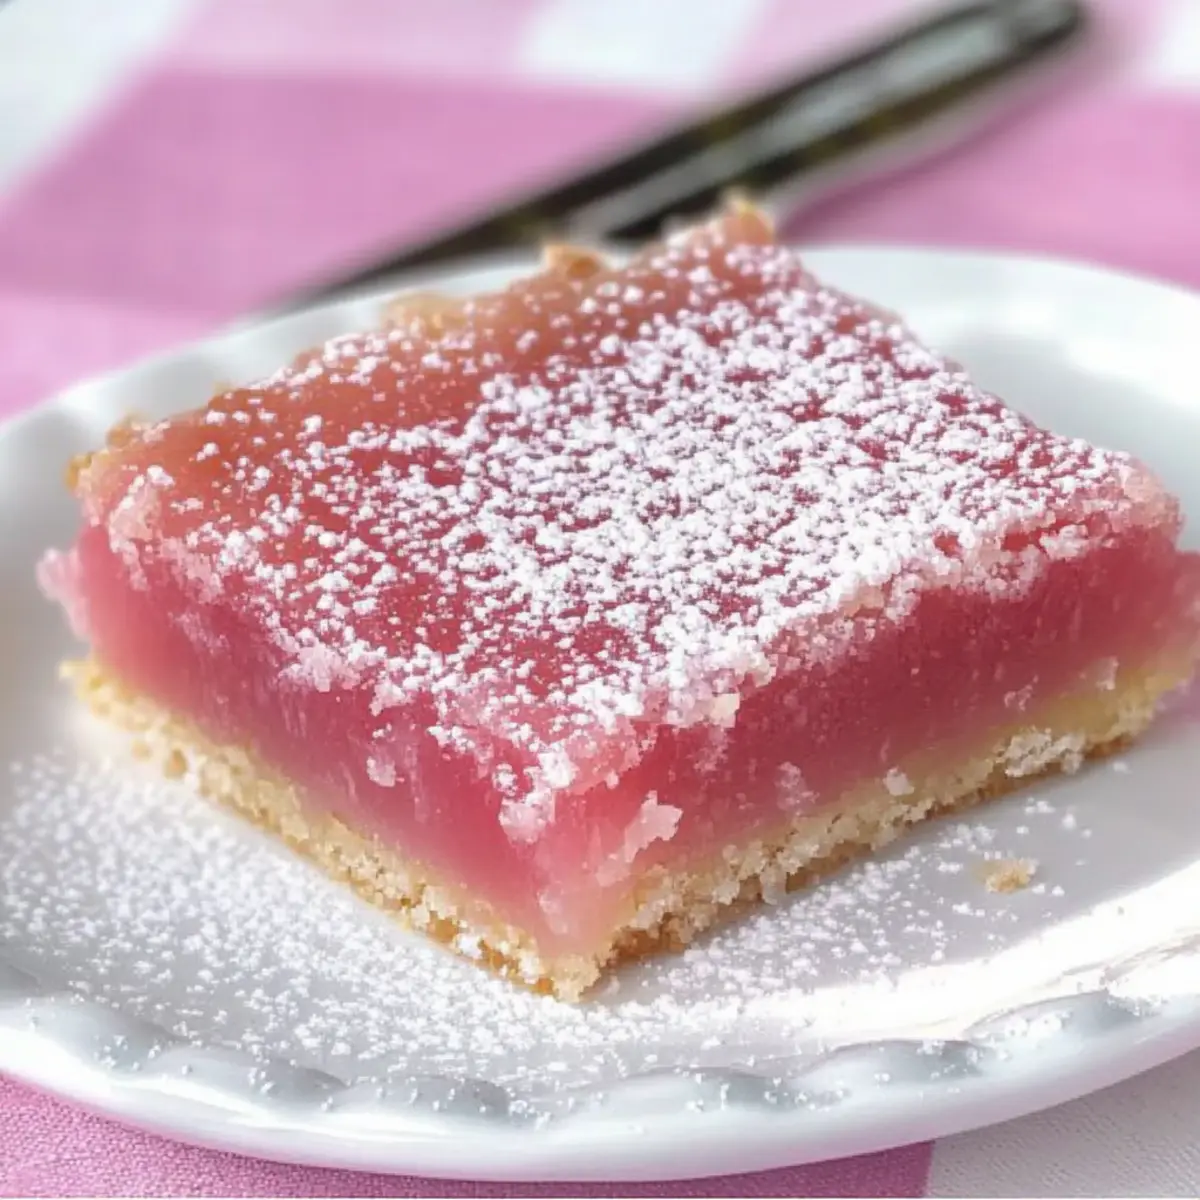
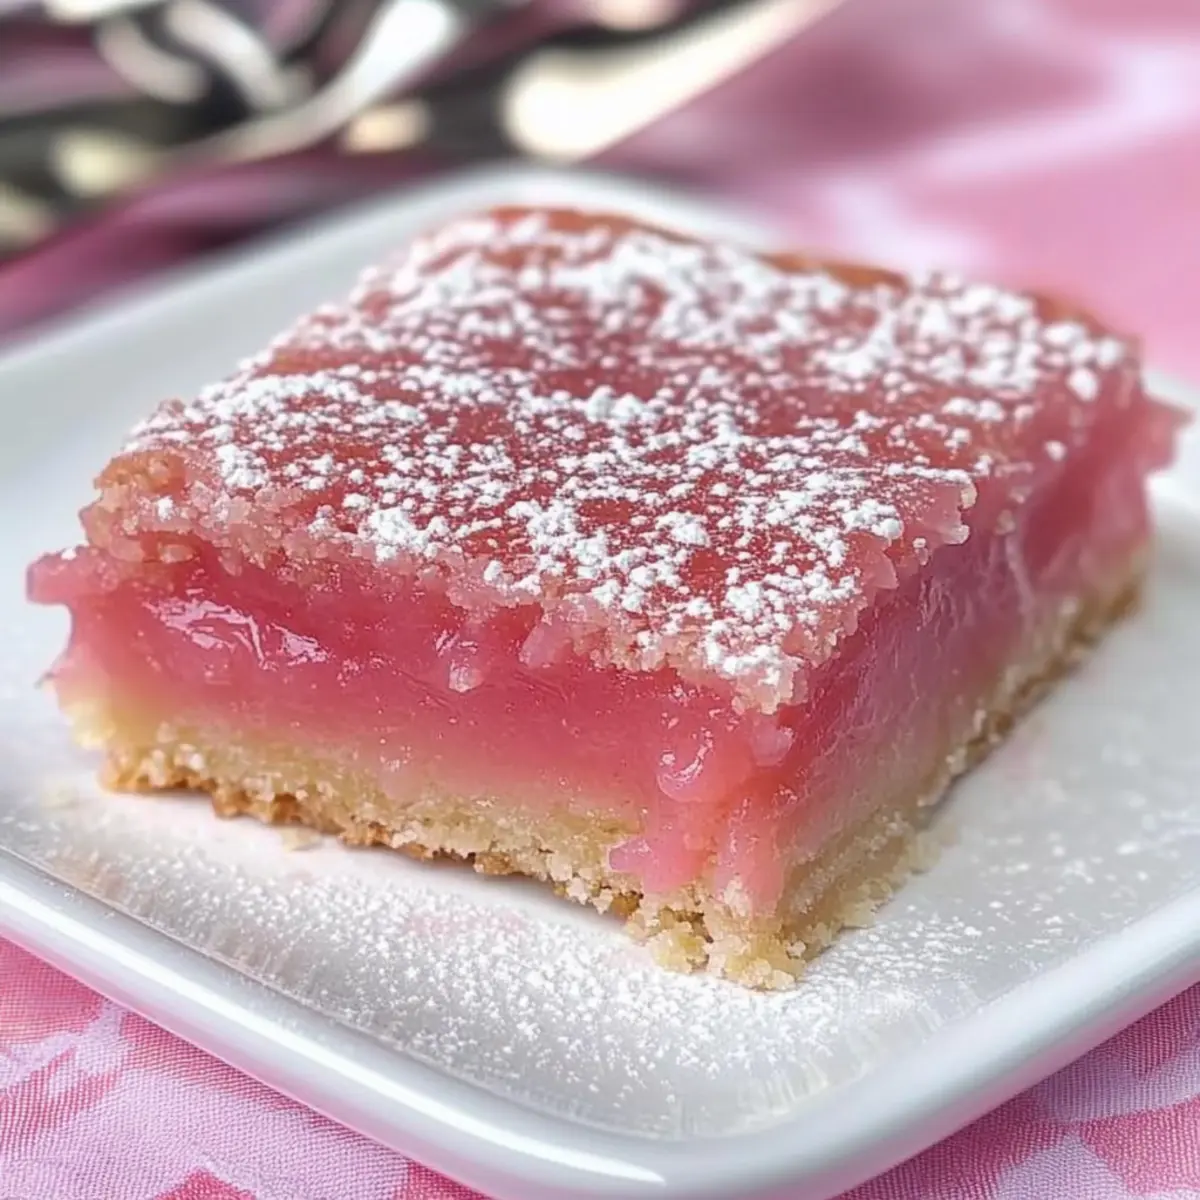
As I took a bite of the Hibiscus Lemon Bars, the vibrant pink hue captured my senses, instantly transporting me to a sunny afternoon picnic. These delightful treats marry a tangy lemon filling with the fruity notes of dried hibiscus, creating a symphony of flavors that tantalizes the taste buds. What I love most about these Hibiscus Lemon Bars is their quick prep time, making them perfect for unexpected guests or a sweet finishing touch to weeknight dinners. Plus, they’re packed with vitamin C, offering a tasty way to boost your day! Curious how we transform simple ingredients into these stunning treats? Let’s dive right into the recipe!
Why Hibiscus Lemon Bars Will Delight You
Vibrant, Eye-Catching Color: These bars boast a stunning pink hue that makes them an instant showstopper at any gathering.
Simple Prep Procedure: With just a few steps, you’ll have these Hibiscus Lemon Bars prepped and ready to bake in no time.
A Tangy Flavor Dance: The zesty lemon combined with the fruity notes of hibiscus creates a unique tartness that will leave your taste buds singing.
Vitamin C Boost: Packed with vitamin C, these bars not only satisfy your sweet tooth but also offer nutritional benefits.
Perfect for Any Occasion: Be it dinner parties or cozy afternoons with tea, these bars add a deliciously refreshing touch to any dessert table. If you’re in the mood for something equally delightful, consider trying Lemon Meltaways Buttery as well!
Hibiscus Lemon Bars Ingredients
• To create these delightful Hibiscus Lemon Bars, gather the following ingredients and get ready for a flavor explosion!
For the Crust
- Unsalted Butter – 1/2 cup, room temperature; adds richness and flavor to the crust. Use salted butter and adjust added salt if necessary.
- Sugar – 1/4 cup; sweetens the crust. Consider coconut sugar for a different flavor profile.
- Flour – 1 cup; provides structure for the crust. Gluten-free flour may be used as a substitute.
- Pinch of Salt – enhances overall flavor; essential for balancing sweetness.
- Vanilla Bean Paste – 1 tsp; adds depth of flavor. Substitute with extract if unavailable.
For the Filling
- Fresh Squeezed Lemon Juice – 1/2 cup; primary flavoring agent, providing tartness. Meyer lemons may add a sweeter note.
- Dried Hibiscus or Hibiscus Tea – 1 Tbsp; infuses the filling with a unique berry flavor and color. Use additional hibiscus tea if desired.
- Large Eggs – 3; bind the filling and add to its creamy texture. Ensure they are at room temperature for best results.
- Sugar – 1 1/2 cups; sweetens the filling for that tart flavor balance. Alternate sweeteners like honey can be experimented with.
For Dusting
- Confectioner’s Sugar – for dusting before serving; shows off those vibrant Hibiscus Lemon Bars beautifully. May be omitted for a less sweet finish.
Step‑by‑Step Instructions for Hibiscus Lemon Bars
Step 1: Preheat the Oven
Begin by preheating your oven to 350°F (175°C). This step is essential as a properly heated oven ensures that your Hibiscus Lemon Bars bake evenly and thoroughly. As it warms, gather your ingredients and prepare your baking equipment, including a 9×9 inch baking pan lined with parchment paper for easy removal later.
Step 2: Prepare the Crust
In a mixing bowl, cream together 1/2 cup of room temperature unsalted butter and 1/4 cup of sugar until fluffy, about 2-3 minutes. Stir in 1 teaspoon of vanilla bean paste, followed by 1 cup of flour and a pinch of salt, mixing until just combined. Once blended, press this buttery mixture firmly into the bottom of your prepared baking pan, creating an even layer. Chill in the refrigerator for 15 minutes to firm up.
Step 3: Bake the Crust
After chilling, place the crust in your preheated oven and bake for 15 minutes. The edges should turn lightly golden, indicating that the crust is just starting to set. Once baked, remove it from the oven and set aside to cool slightly while keeping it at the oven temperature. This will help the filling set perfectly when poured over.
Step 4: Make the Filling
In a small bowl, steep 1 tablespoon of dried hibiscus in 1/2 cup of fresh lemon juice for 15 minutes, allowing it to infuse its vibrant color and flavor. Strain the mixture to remove the hibiscus flowers. In a separate bowl, whisk together 3 large eggs and 1 1/2 cups of sugar until smooth. Add the strained lemon-hibiscus mixture and 1/2 cup of flour, combining well to create a creamy filling.
Step 5: Assemble and Bake
Pour the smooth hibiscus lemon filling over the cooled crust, spreading it evenly with a spatula. Carefully return the baking pan to the oven and bake for 20-25 minutes. Keep an eye out for the center; it should no longer jiggle and should feel firm to the touch. The edges may slightly puff up, forming a delightful contrast to the creamy center.
Step 6: Cool and Serve
Once baked, remove your Hibiscus Lemon Bars from the oven and allow them to cool completely in the pan at room temperature. This cooling period is essential for slicing. After they have cooled, dust the top with confectioner’s sugar for a beautiful finish. Once dusted, slice into squares, and your vibrant Hibiscus Lemon Bars are ready to be enjoyed!
Hibiscus Lemon Bars to Customize
Feel free to explore new flavors and textures with these delightful Hibiscus Lemon Bars!
-
Fresh Hibiscus: Use fresh, pesticide-free hibiscus flowers for an even brighter flavor and color. Simply steep them in your lemon juice like the dried version!
-
Natural Sweeteners: Swap out regular sugar for honey or maple syrup for a more wholesome approach that adds a unique depth of sweetness.
-
Citrus Variety: Experiment with different citrus juices, like grapefruit or orange, for a refreshing new twist on tartness!
-
Creamy Coconut: Replace some of the butter with coconut oil for a slightly tropical vibe that pairs beautifully with the hibiscus flavors.
-
Nutty Crust: Add finely crushed nuts like almonds or pecans to the crust for a delightful crunch. The nutty notes will complement the tangy filling wonderfully.
-
Chocolate Drizzle: Drizzle melted dark chocolate on top before serving to add a luxurious touch that balances the tartness.
-
Spicy Kick: Incorporate a pinch of cayenne pepper or chili powder into the filling for a surprising hint of heat that enhances the flavor complexity.
For those craving a melt-in-your-mouth experience, consider trying these alongside Lemon Meltaways Buttery. They’re a sweet and buttery treat that’s sure to please!
Storage Tips for Hibiscus Lemon Bars
Fridge: Store your Hibiscus Lemon Bars in an airtight container for up to 1 week. This keeps them fresh while preserving their delightful tart flavor.
Freezer: For longer storage, freeze the bars by wrapping them tightly in plastic wrap and aluminum foil for up to 3 months. Thaw in the refrigerator before serving.
Reheating: If desired, reheat individual bars in the microwave for a few seconds to enjoy a warm treat. Dust with confectioner’s sugar before serving for added sweetness.
What to Serve with Hibiscus Lemon Bars
Brighten your dessert table with delightful pairings that complement the tangy sweetness of these vibrant bars.
- Creamy Vanilla Ice Cream: A scoop of this classic dessert adds a rich, smooth texture that balances the tartness of the lemon bars beautifully. The ice cream slowly melts, creating a luscious sauce that perfectly coats each bite.
- Fresh Berries: Serve a mix of strawberries, raspberries, and blueberries for a burst of freshness. Their natural sweetness provides a lovely contrast to the tartness of the hibiscus lemon filling. Plus, they add a pop of color to your plate!
- Whipped Cream: A dollop of fluffy whipped cream brings a lightness to each bite, enhancing the creamy filling while adding an airy touch that beautifully contrasts with the crumbly crust.
- Iced Herbal Tea: A chilled hibiscus or mint herbal tea is a refreshing drink choice, echoing the floral notes in the bars while keeping you cool on a warm day.
- Lemonade Spritzer: Combine lemonade with sparkling water for a bubbly twist that enhances the citrusy flavors in the bars. This zesty drink is an invigorating accompaniment to the sweet-tart dessert.
- Chocolate Drizzle: A light drizzling of melted chocolate over the bars offers a decadent twist that pairs well with the tart notes, creating an indulgent experience that’s hard to resist.
- Coconut Macaroons: These chewy coconut treats heighten the flavor of the hibiscus while adding an extra layer of sweetness. Their chewy texture contrasts nicely with the smooth lemon filling.
- Cheese Platter: Pairing with a selection of soft cheeses like goat cheese or brie brings a savory element that complements the sweetness, balancing the flavors beautifully.
- Lemon Meringue Pie: For the lovers of citrus desserts, this pie’s light and fluffy meringue provides a striking textural contrast while echoing the zesty notes of the hibiscus lemon bars.
Expert Tips for Hibiscus Lemon Bars
Steeping Time Matters: Make sure to steep the dried hibiscus in lemon juice long enough to achieve a vibrant color and flavor.
Mind Your Bake: Avoid over-baking the bars! They should remain slightly jiggly in the center when coming out of the oven but will set perfectly as they cool.
Crust Texture: Use a light hand when pressing the crust into the pan to keep it from becoming tough; a gentle touch will yield a crumbly, tender base.
Room Temperature Eggs: For the filling, use eggs at room temperature to create a creamier texture and to ensure even mixing.
Storage Tips: Store any leftovers in an airtight container in the refrigerator to maintain freshness, as these Hibiscus Lemon Bars taste even better chilled!
Make Ahead Options
These Hibiscus Lemon Bars are perfect for meal prep! To save time, you can prepare the crust up to 24 hours in advance; simply make it, press it into the pan, and cover it tightly with plastic wrap in the refrigerator. The filling can also be made and stored in the fridge for up to 3 days; just ensure to keep it in an airtight container to maintain its vibrant flavor. When you’re ready to bake, pour the filling over the chilled crust and bake as directed. This not only provides convenience for busy weeknights but also ensures your Hibiscus Lemon Bars are just as delicious when served!
Hibiscus Lemon Bars Recipe FAQs
What type of hibiscus should I use for the bars?
For the best results, use dried hibiscus flowers or hibiscus tea in your recipe. Dried flowers provide a more intense flavor and color. If using tea, opt for a high-quality brand, and make sure there’s no added sugar or flavors.
How should I store leftovers?
Store your Hibiscus Lemon Bars in an airtight container in the refrigerator for up to 1 week. This will help maintain their freshness and that delicious tart flavor you love. Avoid leaving them at room temperature for too long to keep the filling from becoming overly soft.
Can I freeze Hibiscus Lemon Bars?
Absolutely! To freeze them, wrap the bars tightly in plastic wrap or foil, and then place them in a freezer-safe container. They can be stored for up to 3 months. To enjoy them, simply thaw in the refrigerator overnight before serving.
What if my filling doesn’t set properly?
If you find that your filling is still jiggly after baking, it might need a little more time in the oven. Bake for an additional 5 minutes, checking regularly. Remember, the bars will firm up as they cool, so allow them to rest completely at room temperature before slicing.
Can these bars be made gluten-free?
Yes! You can easily make Hibiscus Lemon Bars gluten-free by substituting regular flour with a 1:1 gluten-free flour blend. Just ensure the blend has xanthan gum or another binding agent to provide the necessary structure.
Are Hibiscus Lemon Bars safe for pets?
While hibiscus is generally safe in small amounts for humans, it’s essential to note that not all plants are safe for pets. Avoid giving these bars to dogs or cats, as sugar and certain citrus ingredients can upset their stomachs. Always consult your vet if you’re unsure about specific ingredients.
Hibiscus Lemon Bars That Brighten Your Dessert Game
Ingredients
Equipment
Method
- Preheat your oven to 350°F (175°C) and prepare a 9x9 inch baking pan lined with parchment paper.
- Cream together 1/2 cup of unsalted butter and 1/4 cup of sugar until fluffy, then mix in 1 tsp of vanilla bean paste, 1 cup of flour, and a pinch of salt.
- Press the mixture into the base of the prepared pan and chill in the refrigerator for 15 minutes.
- Bake the crust in the preheated oven for 15 minutes until lightly golden.
- In a small bowl, steep 1 Tbsp of dried hibiscus in 1/2 cup of lemon juice for 15 minutes, then strain.
- In a separate bowl, whisk together 3 eggs and 1 1/2 cups of sugar, add the strained mixture along with 1/2 cup of flour and mix until creamy.
- Pour the filling over the cooled crust and bake for 20-25 minutes until the center is firm.
- Cool completely in the pan before dusting with confectioner’s sugar and slicing into squares.
Leave a Reply