
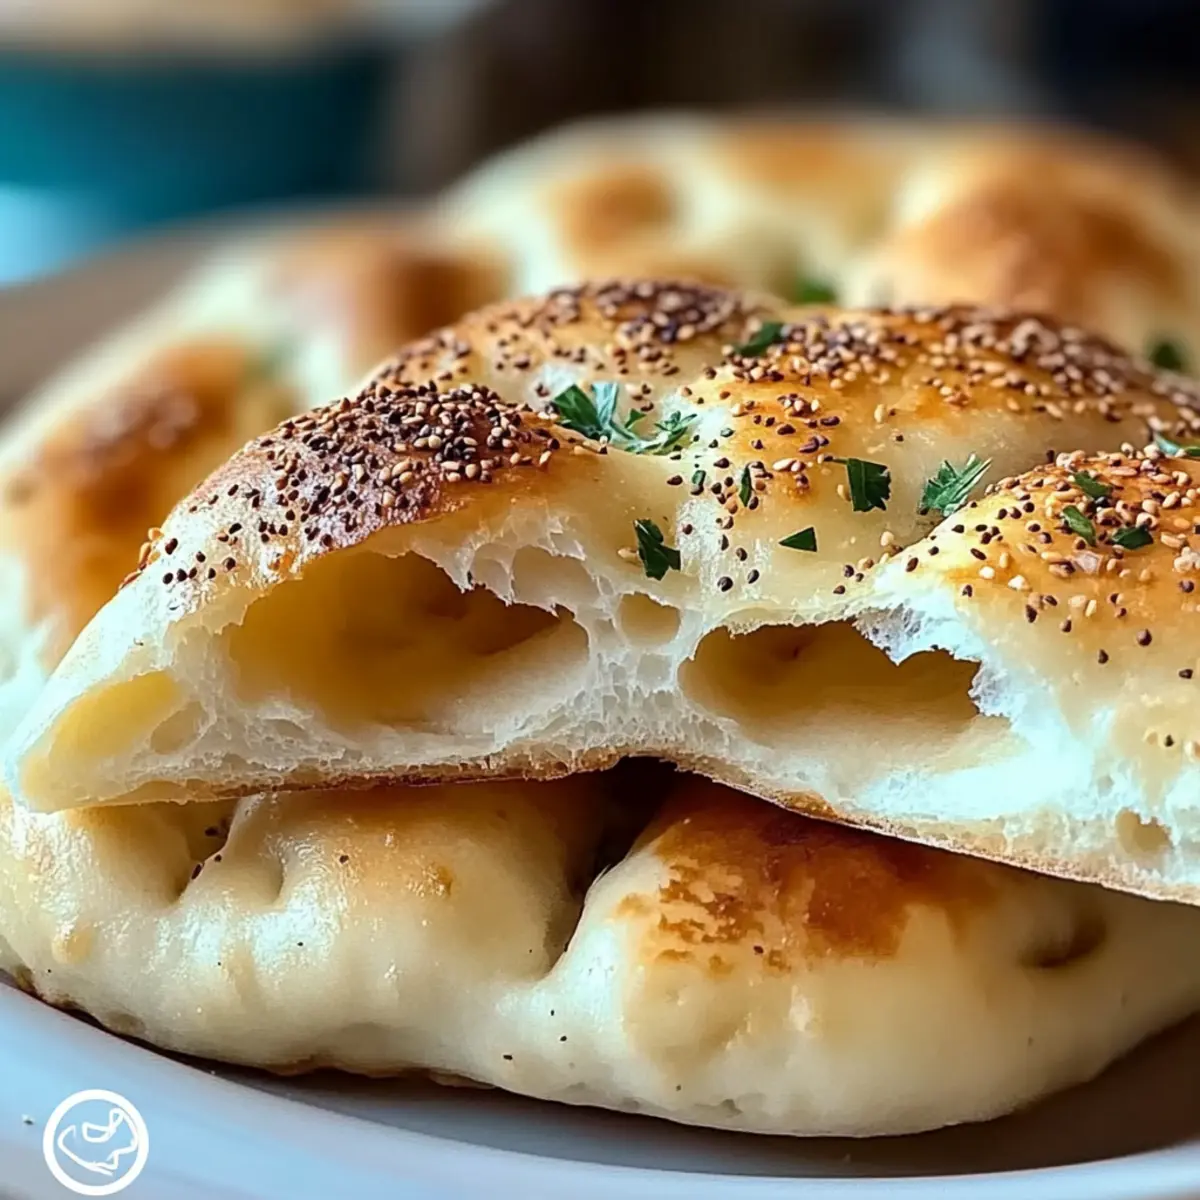
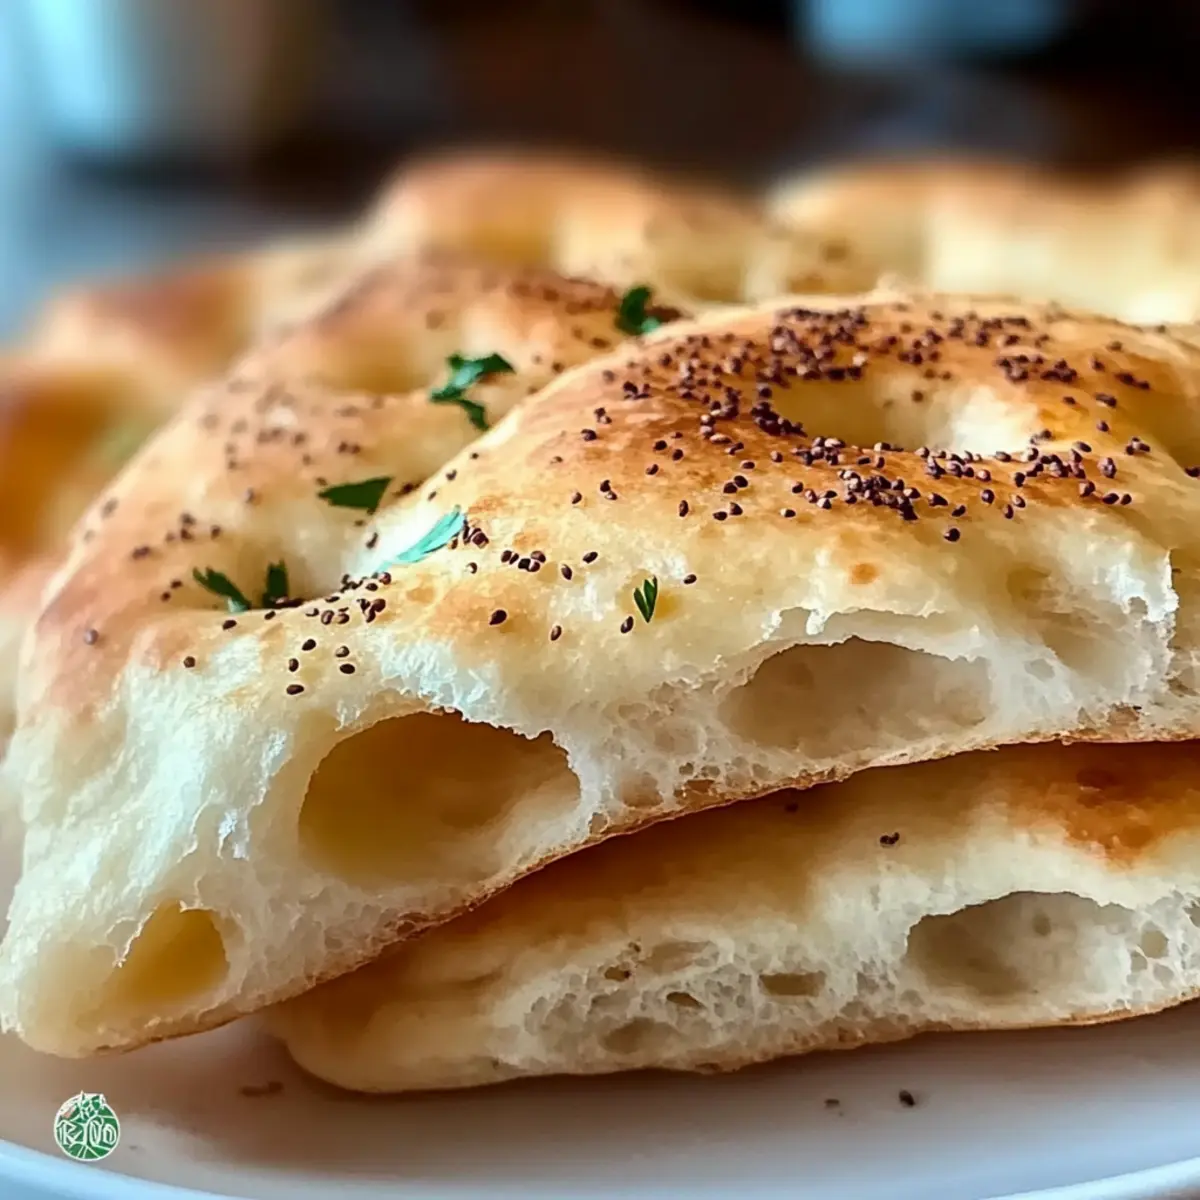
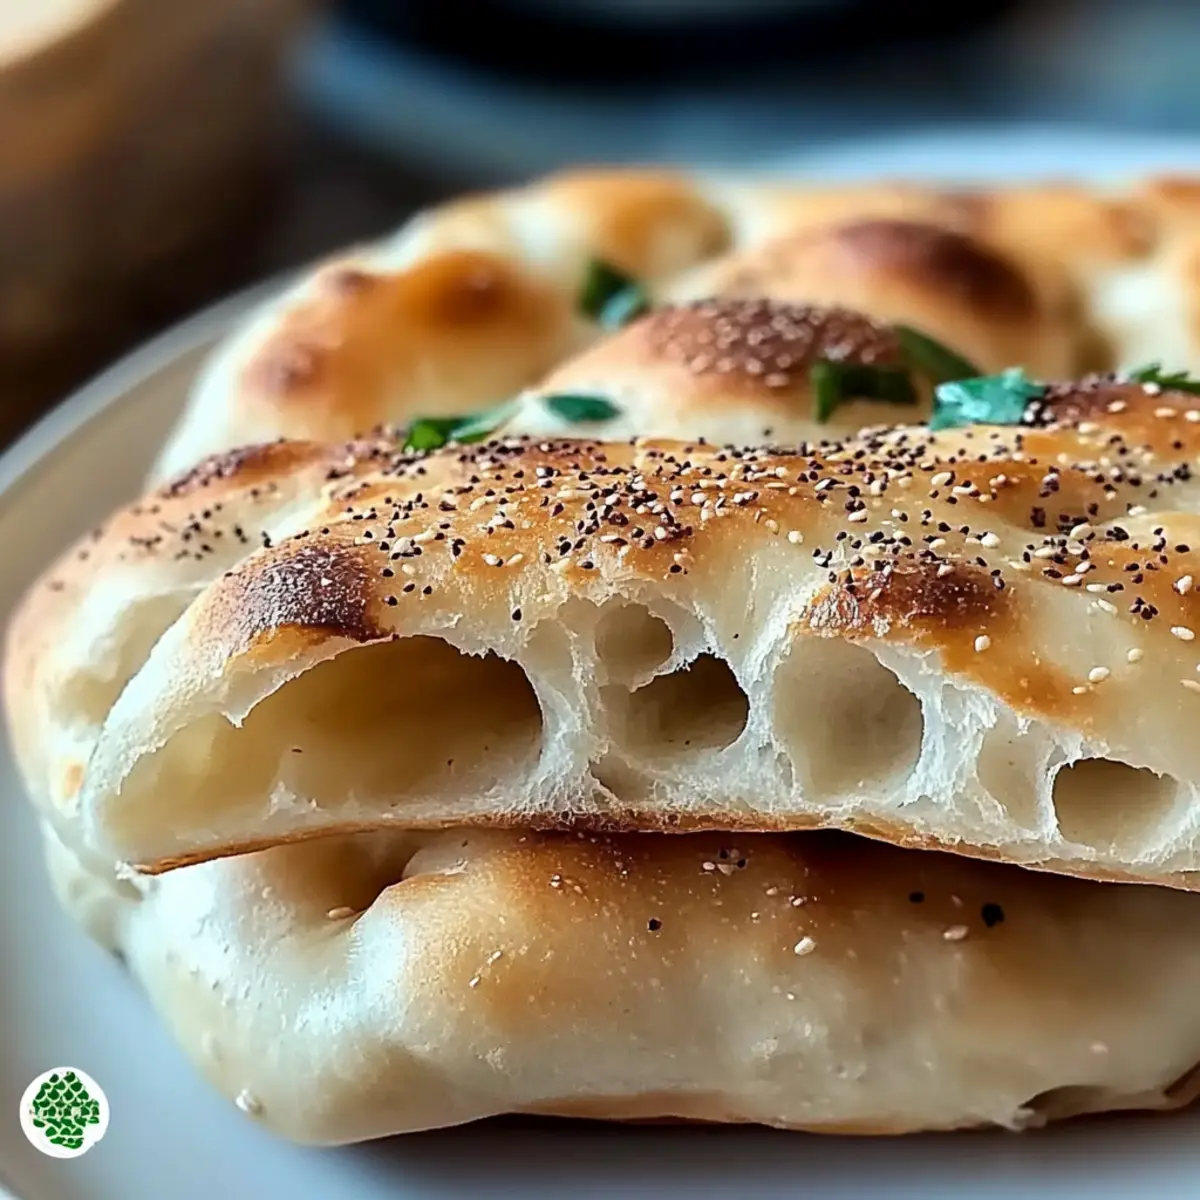
You won’t believe how easy it is to whip up a delicious homemade bread without ever turning on the oven. My No-Oven Turkish Bread is a simple delight that results in soft, fluffy flatbreads with a golden-brown crust—perfect for everything from dipping in hummus to wrapping around your favorite grilled veggies. Not only is this easy bread recipe ideal for warm, homemade food lovers, but it also saves you time and energy, making it a great go-to for any meal. Whether you’re a seasoned chef or just starting out, this recipe simplifies your baking experience and offers a crowd-pleasing option for all. Curious to discover how this delightful flatbread comes together? Let’s dive in!
Why Make No-Oven Turkish Bread?
Deliciously Simple: With just a few basic ingredients, you can create this soft and fluffy flatbread without an oven.
Time-Saving Delight: No need to wait for the oven to preheat; just mix, knead, and cook on a skillet for a fresh bread experience in minutes.
Versatile Companion: Perfect for serving alongside soups, dips, or as a wrap for grilled meats and veggies, it complements a variety of meals effortlessly.
Healthy Alternative: You can easily customize this recipe using whole grain or gluten-free flours, making it a wholesome choice for everyone.
Crowd-Pleasing: Whether it’s a family dinner or a casual gathering, this No-Oven Turkish Bread will have everyone asking for seconds! Dive into this wonderful recipe and also check out our Herb Cheese Bread for another delicious homemade treat.
No-Oven Turkish Bread Ingredients
-
For the Dough
-
All-Purpose Flour – Provides structure and softness. Can substitute with whole wheat flour for a denser bread.
-
Salt – Enhances flavor. Use sea salt for a richer taste.
-
Sugar – Aids in browning and adds mild sweetness. Leave out for a savory version.
-
Instant Yeast – Essential for rising. Active dry yeast can be used; activate before mixing.
-
Warm Milk – Adds moisture and richness. Use almond milk for a dairy-free version.
-
Warm Water – Hydrates the dough. Ensure it’s warm, not hot, to preserve yeast activity.
-
Olive Oil or Melted Butter – Adds flavor and moisture. Either can be substituted depending on taste preference.
-
For Topping
-
Melted Butter – Adds richness and a soft finish. Omit or use a vegan spread for a dairy-free version.
-
Garlic (Optional) – Adds aromatic flavor. Skip for a plain version.
-
Sesame Seeds (Optional) – Provides additional texture and flavor. Can substitute with poppy seeds.
-
Fresh Parsley or Cilantro (Optional) – For garnish and freshness. Use any fresh herb you have on hand.
This No-Oven Turkish Bread is not just an easy bread recipe, it’s the secret to a delightful homemade experience!
Step‑by‑Step Instructions for No-Oven Turkish Bread
Step 1: Mix Dry Ingredients
In a large mixing bowl, whisk together 3 cups of all-purpose flour, 1 teaspoon of salt, 1 tablespoon of sugar, and 1 packet of instant yeast. This creates a uniform dry base, ensuring the yeast will activate properly, which is crucial for the fluffy texture of your No-Oven Turkish Bread. The mixture should be light and airy, filled with tiny air pockets.
Step 2: Combine Wet Ingredients
Gently warm 1 cup of milk and 1 cup of water until they’re just warm to the touch, not exceeding 110°F (43°C). Pour the warm milk and water into your dry mixture along with 2 tablespoons of olive oil or melted butter. Stir with a wooden spoon until you achieve a rough dough, demonstrating a smooth beginning to this wonderful homemade bread.
Step 3: Knead Dough
Dust a clean surface with flour and transfer the dough onto it. Knead the dough for about 8 minutes, or until it’s smooth and elastic. As you knead, you’ll be able to feel it transform into a soft ball, perfecting the texture necessary for your lovely No-Oven Turkish Bread. Remember, adequate kneading develops the gluten for a satisfying rise.
Step 4: Let Dough Rise
Shape the kneaded dough into a ball and place it in a greased bowl, covering it with a clean kitchen towel. Let the dough rise in a warm spot for about 1 hour or until it has doubled in size. The dough should feel light and airy, puffing up beautifully to become the perfect base for your flatbreads.
Step 5: Shape Bread
Once risen, punch down the dough gently to release trapped air, then divide it into equal portions, about 6 to 8 pieces. Roll each piece into a ball and flatten it into thin circles, about 6 inches in diameter. This shaping step is essential for even cooking and achieving that appealing appearance of No-Oven Turkish Bread.
Step 6: Cook in Skillet
Preheat a non-stick skillet over medium heat. Add each flatbread to the skillet, cooking for about 2-3 minutes on each side. Watch for a golden-brown color and slight puffing as it cooks; this visual signal indicates that your bread is developing the desired texture. Repeat with the remaining bread, enjoying the enticing aroma filling your kitchen.
Step 7: Add Toppings
Remove the cooked flatbread from the skillet and brush with melted butter while still warm. If desired, sprinkle with minced garlic, sesame seeds, or freshly chopped herbs for added flavor. This step enhances the deliciousness of your No-Oven Turkish Bread and brings life to each bite.
Step 8: Serve Warm
The final touch is to serve your No-Oven Turkish Bread warm, perfect for dipping into hummus or wrapping around your favorite grilled meats. Store any leftovers in an airtight container at room temperature for up to two days, ensuring the fluffy texture is preserved for your next meal.
No-Oven Turkish Bread Variations
Feel free to make this delightful No-Oven Turkish Bread truly your own with these exciting adaptations!
-
Whole Wheat: Substitute all-purpose flour with whole wheat flour for a nuttier flavor and denser texture. It makes for a heartier bread that still retains its amazing fluffiness.
-
Vegan Version: Swap warm milk with almond or oat milk and use a vegan spread instead of butter for a delicious dairy-free option. It’s just as delightful while catering to a vegan lifestyle.
-
Garlic Infusion: Intensify the flavor by adding minced garlic directly into the dough while mixing. The aroma and taste of garlic will fill your kitchen with warmth and entice everyone sitting at the table.
-
Herb-Infused Bread: Mix in dried herbs like oregano, thyme, or rosemary into your dough for a fragrant twist. This adds depth and makes it a perfect pairing for Mediterranean dishes.
-
Cheesy Delight: For a luxurious touch, sprinkle shredded cheese into the dough or on top before cooking. The melted cheese creates a heavenly experience that will leave everyone wanting more.
-
Spicy Kick: Add a pinch of crushed red pepper flakes or a dash of cayenne pepper to the dough for a zesty flavor enhancement. It’s a fantastic twist for those who enjoy a little heat.
-
Sweet Version: Turn it into a subtly sweet treat by including a tablespoon of honey or maple syrup in the dough. It’s delightful for breakfast paired with jam or butter!
-
Stuffed Flatbreads: Experience a twist by stuffing the flatbreads with your choice of fillings, such as sautéed veggies, meats, or cheeses before cooking them in the skillet. This transforms your No-Oven Turkish Bread into satisfying hand-held treats.
You can serve your stunning creations with a side of hummus or alongside a warm bowl of soup. Looking for more delicious bread recipes? Check out our delightful Christmas Tree Bread or our flavorful Herb Cheese Bread.
How to Store and Freeze No-Oven Turkish Bread
Room Temperature: Store your No-Oven Turkish Bread in an airtight container at room temperature for up to 2 days to maintain its soft texture.
Fridge: If needed for longer freshness, refrigerate the bread wrapped in plastic wrap, consuming it within 4 days for the best taste and quality.
Freezer: For extended storage, freeze the flatbreads by placing them in a freezer-safe bag or container for up to 3 months. Thaw at room temperature or reheat directly from frozen.
Reheating: Warm the bread in a skillet or microwave just before serving to restore its delightful softness and warmth. Enjoy this homemade treat anytime!
Make Ahead Options
These No-Oven Turkish Breads are wonderful for meal prep enthusiasts looking to save time during busy weeknights! You can prepare the dough up to 24 hours in advance by following the initial mixing and kneading steps, then covering it tightly and refrigerating it. When ready to cook, simply let the dough sit at room temperature for about 30 minutes to warm up, then shape and cook as directed. Additionally, you can also shape the flatbreads and refrigerate them, stacked with parchment paper in between, for up to 3 days. For the best quality, be sure to seal them well to prevent drying out. Reheat in a skillet for a few minutes before serving, allowing you to enjoy soft, fluffy No-Oven Turkish Bread with minimal effort!
What to Serve with No-Oven Turkish Bread
There’s nothing quite like the aroma of freshly cooked flatbreads wafting through your kitchen, inviting you to create a meal that delights the senses.
- Creamy Hummus: This rich, nutty dip complements the fluffy texture of the bread perfectly, making every bite a delicious experience.
- Spiced Lentil Soup: A warm, hearty soup packed with flavor, it pairs wonderfully with the soft bread, ideal for dipping or savouring side by side.
- Grilled Vegetables: Tossed with olive oil and herbs, these veggies offer a fresh, vibrant contrast to the warm, fluffy bread, creating a delightful meal.
- Savory Stews: Whether it’s a rich beef or a fragrant vegetable stew, the bread’s airy texture and flavor absorb the delicious juices beautifully.
- Fresh Salad: A crisp salad, perhaps with a tangy dressing, adds a refreshing crunch that perfectly balances the softness of your No-Oven Turkish Bread.
- Feta Cheese: Crumbled feta sprinkled atop allows for a deliciously salty kick, enhancing the overall flavors while providing a textural contrast.
- Sizzling Grilled Chicken: Marinated and grilled to perfection, this protein can be wrapped in the bread for a tasty, satisfying meal on the go.
- Mint Tea: Cooling and aromatic, a glass of this refreshing drink complements the spices in your meal, offering a delightful endnote to the feast.
- Baklava: For a sweet finish, serve this rich dessert, as its nutty, sweet layers provide an unforgettable sweet contrast to your savory bread.
Expert Tips for No-Oven Turkish Bread
-
Proper Yeast Activation: Ensure your yeast is fresh and bubbly before mixing it with dry ingredients. This step is crucial for achieving that fluffy rise in your No-Oven Turkish Bread.
-
Knead Thoroughly: Don’t skip the kneading process; this develops gluten and ensures your bread has the soft, chewy texture you desire. Aim for about 8 minutes of kneading.
-
Temperature Matters: When adding warm milk and water, make sure they are not too hot. High temperatures can kill the yeast, preventing the dough from rising properly.
-
Mind Your Skillet: Avoid overcrowding the skillet. Cooking one or two flatbreads at a time helps them cook evenly and puff up beautifully.
-
Customize Toppings: Feel free to get creative with toppings! Different herbs, spices, or even cheese can elevate your No-Oven Turkish Bread to suit your taste preferences.

No-Oven Turkish Bread Recipe FAQs
What kind of flour should I use for No-Oven Turkish Bread?
I typically use all-purpose flour for a soft texture, but you can absolutely substitute with whole wheat flour for a denser bread. If you’re looking for a gluten-free option, using almond or gluten-free flour blends can work great too!
How should I store my No-Oven Turkish Bread?
Keep your No-Oven Turkish Bread in an airtight container at room temperature for up to 2 days. If you want to extend its freshness, you can refrigerate it wrapped in plastic wrap for about 4 days. Just remember to warm it up before serving for that delightful softness!
Can I freeze No-Oven Turkish Bread?
Yes! To freeze, place your flatbreads in a freezer-safe bag or container, making sure to remove as much air as possible. They can be stored for up to 3 months. To thaw, leave them at room temperature or reheat directly in a skillet or microwave—this helps restore their soft texture!
What should I do if my dough doesn’t rise?
If your dough isn’t rising, it could be that your yeast is expired or you mixed it with liquid that was too hot. First, check if your yeast is active by dissolving it in warm water; it should become foamy within 5-10 minutes. If it doesn’t, it’s best to start over with fresh yeast.
Can I customize the toppings on my No-Oven Turkish Bread?
Absolutely! Get creative with your toppings! You can sprinkle garlic, sesame seeds, or even cheese on top. For an herby flavor, mix dried herbs like oregano or basil into the dough. Enjoy experimenting to find your favorite combinations!
Is No-Oven Turkish Bread pet-friendly?
Yes, the ingredients in No-Oven Turkish Bread are safe for most pets; however, keep in mind that bread should be a treat rather than a staple in their diet. Always check for allergies or sensitivities before sharing any homemade food with your furry friends!
No-Oven Turkish Bread: Soft, Fluffy Flatbreads Made Easily
Ingredients
Equipment
Method
- In a large mixing bowl, whisk together 3 cups of all-purpose flour, 1 teaspoon of salt, 1 tablespoon of sugar, and 1 packet of instant yeast.
- Gently warm 1 cup of milk and 1 cup of water until they're just warm to the touch, then pour into the dry mixture along with 2 tablespoons of olive oil or melted butter.
- Dust a clean surface with flour and transfer the dough onto it. Knead the dough for about 8 minutes, until smooth and elastic.
- Shape the kneaded dough into a ball and place it in a greased bowl, covering it with a clean kitchen towel. Let the dough rise in a warm spot for about 1 hour.
- Once risen, punch down the dough gently, then divide it into equal portions, about 6 to 8 pieces. Roll each piece into balls and flatten into thin circles.
- Preheat a non-stick skillet over medium heat and cook each flatbread for about 2-3 minutes on each side until golden brown.
- Remove the cooked flatbread from the skillet and brush with melted butter while still warm.
- Serve your No-Oven Turkish Bread warm, perfect for dipping or wrapping.
Leave a Reply