
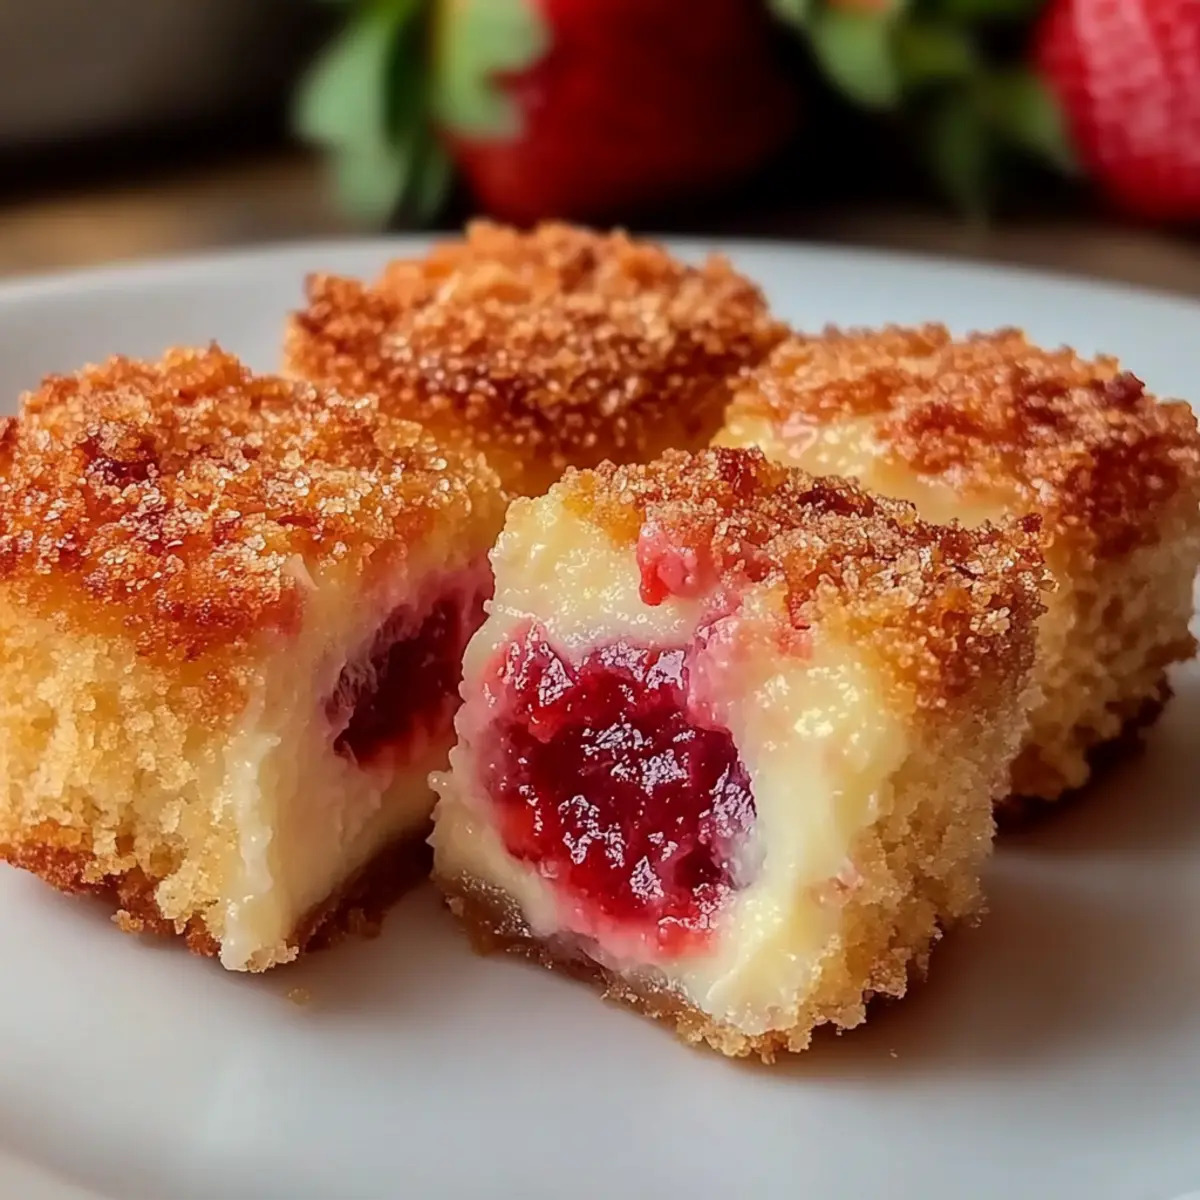
Walking through the local market, I stumbled upon a bounty of sun-kissed strawberries, their vibrant red hue beckoning me to create something special. That’s when the idea for my Strawberry Crunch Cheesecake Bites sparked! This no-bake wonder captures the perfect blend of creamy cheesecake filling and a buttery graham cracker crust, topped with a satisfying strawberry crunch. Not only are these delightful bites a quick dessert option, but they’re also a stress-free solution for any gathering—perfect for parties or family get-togethers. Plus, with easy gluten-free variations, everyone gets to join in on the deliciousness! Curious about how to whip up these treats that are just as fun to make as they are to eat? Let’s dive in and create some strawberry magic together!
Why are Strawberry Crunch Cheesecake Bites a must-try?
Irresistible Flavor: The balance of creamy cheesecake and crunchy strawberry topping creates a unique taste experience that will leave everyone wanting more.
No-Bake Convenience: These bites require no baking, making them a quick dessert choice that won’t heat up your kitchen.
Customizable to Suit You: With options for gluten-free crusts or substitutions like vegan cream cheese, you can cater to various dietary preferences.
Perfect for Sharing: Ideal for parties or family gatherings, these bite-sized treats are easy to share and always a hit, just like my Mini Cheesecake Cups!
Make-Ahead Delight: Prepare them in advance and let them chill, providing a stress-free dessert solution for any occasion.
Get ready to impress your guests with these delicious Strawberry Crunch Cheesecake Bites!
Strawberry Crunch Cheesecake Bites Ingredients
For the Crust
- Graham Cracker Crumbs – Provides structure and a buttery flavor for the crust; substitute with gluten-free graham crackers for a gluten-free option.
- Unsalted Butter (1/2 cup, melted) – Binds the crust ingredients together while adding richness; can substitute with coconut oil for a dairy-free version.
For the Cheesecake Filling
- Cream Cheese (8 oz, softened) – Creates a creamy and rich cheesecake filling; use vegan cream cheese for a dairy-free alternative.
- Powdered Sugar (1/2 cup) – Sweetens the filling and adds smoothness; can be substituted with a sugar alternative for lower sugar options.
- Vanilla Extract (1 teaspoon) – Enhances the flavor of the cheesecake; use vanilla bean paste for a more intense vanilla flavor.
- Whipped Topping (1 cup, like Cool Whip) – Provides lightness and volume to the filling; opt for a dairy-free whipped topping if needed.
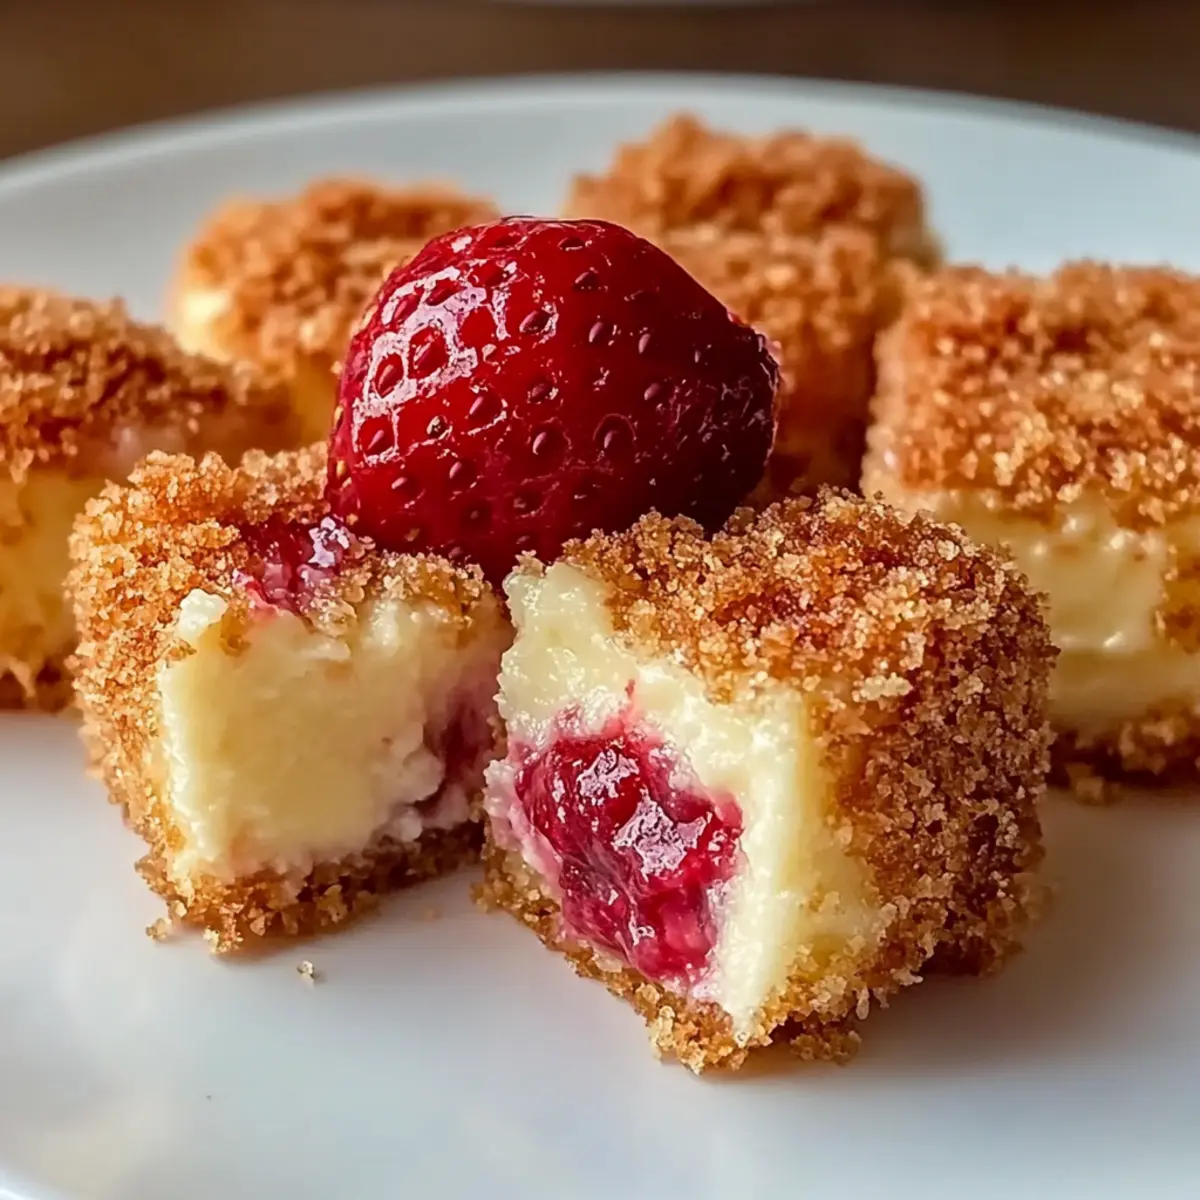
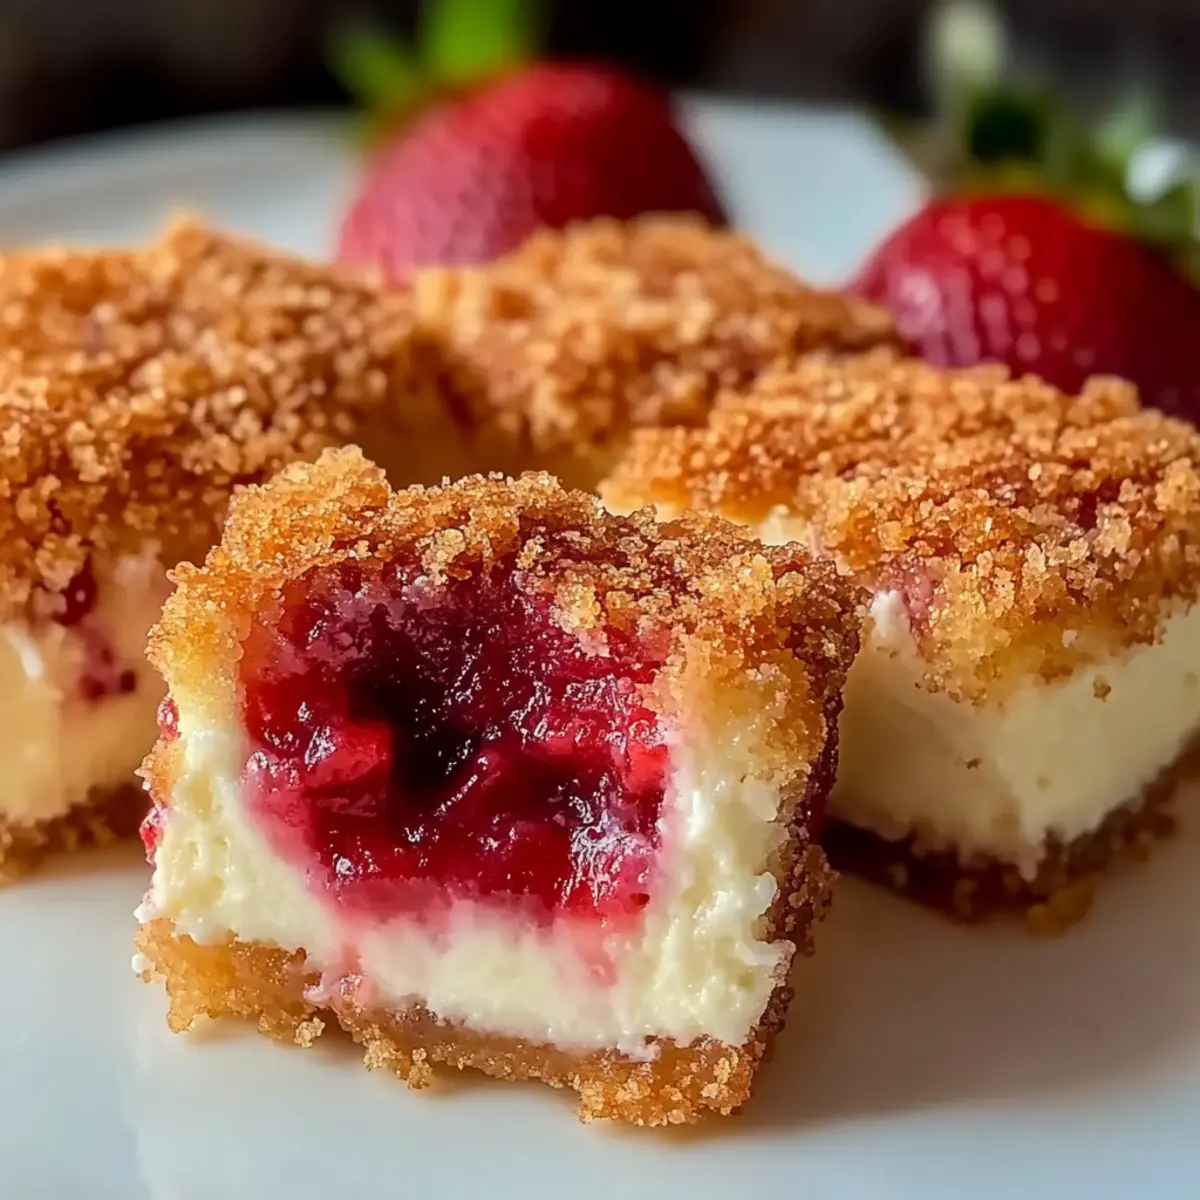
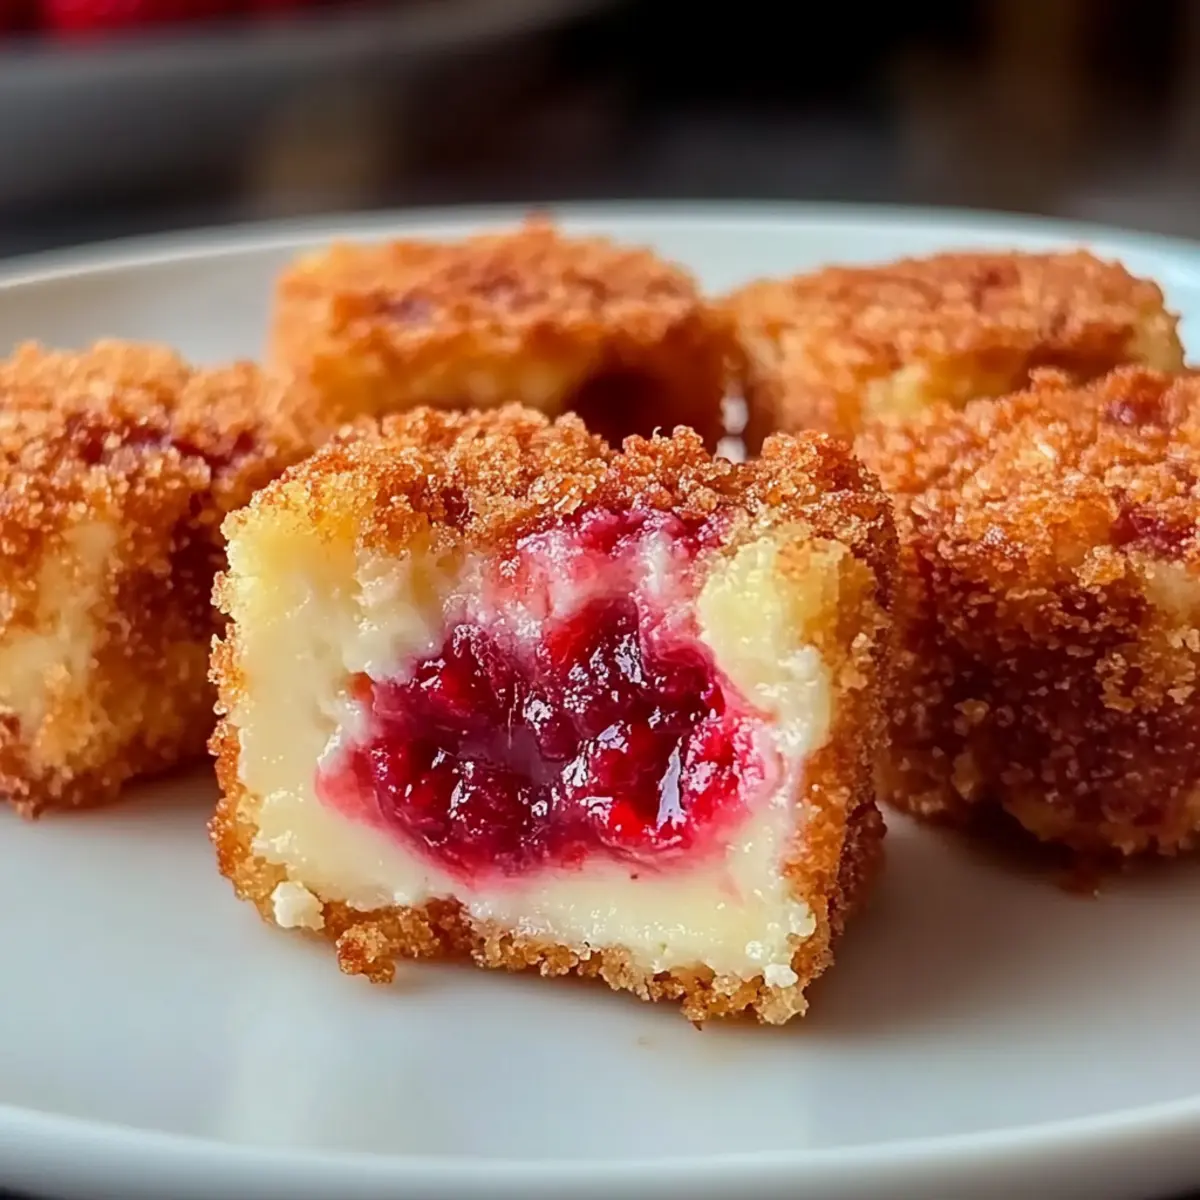
- Fresh Strawberries (1 cup, diced) – Adds freshness and fruity flavor; can replace with other berries like raspberries or blueberries.
For the Topping
- Strawberry Crunch Topping (1/2 cup, store-bought or homemade) – Adds crunch and strawberry flavor; make a homemade version by blending freeze-dried strawberries with crushed cookies or cereal.
Let’s get cooking and indulge in these Strawberry Crunch Cheesecake Bites that everyone will love!
Step‑by‑Step Instructions for Strawberry Crunch Cheesecake Bites
Step 1: Preheat the Oven
Begin by preheating your oven to 350°F (175°C). This ensures your crust bakes evenly and achieves that perfect golden color. It’s a great starting point while you prepare the crust, so it will be ready to go as soon as you’re finished mixing.
Step 2: Make the Crust
In a medium bowl, combine the graham cracker crumbs and melted butter, stirring until the mixture is fully coated and resembles wet sand. Pour this crumb mixture into an 8-inch baking dish, pressing it firmly and evenly into the bottom with the back of a measuring cup or your fingers to create a solid crust.
Step 3: Bake the Crust
Place the baking dish in your preheated oven and bake the crust for about 10 minutes. You’ll know it’s ready when it turns lightly golden and starts to smell deliciously toasty. Once baked, remove the dish and let it cool completely on a wire rack while you prepare the cheesecake filling.
Step 4: Prepare the Cheesecake Filling
In a mixing bowl, beat the softened cream cheese with an electric mixer until it’s perfectly smooth. Gradually add the powdered sugar and vanilla extract, mixing well until fully incorporated. This forms a rich and creamy base for your Strawberry Crunch Cheesecake Bites that will be hard to resist.
Step 5: Fold in Whipped Topping and Strawberries
Gently fold in the whipped topping and diced strawberries into the cream cheese mixture. Be careful not to overmix; you want to keep the filling light and airy while ensuring everything is evenly combined. This step brings a delightful lightness to the creamy cheesecake filling!
Step 6: Assemble the Cheesecake Bites
Spread the cheesecake mixture evenly over the cooled crust using a spatula. Smooth the top to create a nice, even layer, ensuring that every bite of your Strawberry Crunch Cheesecake Bites will have that delicious balance of textures.
Step 7: Add the Crunch Topping
Sprinkle the strawberry crunch topping evenly over the cheesecake layer, ensuring that it covers the entire top. This crispy element will add a delightful contrast to the creamy filling, making each bite unforgettable.
Step 8: Chill the Dessert
Cover the baking dish with plastic wrap or a lid and place it in the refrigerator to chill for at least 4 hours, or overnight if time allows. Chilling is key, as it allows the cheesecake to set properly and enhances the flavors as they meld together.
Step 9: Cut and Serve
Once the cheesecake has chilled and set, carefully lift it out of the dish using the parchment overhang. Place it on a cutting board, and cut it into squares or bite-sized pieces. Serve your Strawberry Crunch Cheesecake Bites chilled, and enjoy the delightful balance of flavors with family and friends!
Make Ahead Options
These Strawberry Crunch Cheesecake Bites are a perfect solution for busy home cooks looking to streamline meal prep! You can prepare the crust and the cheesecake filling up to 24 hours in advance. Simply let the crust cool completely after baking, then layer the cheesecake mixture over it. Cover the entire dish tightly with plastic wrap and refrigerate overnight; this allows the flavors to meld beautifully while maintaining the quality. When it’s time to serve, just sprinkle the strawberry crunch topping on just before presenting for that delightful crunch! These simple steps save you time and ensure your dessert remains just as delicious when it’s time to indulge.
What to Serve with Strawberry Crunch Cheesecake Bites
Elevate your dessert experience with delightful pairings that enhance the flavors and textures of your delightful cheesecake bites.
-
Fresh Berries: The bright acidity of fresh raspberries or blueberries contrasts wonderfully, complementing the sweetness of the cheesecake bites. Their vibrant colors also add an appealing pop to your dessert spread.
-
Whipped Cream: A dollop of light whipped cream provides an extra creamy layer that balances the rich cheesecake flavors. It’s a classic pairing, making each bite even more indulgent.
-
Chocolate Drizzle: A drizzle of melted chocolate adds a decadent touch. The bittersweet flavor enhances the dessert without overpowering it, creating a harmonious balance.
-
Mint Sprigs: A few fresh mint leaves offer a refreshing burst. They not only brighten the presentation but also add a flavorful note that cuts through the richness of the bites.
-
Sparkling Water with Lime: A glass of sparkling water infused with fresh lime complements the sweetness without clashing. The bubbles add a fun fizz, making your dessert experience feel extra special.
-
Coffee or Tea: A warm cup of brewed coffee or herbal tea creates a comforting closing note. The warmth can help wash down the sweet cheesecake flavors, enhancing the overall tasting journey.
-
Mini Fruit Tarts: Serve alongside little fruit tarts for a delightful variety. The flaky crust and creamy fillings echo the textures while offering a different flavor experience, making your dessert table appealing and diverse.
How to Store and Freeze Strawberry Crunch Cheesecake Bites
Fridge: Store your Strawberry Crunch Cheesecake Bites in an airtight container for up to 3-4 days. This keeps them fresh and ready to enjoy whenever a sweet craving strikes.
Freezer: If you wish to make these bites ahead of time, freeze them tightly wrapped in plastic wrap or aluminum foil for up to 2 months. Just ensure they’re well sealed to prevent freezer burn.
Thawing: When ready to enjoy, simply thaw the bites in the fridge for several hours or overnight. Doing so helps maintain their delicious texture and flavor.
Reheating: These no-bake treats are best served cold, so there’s no need to reheat them. Just slice and serve right from the fridge after thawing!
Strawberry Crunch Cheesecake Bites Variations
Feel free to put your own spin on these delicious treats and tailor them to your taste!
-
Gluten-Free: Substitute graham cracker crumbs with gluten-free ones for a delightful gluten-free dessert. Your guests won’t even notice the difference!
-
Dairy-Free: Swap cream cheese for vegan cream cheese and use coconut oil instead of butter. These changes make the bites accessible for dairy-free diets while retaining that creamy texture.
-
Reduced Sugar: Use a sugar alternative in place of powdered sugar to lighten up this dessert. It’s a great option for those watching their sugar intake.
-
Flavor Twist: Experiment by adding different flavored extracts like almond or peppermint to the filling. It’ll add a fun flavor boost that will surprise your taste buds!
-
Berry Medley: Instead of just strawberries, use a mix of berries like raspberries, blueberries, or blackberries. This fresh fruit swap will give a beautiful color and varied taste.
-
Protein-Packed: Consider adding a layer of Greek yogurt over the crust before spreading the cheesecake filling for an extra protein boost! It’s a fun way to make dessert a bit healthier.
-
Choco-Crunch: For a chocolate twist, mix in some cocoa powder into the creamy filling or top with chocolate shavings along with your strawberry crunch. Chocolate lovers will appreciate this indulgent variation!
-
Fruity Surprise: Incorporate diced peaches or mangos in the cheesecake mixture for a tropical flair. These fruits will add a refreshing twist that’s perfect for summer!
No matter how you decide to customize your Strawberry Crunch Cheesecake Bites, each variation promises to be just as delightful as the original! If you’re looking for more delicious cheesecake inspirations, check out my Cherry Pistachio Cheesecake or the surprisingly light Japanese Cotton Cheesecake. Enjoy the creativity in your kitchen!
Expert Tips for Strawberry Crunch Cheesecake Bites
-
Room Temperature Cream Cheese: Ensure your cream cheese is at room temperature before mixing. This prevents lumps and ensures a smooth, creamy filling for your Strawberry Crunch Cheesecake Bites.
-
Gentle Folding Method: When incorporating the whipped topping and strawberries, gently fold in the mixture. Overmixing can deflate the lightness you’re aiming for in your cheesecake filling.
-
Chill for Best Results: Patience is key! Allow the cheesecake bites to chill for at least 4 hours (or overnight) to ensure they cut cleanly and flavors meld beautifully.
-
Homemade Crunch Topping: For an extra special touch, consider making your own strawberry crunch topping. Blend freeze-dried strawberries with crushed cereal or cookies for a unique crunch.
-
Portion Control: Use a sharp knife to cut the squares cleanly, ensuring each bite is uniform. This not only looks appealing but helps with serving at gatherings!
Strawberry Crunch Cheesecake Bites Recipe FAQs
What type of strawberries should I use for the best flavor?
Absolutely! For the best flavor in your Strawberry Crunch Cheesecake Bites, choose ripe, sweet strawberries. Look for berries that are bright red with no dark spots. If you can, pick them up from a local farmers’ market—there’s nothing quite like fresh, in-season strawberries!
How should I store leftover Strawberry Crunch Cheesecake Bites?
Store your Strawberry Crunch Cheesecake Bites in an airtight container in the refrigerator for up to 3-4 days. This keeps them fresh and ready for when you’re craving a sweet treat! Make sure they are well sealed to maintain their delicious texture.
Can I freeze Strawberry Crunch Cheesecake Bites, and how?
Yes, you can freeze these delightful bites! First, cut the cheesecake into squares as desired. Then, wrap each piece tightly in plastic wrap or aluminum foil and place them in a freezer-safe bag or container. They can be frozen for up to 2 months. To thaw, place them in the fridge for several hours or overnight before serving.
What should I do if my cheesecake filling is too thick?
If you find your cheesecake filling is too thick, don’t worry! Simply add a splash of milk or cream to the mixture, a tablespoon at a time, while mixing until you reach your desired consistency. This will help loosen it up and make it more spreadable. Remember to fold gently after adding to keep the airy texture!
Are there any allergy considerations for this recipe?
Very! This recipe contains dairy (cream cheese, whipped topping, butter) and gluten (graham crackers). For dairy-free options, use vegan cream cheese and a dairy-free whipped topping. Substitute gluten-free graham crackers for a gluten-free option, ensuring that all ingredients are certified gluten-free to avoid cross-contamination if necessary.
Irresistible Strawberry Crunch Cheesecake Bites You’ll Love
Ingredients
Equipment
Method
- Preheat your oven to 350°F (175°C).
- In a medium bowl, combine graham cracker crumbs and melted butter until fully coated. Press this mixture into an 8-inch baking dish to form a solid crust.
- Bake the crust for about 10 minutes until lightly golden. Let cool completely on a wire rack.
- In a mixing bowl, beat the softened cream cheese until smooth. Gradually add powdered sugar and vanilla extract until fully incorporated.
- Gently fold in the whipped topping and diced strawberries into the cream cheese mixture.
- Spread the cheesecake mixture evenly over the cooled crust using a spatula.
- Sprinkle the strawberry crunch topping evenly over the cheesecake layer.
- Cover and refrigerate for at least 4 hours or overnight to chill.
- Carefully lift out of the dish using the parchment overhang and cut into squares or bite-sized pieces.
- Serve chilled and enjoy the delightful flavors.
Leave a Reply