
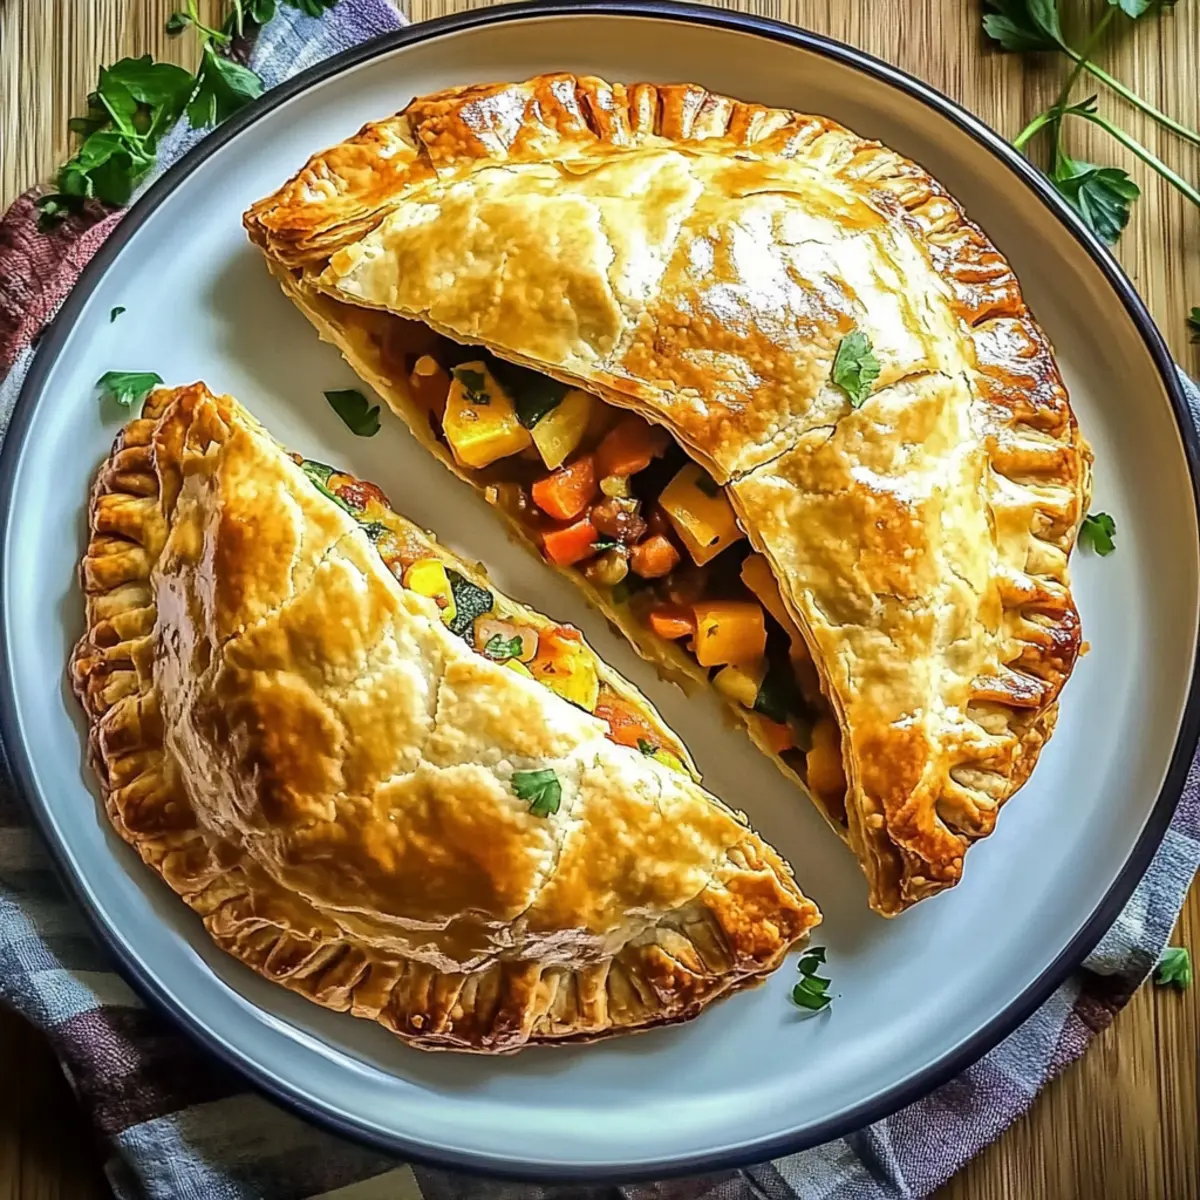
As I unwrapped the warm, flaky crust of a Vegetable Irish Pastie, the rich aroma of sautéed onions and fresh herbs instantly transported me back to my grandmother’s cozy kitchen. This recipe combines the art of flaky pastry with a colorful medley of vegetables, making it a perfect vegetarian delight. Not only are these pasties a fantastic way to use up leftover vegetables, but their quick preparation makes them ideal for busy weeknights or meal prep. Whether you’re feeding kids or simply craving a wholesome snack, these pasties promise nourishing comfort in every bite. Curious to learn how to make these delightful treats at home? Let’s dive in!

Why You’ll Love Vegetable Irish Pasties
Comforting Tradition: These Vegetable Irish Pasties bring together a flaky crust and a savory filling that’s deeply satisfying and reminiscent of home-cooked meals.
Quick and Easy: With straightforward steps, preparing these pasties requires minimal experience, making it a fantastic choice for busy weeknights or meal prep.
Veggie-Packed Goodness: Loaded with fresh vegetables, this dish is not only hearty but also a great way to sneak nutrients into your family’s diet.
Kid-Friendly Appeal: Kids adore the fun, hand-held shape, and the savory flavor makes this a delightful snack they will love.
Versatile Filling Options: Experiment with flavors by adding different veggies or spices, making each batch unique. You can even use leftover vegetables for a zero-waste approach, or pair them with Healthy Sauteed Vegetables to elevate your meal.
Freezer-Friendly: Make a large batch and freeze extras for future cravings, ensuring comfort food is just a reheating away!
Vegetable Irish Pasties Ingredients
Here’s everything you need to create these delightful, flaky treats!
For the Pastry
- All-Purpose Flour – A base for the pastry, providing structure; try whole wheat for a denser texture.
- Salt – Enhances flavor in both the pastry and filling.
- Unsalted Butter – Adds richness and flakiness; substitute with plant-based butter for a vegan option.
- Cold Water – Binds the flour into dough, crucial for achieving that perfect pastry texture.
For the Filling
- Olive Oil – Provides flavor and moisture; feel free to use another oil you prefer.
- Onion – Sautéed for sweetness, forming the base flavor of the filling.
- Garlic – Delivers aromatic depth to the dish.
- Carrot – Adds sweetness and vibrant color to the filling.
- Potato – Contributes heartiness and texture; substitute with sweet potatoes if desired.
- Peas – Fresh or frozen, adds bright color and a hint of sweetness.
- Dried Thyme & Rosemary – Herbal notes to elevate filling flavor beautifully.
- Salt and Pepper – Essential seasonings that enhance the overall taste.
- Egg (optional) – Use for an egg wash to achieve that golden-brown finish; omit for a vegan alternative.
Step‑by‑Step Instructions for Vegetable Irish Pasties
Step 1: Prepare the Pastry
In a large mixing bowl, combine all-purpose flour and salt. Cut in unsalted butter using a pastry cutter or your hands until the mixture resembles coarse crumbs. This process should take about 5 minutes, and you’ll want it to look flaky. Set the bowl aside as you prepare your filling.
Step 2: Add Water
Gradually mix in cold water, one tablespoon at a time, stirring gently until a soft dough begins to form. Knead the dough lightly for about 1 minute until smooth, taking care not to overwork it. Wrap the pastry in plastic wrap and refrigerate for 30 minutes to firm up; this helps in achieving the perfect flaky crust for your Vegetable Irish Pasties.
Step 3: Cook Filling
In a large skillet, heat olive oil over medium heat. Sauté chopped onion and minced garlic for about 3-4 minutes until softened and translucent. Next, add diced carrot and potato, cooking for an additional 5-7 minutes until tender. Stir to prevent sticking, and let the rich flavors meld together for the delightful filling of your Vegetable Irish Pasties.
Step 4: Cool Filling
Once the vegetables are tender, mix in fresh or frozen peas, dried thyme, and rosemary. Season liberally with salt and pepper to taste. Cook for another 2 minutes, then remove the skillet from heat and allow the filling to cool down significantly. This step ensures the pastry won’t become soggy and that the flavors in the filling blend beautifully.
Step 5: Roll Out
Preheat your oven to 400°F (200°C). On a lightly floured surface, roll out the chilled dough until it’s about 1/8 inch thick. Use a round cutter or a bowl to cut out circles about 5-6 inches in diameter. Gather any scraps, re-roll, and cut more circles until you have enough for all pasties, ensuring each one is perfectly flaky for your Vegetable Irish Pasties.
Step 6: Fill Pastry
Place a generous spoonful of the cooled vegetable filling onto the center of each dough circle. Carefully fold the pastry over to create a half-moon shape, and use a fork to crimp the edges securely. This not only creates a beautiful border but also seals in all the delectable flavors of your Vegetable Irish Pasties.
Step 7: Prepare for Baking
Arrange the filled pasties on a parchment-lined baking sheet, leaving space between them. If desired, brush the tops with a beaten egg for a golden finish; for a vegan option, skip this step. Make sure the oven is preheated and ready to ensure even baking of your Vegetable Irish Pasties.
Step 8: Bake
Place the baking sheet in the preheated oven and bake for 25-30 minutes or until the pasties are golden brown and flaky. Keep an eye on them, as the beautiful aroma will hint at their deliciousness! You want that perfect crispy exterior that contrasts beautifully with the savory filling.
Step 9: Cool
Once done, remove your Vegetable Irish Pasties from the oven and allow them to cool for 5-10 minutes. This slight cooling period lets the flavors settle and ensures you won’t burn your mouth when taking that first delightful bite! Serve warm and enjoy the wholesome comfort of homemade pasties.
Vegetable Irish Pasties: Creative Variations
Feeling inspired? These Vegetable Irish Pasties are versatile enough for you to customize, so let your culinary creativity shine!
- Exotic Ingredients: Try replacing traditional veggies with spinach, kale, or roasted squash for a unique twist. The flavors will surprise you!
- Cheesy Twist: Blend in some crumbled feta or shredded cheddar to add richness and depth to your filling. Cheese always brings a comforting touch!
- Spicy Version: For those who love a kick, incorporate diced jalapeños or a sprinkle of chili flakes to your filling. Balance the heat with a refreshing dip.
- Herbaceous Delight: Experiment with fresh herbs like basil, cilantro, or dill. Each herb adds its distinct aroma and flavor, elevating your pasties!
- Sweet Potato Swap: Instead of regular potatoes, use sweet potatoes for a subtly sweet and nutritious filling. They bring vibrant color and a delightful sweetness.
- Creamy Filling: Add a splash of cream or a dollop of sour cream to the vegetable mixture for a luxuriously creamy texture that’s simply irresistible.
- Crunchy Topping: Brush the tops with seasoned breadcrumbs instead of egg wash for a crispy, crunchy finish that’ll satisfy your texture cravings.
- Meal Prep Friendly: Make a batch of these delicious pasties and pair them with some Healthy Sauteed Vegetables to create a wholesome meal prep option for the week ahead!
Feel free to mix and match any of these variations to make your own signature pasties!
How to Store and Freeze Vegetable Irish Pasties
Fridge: Store any leftover Vegetable Irish Pasties in an airtight container for up to 3 days to maintain freshness and flavor.
Freezer: For longer storage, freeze individually wrapped pasties in plastic wrap, then place them in a freezer bag. They can be frozen for up to 2 months.
Reheating: When ready to enjoy, reheat from frozen at 375°F (190°C) for about 25 minutes, or until heated through and crispy.
Room Temperature: If serving immediately, allow pasties to cool for about 5-10 minutes post-baking; they’re best enjoyed warm!
Expert Tips for Vegetable Irish Pasties
-
Fresh Ingredients Matter: Use fresh vegetables for the filling to elevate flavors. Avoid canned veggies, which can be mushy and bland.
-
Chill the Dough: Refrigerate the pastry dough for at least 30 minutes. This helps create a flaky crust and prevents shrinkage during baking.
-
Even Thickness: Roll out the dough evenly to about 1/8 inch thick. This ensures consistent baking and deliciously flaky Vegetable Irish Pasties.
-
Seal Well: Be sure to crimp the edges tightly with a fork to prevent any filling from leaking out during baking.
-
Customize Spices: Feel free to experiment with different herbs and spices, such as adding smoked paprika or cumin, to personalize your pasties.
-
Reheat Properly: If you have leftovers, reheat them in the oven instead of the microwave for that perfect crisp texture!
Make Ahead Options
These Vegetable Irish Pasties are perfect for meal prep enthusiasts looking to save time on busy nights! You can prepare the pastry and filling up to 3 days in advance to make mealtime a breeze. For best results, make the dough, wrap it tightly in plastic, and refrigerate it, while the vegetable filling can be stored in an airtight container, ensuring it cools completely before sealing to prevent moisture buildup. When you’re ready to bake, simply roll out the dough, fill with the prepped mixture, and follow the baking instructions. Your pasties will turn out just as delicious, providing you with comforting, homemade goodness with minimal effort!
What to Serve with Vegetable Irish Pasties
These savory pastries are a wonderful addition to your meal, but pairing them with the right sides can elevate your dining experience.
-
Light Green Salad: Fresh greens with a citrus vinaigrette provide a zesty contrast, balancing the rich filling’s warmth perfectly. The crunch also brings a vibrant texture to your plate.
-
Creamy Coleslaw: The cool, creamy nature of coleslaw complements the flaky crust while adding a satisfying crunch. It’s a delightful way to bring a bit of tang to every bite.
-
Roasted Root Vegetables: Warm, caramelized root veggies enhance the rustic essence of pasties, offering a warm, hearty flavor that feels like a cozy hug on a plate.
-
Zesty Dipping Sauce: A simple garlic aioli or tangy mustard sauce adds a fun twist, inviting bold flavors that bring out the savory notes in the filling.
-
Hearty Vegetable Soup: Pair your pasties with a bowl of nourishing vegetable soup for a comforting meal that ticks all the boxes for warmth and flavor.
-
Sparkling Lemonade: Refreshing and effervescent, this drink cut through the richness, providing a bright palate cleanser that enhances the overall dining experience.
-
Baked Apples: For a sweet finish, try warm baked apples with cinnamon; their sweetness and warmth pair well with the savory pasties, rounding out your meal beautifully.

Vegetable Irish Pasties Recipe FAQs
How do I choose the right vegetables for the filling?
Absolutely! For the best flavor and texture, select fresh, vibrant vegetables. Look for firm potatoes without dark spots or blemishes, and choose peas that are bright green. When selecting carrots, opt for those that are crisp and not limp. If you’re using spinach or kale, ensure they’re fresh and free from wilting, which can impact the filling’s taste.
What is the best way to store leftover Vegetable Irish Pasties?
After enjoying your delicious pasties, store any leftovers in an airtight container in the refrigerator for up to 3 days. This keeps them fresh while retaining their flavor and texture. If you want to keep them longer, consider freezing them. Wrap each pasty in plastic wrap and then place them in a freezer bag for up to 2 months!
Can I freeze Vegetable Irish Pasties? How do I do it?
Yes, you can freeze Vegetable Irish Pasties easily! After baking, let them cool completely. Then, individually wrap each pasty in plastic wrap to prevent freezer burn. Place the wrapped pasties in a freezer bag, squeezing out excess air. When ready to eat, reheat straight from frozen at 375°F (190°C) for about 25 minutes, or until they’re heated through and the crust is crispy.
What if my pastry dough is too sticky?
If your dough is too sticky, it might be because you added a bit too much water. Don’t worry—just sprinkle a little more flour as you knead it until it reaches the right consistency. Aim for a soft but not sticky feel. You can also chill the dough in the fridge for 10-15 minutes, as the colder temperature helps reduce stickiness!
Are Vegetable Irish Pasties suitable for vegetarians and vegans?
Very! This recipe is inherently vegetarian, and by substituting unsalted butter with plant-based butter or coconut oil, it becomes vegan-friendly, too! Additionally, leave out the egg wash to maintain its vegan status. Everyone can enjoy the lovely flavors of these pasties without worry!
Can my pets enjoy any part of the Vegetable Irish Pasties?
It’s best to keep the Vegetable Irish Pasties away from pets. Ingredients like garlic and onions can be harmful to dogs and cats, so avoid sharing any part of your delightful pasties with them. Instead, consider treating them to a pet-friendly snack!

Delicious Vegetable Irish Pasties for a Cozy Homemade Meal
Ingredients
Equipment
Method
- In a large mixing bowl, combine all-purpose flour and salt. Cut in unsalted butter using a pastry cutter until it resembles coarse crumbs.
- Gradually mix in cold water, stirring gently until a soft dough begins to form. Knead lightly for about 1 minute until smooth.
- Wrap the pastry in plastic wrap and refrigerate for 30 minutes.
- In a large skillet, heat olive oil over medium heat. Sauté onion and garlic for 3-4 minutes until softened.
- Add carrot and potato, cooking for 5-7 minutes until tender. Stir to prevent sticking.
- Mix in peas, thyme, and rosemary. Season with salt and pepper. Cook for another 2 minutes and cool significantly.
- Preheat your oven to 400°F (200°C). Roll out the chilled dough to 1/8 inch thick and cut out circles.
- Place a spoonful of filling on each circle, fold over, and crimp edges securely with a fork.
- Arrange on a lined baking sheet and brush with egg wash if desired.
- Bake for 25-30 minutes or until golden brown and flaky. Cool for 5-10 minutes before serving.
Leave a Reply